Thermocookery

menu icon
go to homepage
  • About Me
  • Recipes
  • Collaborate

subscribe
search icon
Homepage link
  • About Me
  • Recipes
  • Collaborate

×
Home » Page Layouts

Kid-Friendly Broccoli Cauliflower Cheese Casserole Recipe

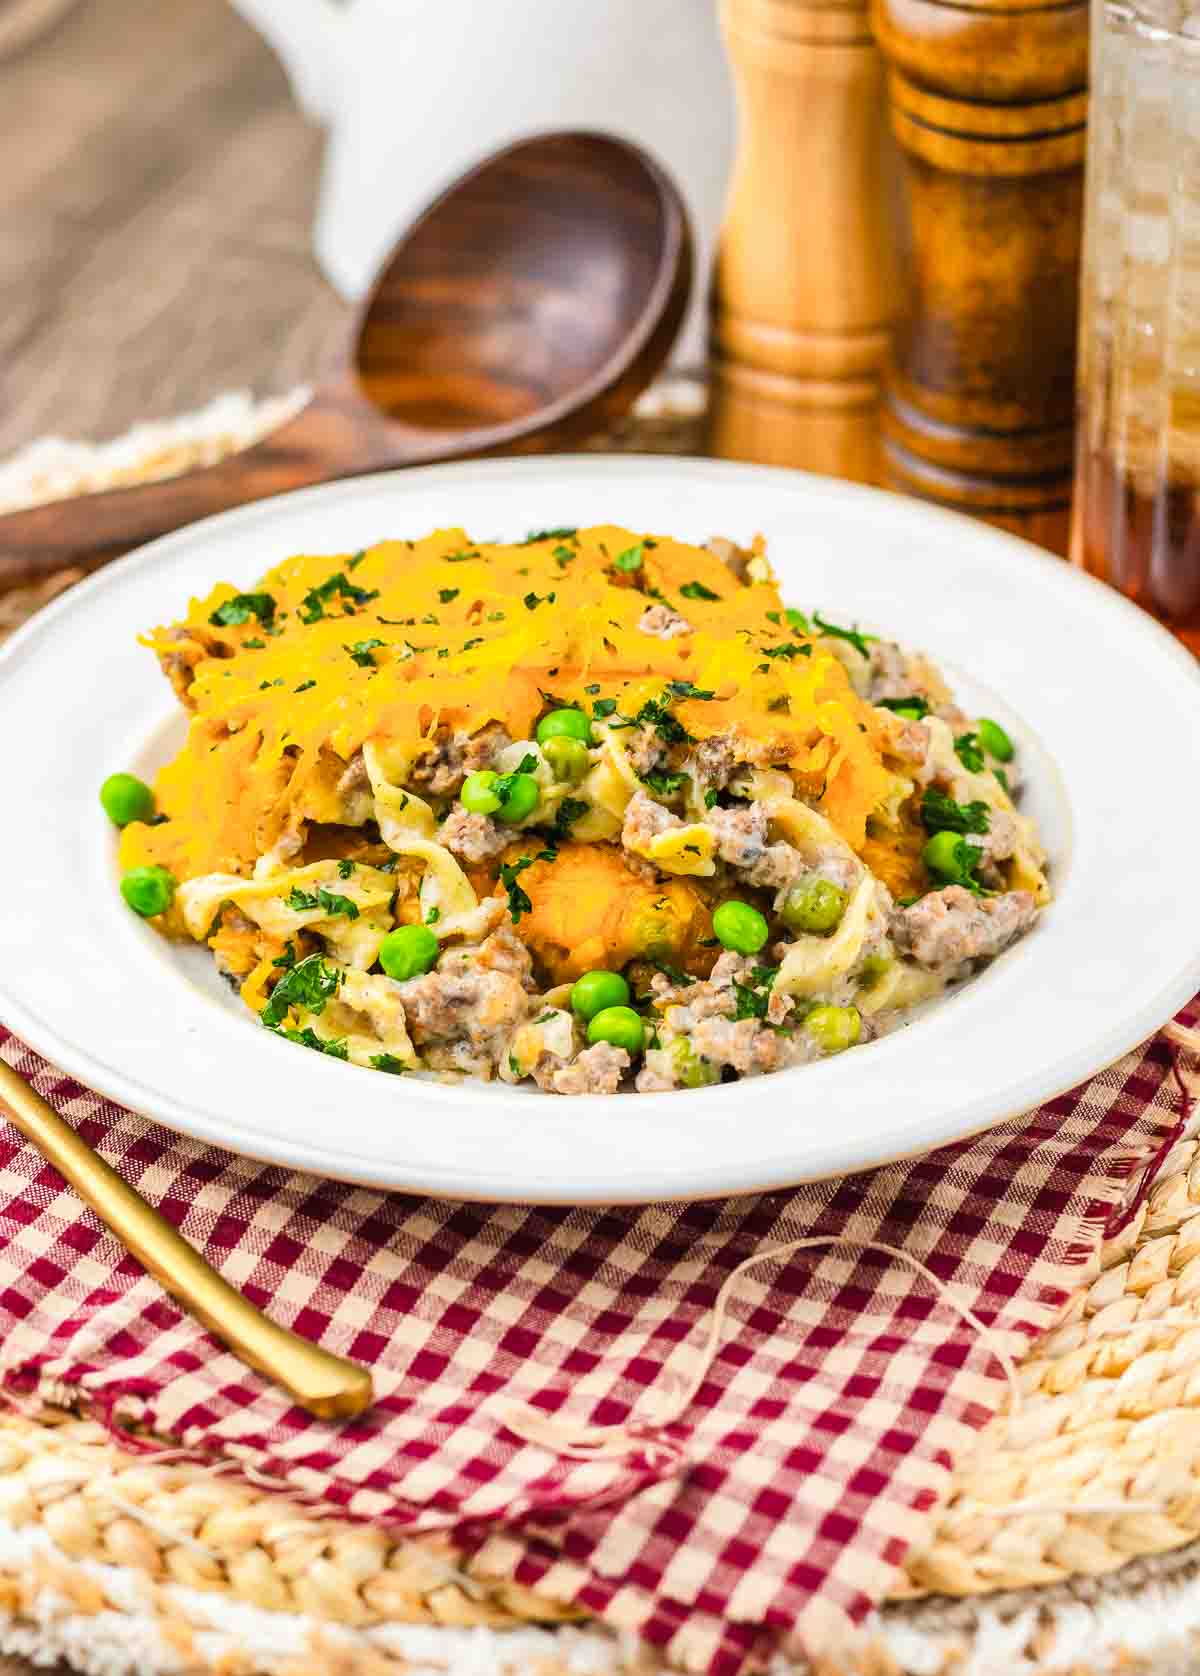
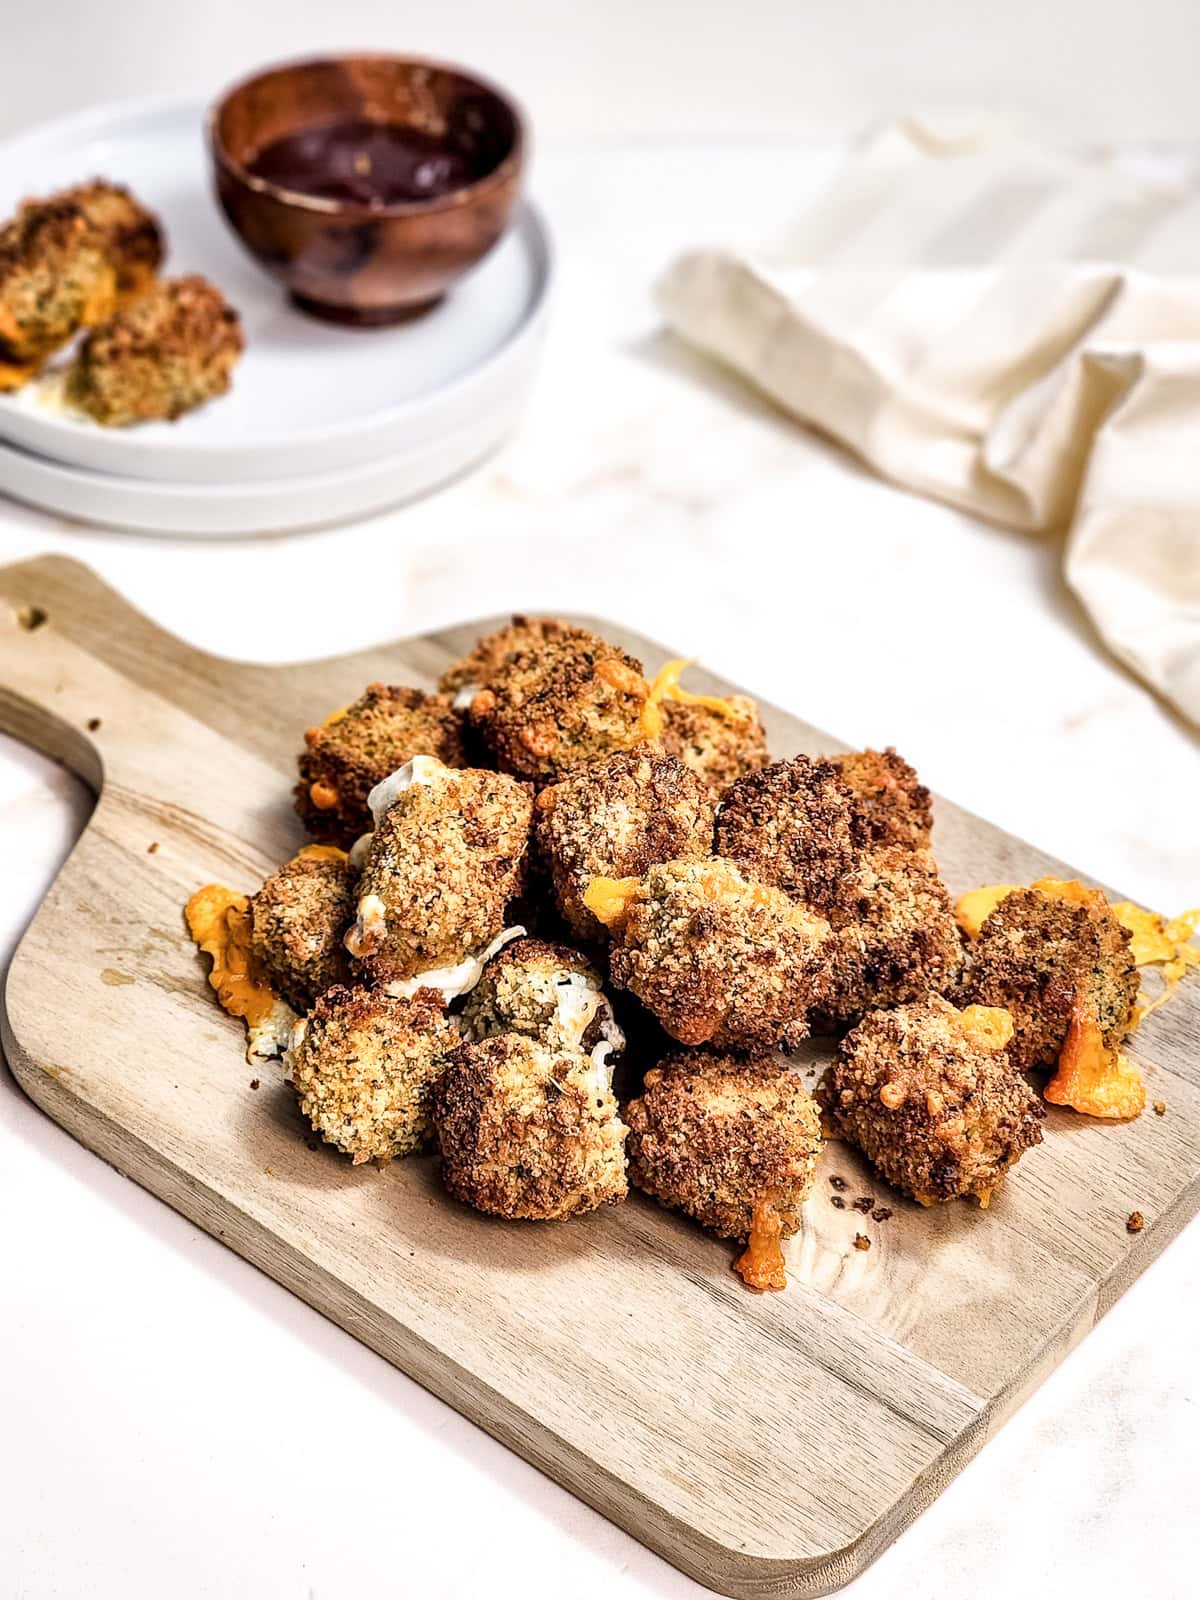
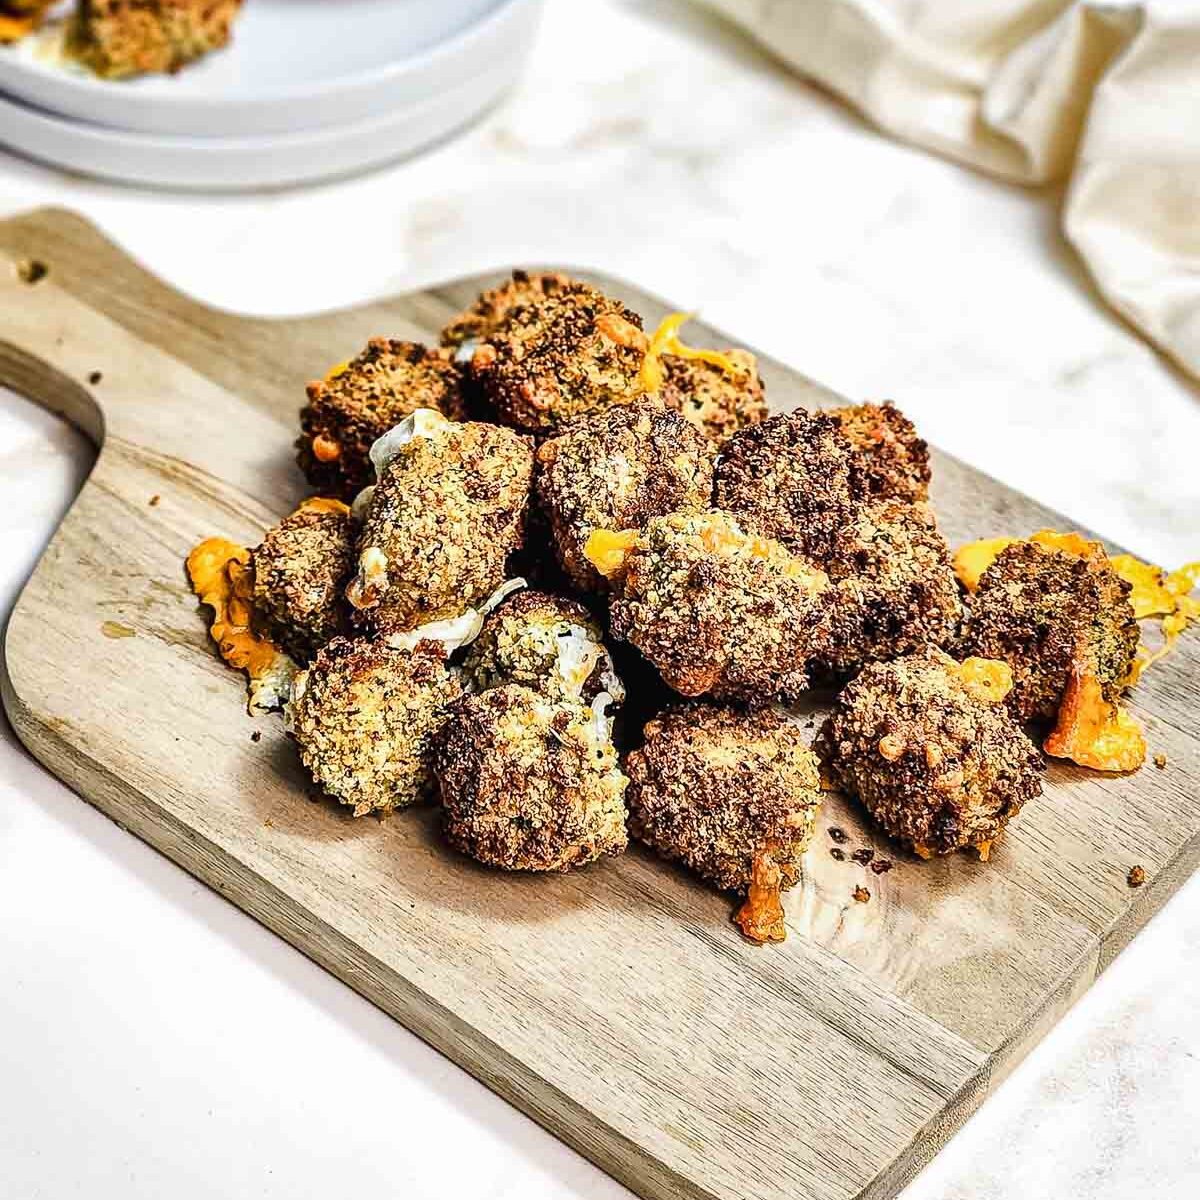
My kids jump with joy when I make this creamy broccoli cauliflower cheese casserole with tender vegetables, rich cheddar sauce, and a golden breadcrumb topping baked until hot and bubbly.

A spoon lifts cheesy, baked Cheese Casserole from a blue dish, with melted cheese stretching—filled with tender broccoli and cauliflower.

Broccoli and cauliflower in a casserole for dinner sounds like the worst nightmare for picky eaters, but I'm always up for a challenge. My kids sometimes finish their vegetables, and other times we go through a lengthy drama just making them eat greens. This broccoli cauliflower cheese casserole may sound scary at first, but it's one of the vegetable casseroles my kids actually ask for seconds of.

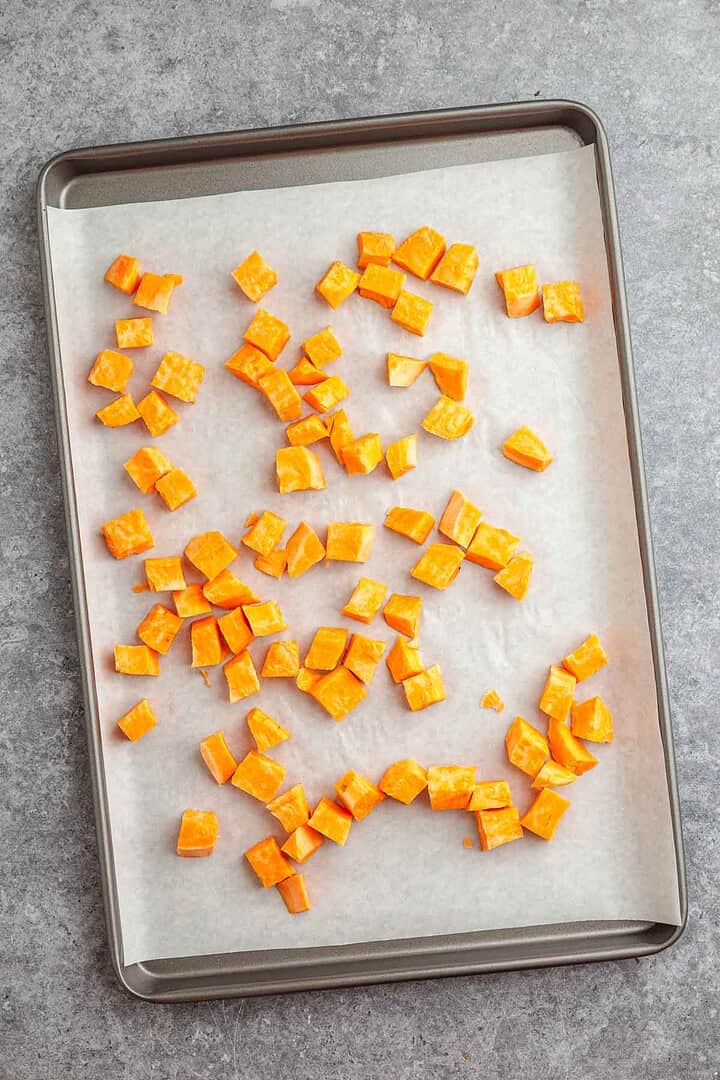
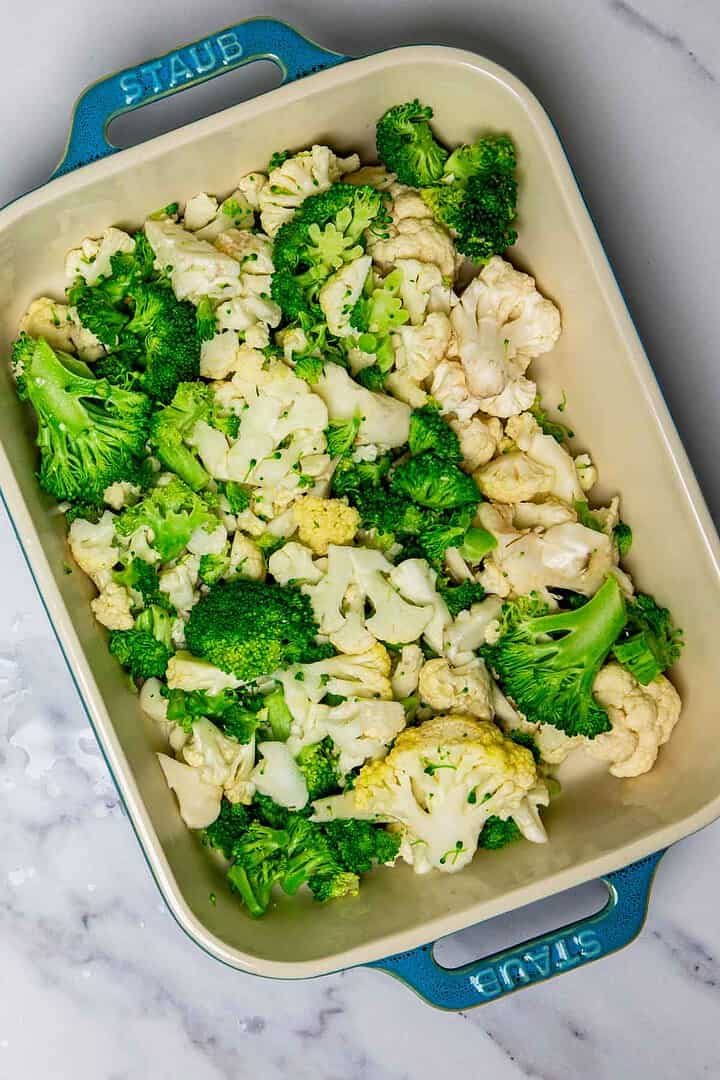
The vegetables need to be blanched for just 5 minutes before they go into the casserole, not cooked all the way through. If you boil them until they're fully tender, they'll turn mushy and shapeless during baking instead of holding their structure. I found this out the first time I overcooked them. I thought softer vegetables would make the casserole easier for my kids to eat, but they broke down into an unappetizing mush that nobody wanted to touch. Draining them well after blanching is critical because any water left on the florets thins out the cheese sauce and makes the whole thing watery instead of thick and creamy. 

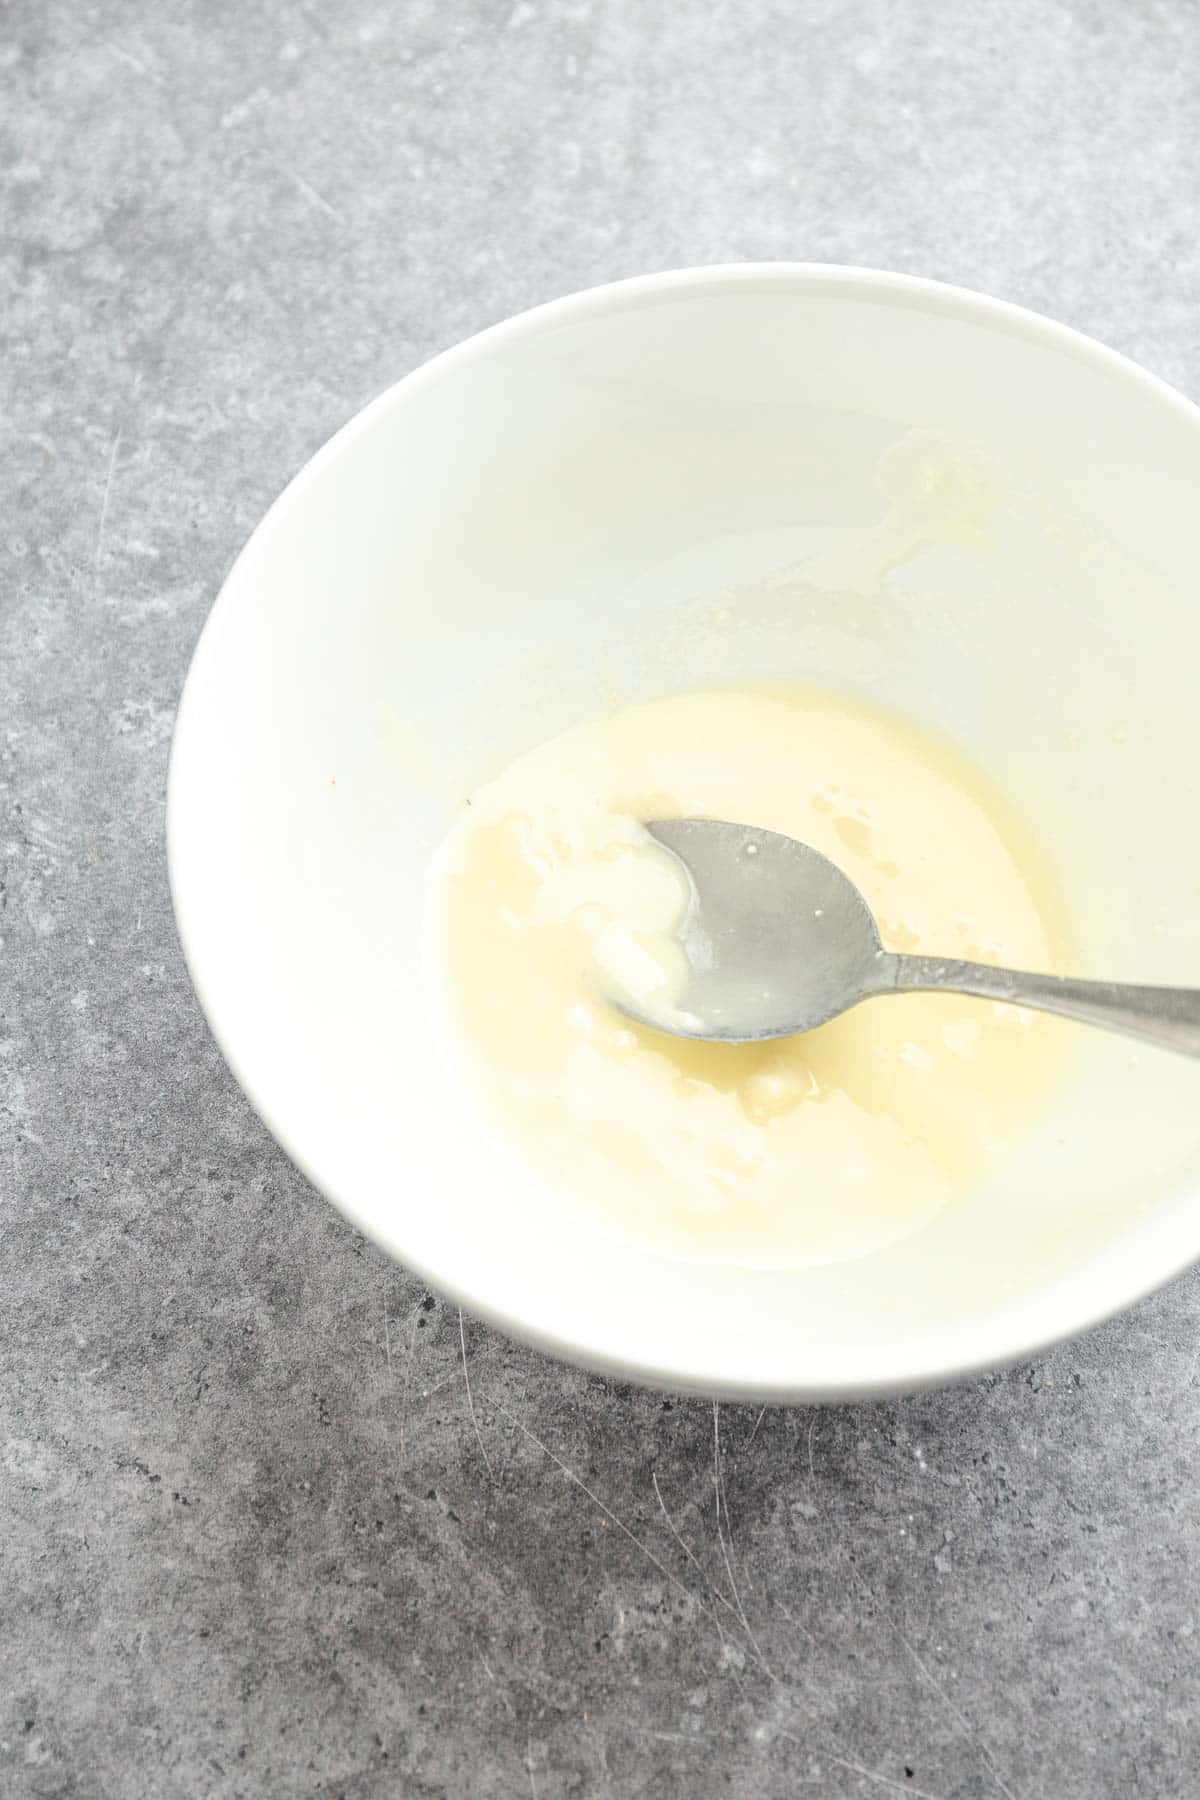
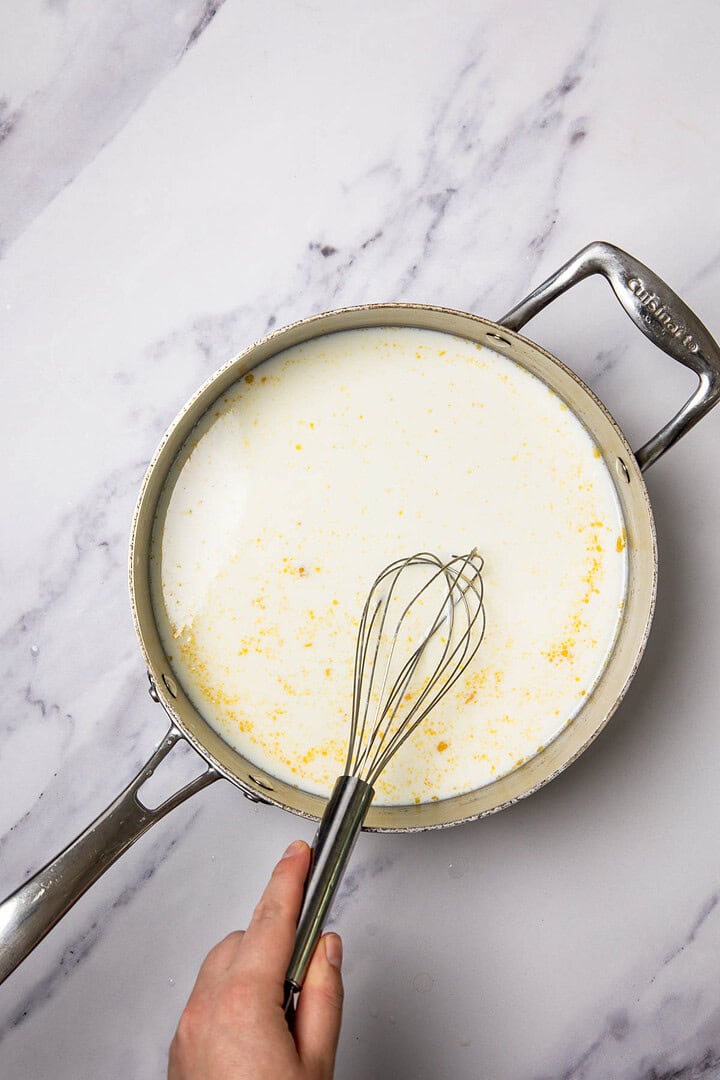
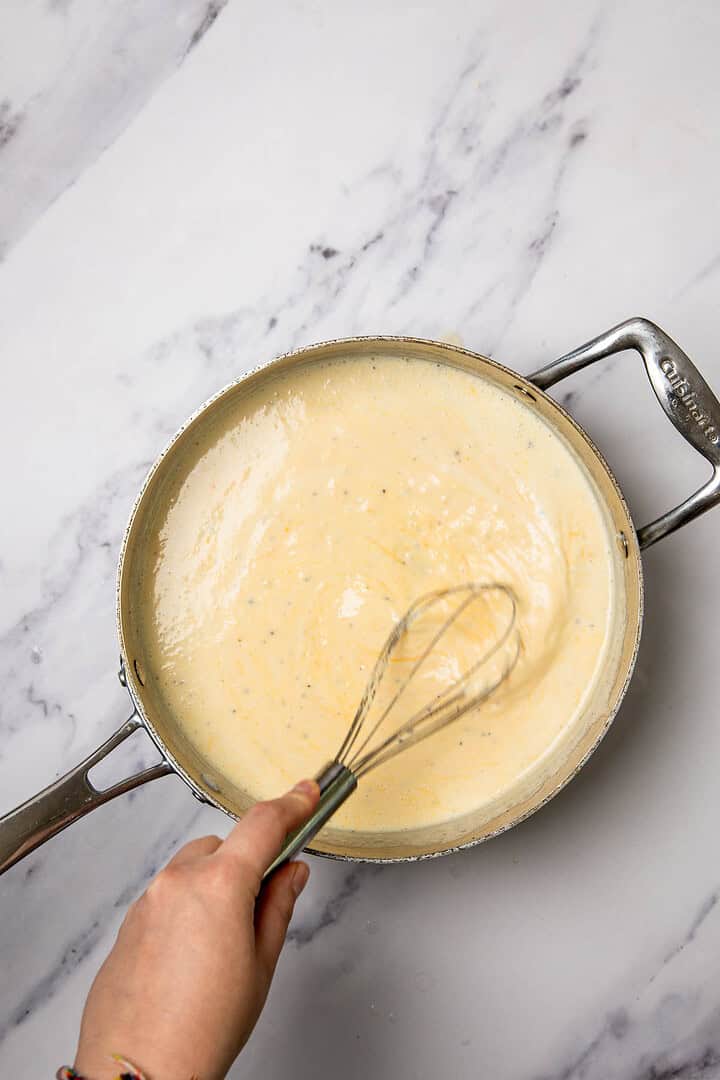
The roux has to cook for at least a minute before adding the milk, or you'll taste raw flour in the sauce, which gives it a chalky, unpleasant flavor that ruins the whole thing. Freshly shredded cheddar melts smoothly into the sauce, but pre-shredded cheese has anti-caking powder on it that makes it clump and separate instead of creating that velvety texture.

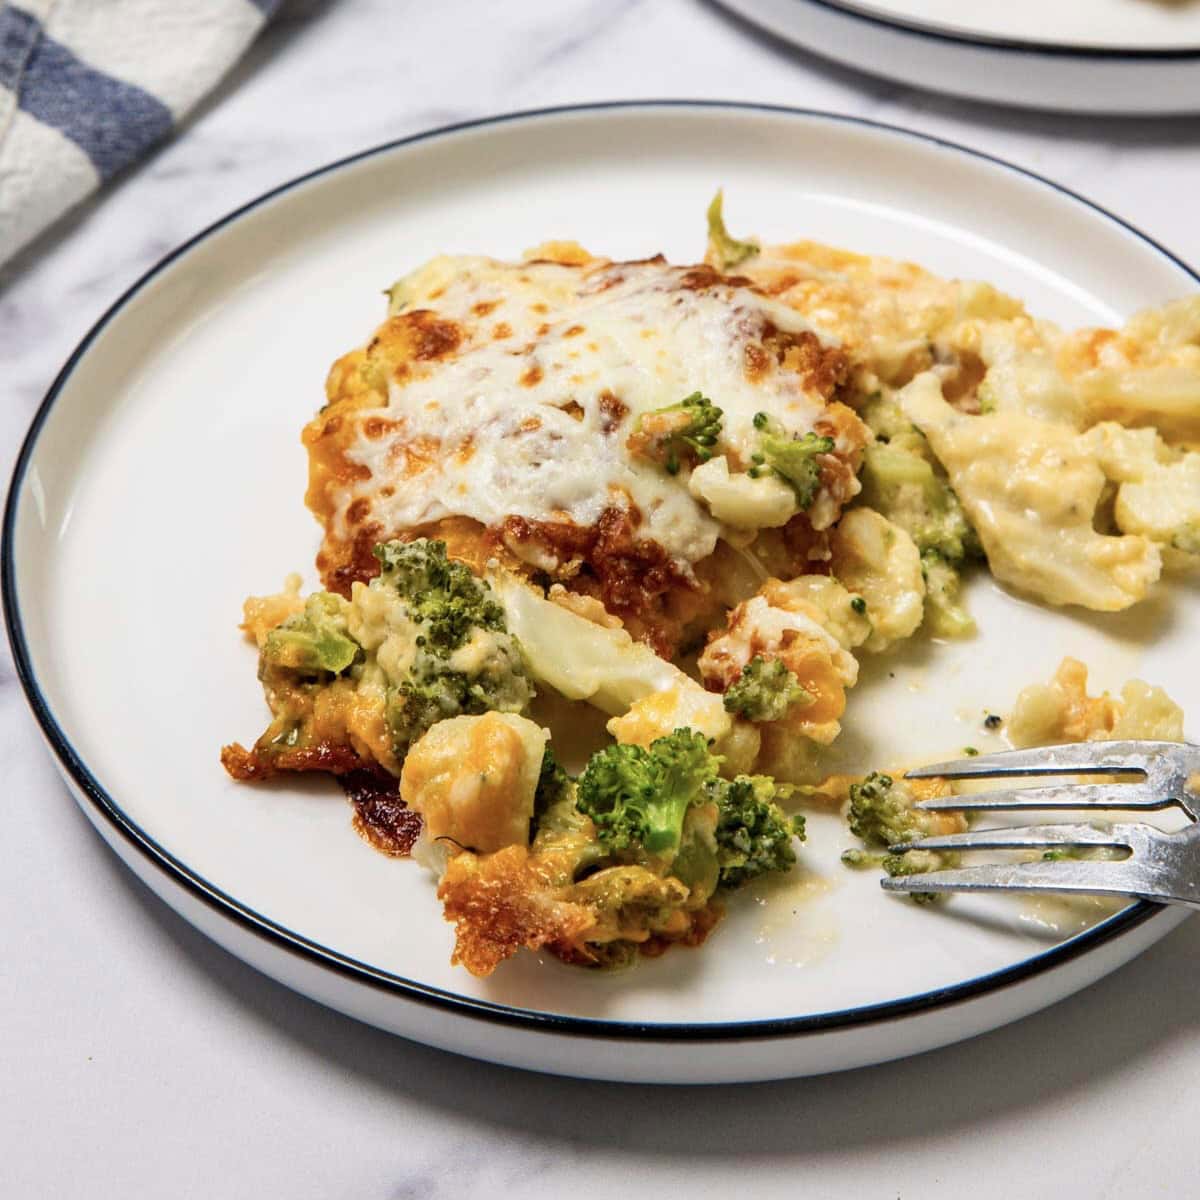
What makes this casserole so appealing is the breadcrumb topping that toasts in the oven. It adds a light crunch that makes the whole dish feel more interesting, and honestly, I think it's what convinced my kids to try it in the first place.

The casserole comes out of the oven hot and bubbly with a golden top, and suddenly vegetables don't seem so scary anymore. This has become my proof that if you cover vegetables in enough cheesy sauce and add a crispy topping, even the most hesitant vegetable eaters will clean their plates.

If you want more broccoli or cauliflower dishes that'll sure be eaten at home, try my green cauliflower bake, cheesy cauliflower casserole, or creamy vegan broccoli casserole!

Top Tips for Broccoli Cauliflower Cheese Casserole

Don’t overcook the vegetables: Boil the broccoli and cauliflower just until slightly tender. They will continue cooking in the oven, and overcooking them at the start can make the casserole mushy.

Drain the vegetables well: Extra water from the broccoli and cauliflower can thin the cheese sauce. Let them sit in a colander for a minute so excess moisture drains off before assembling the casserole.

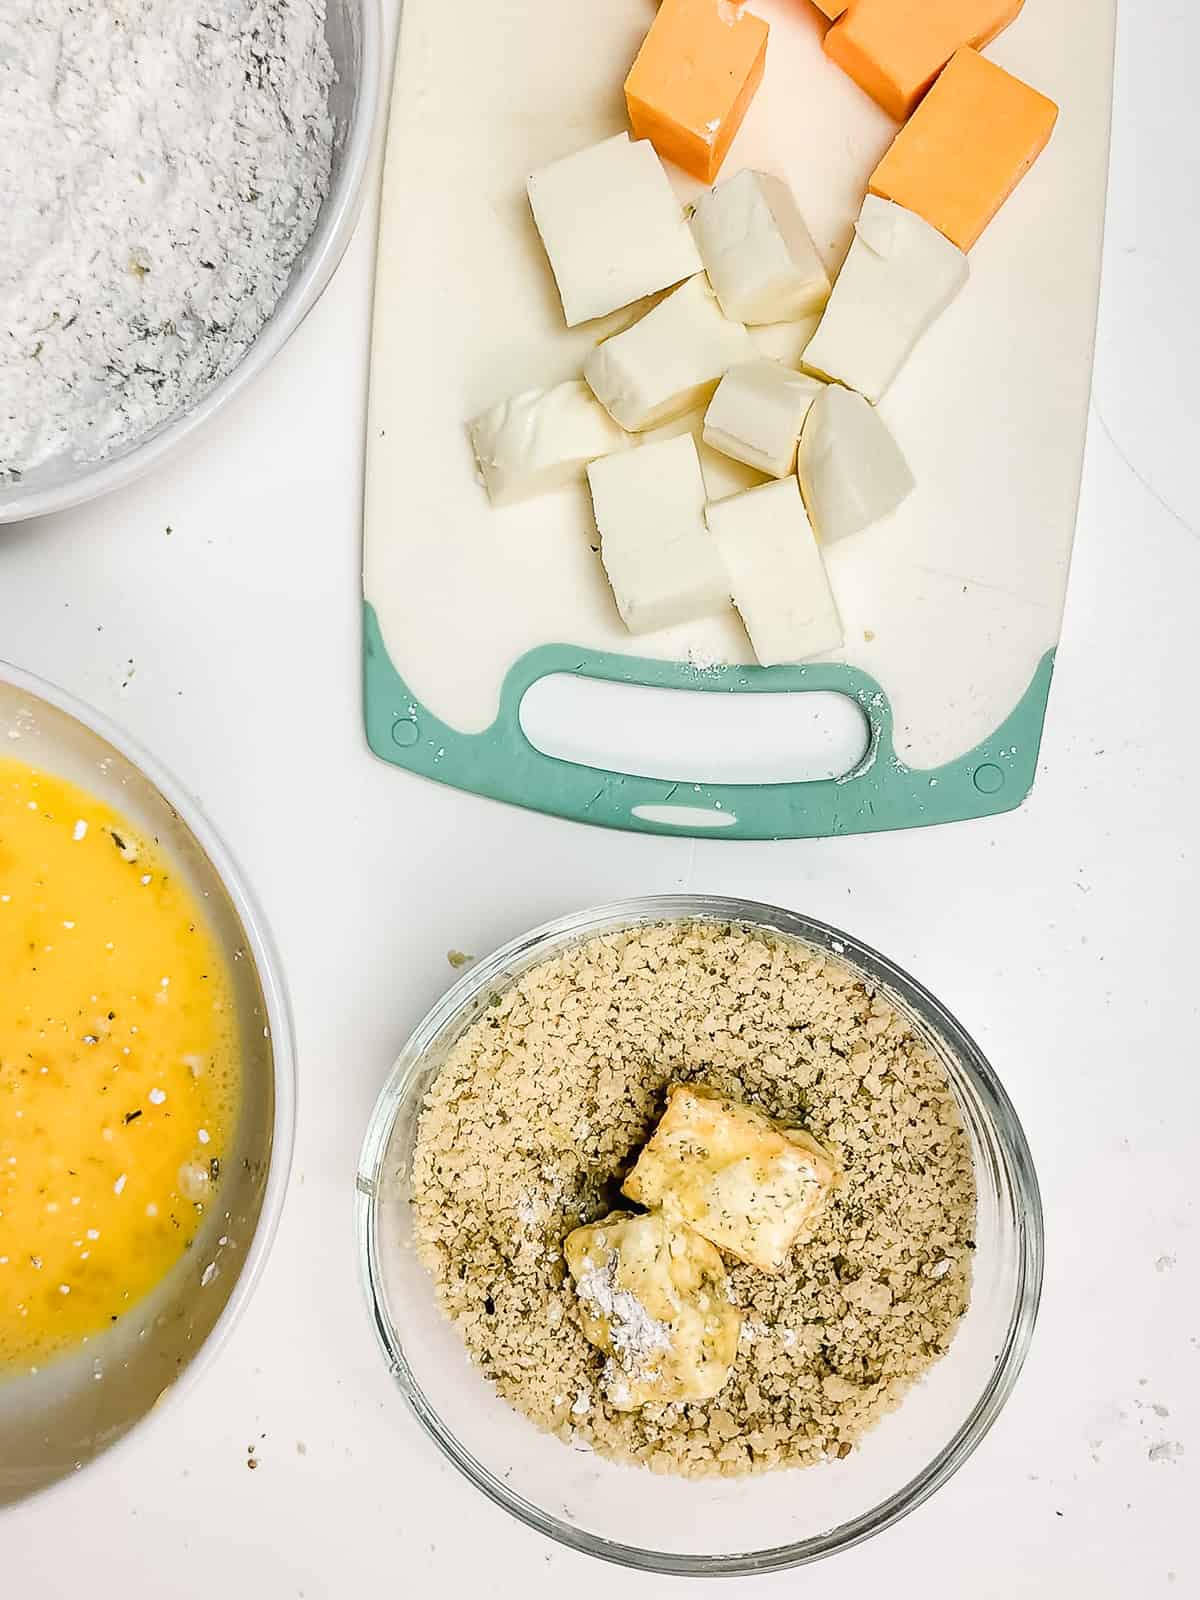
Shred the cheese yourself: Freshly shredded cheddar melts more smoothly and gives the sauce a creamier texture than pre-shredded cheese, which often contains anti-caking agents.

Ingredients

Milk, butter, shredded cheese, cauliflower, broccoli, bread crumbs, flour, salt, and pepper are ready on a marble surface for a delicious Cheese Casserole.

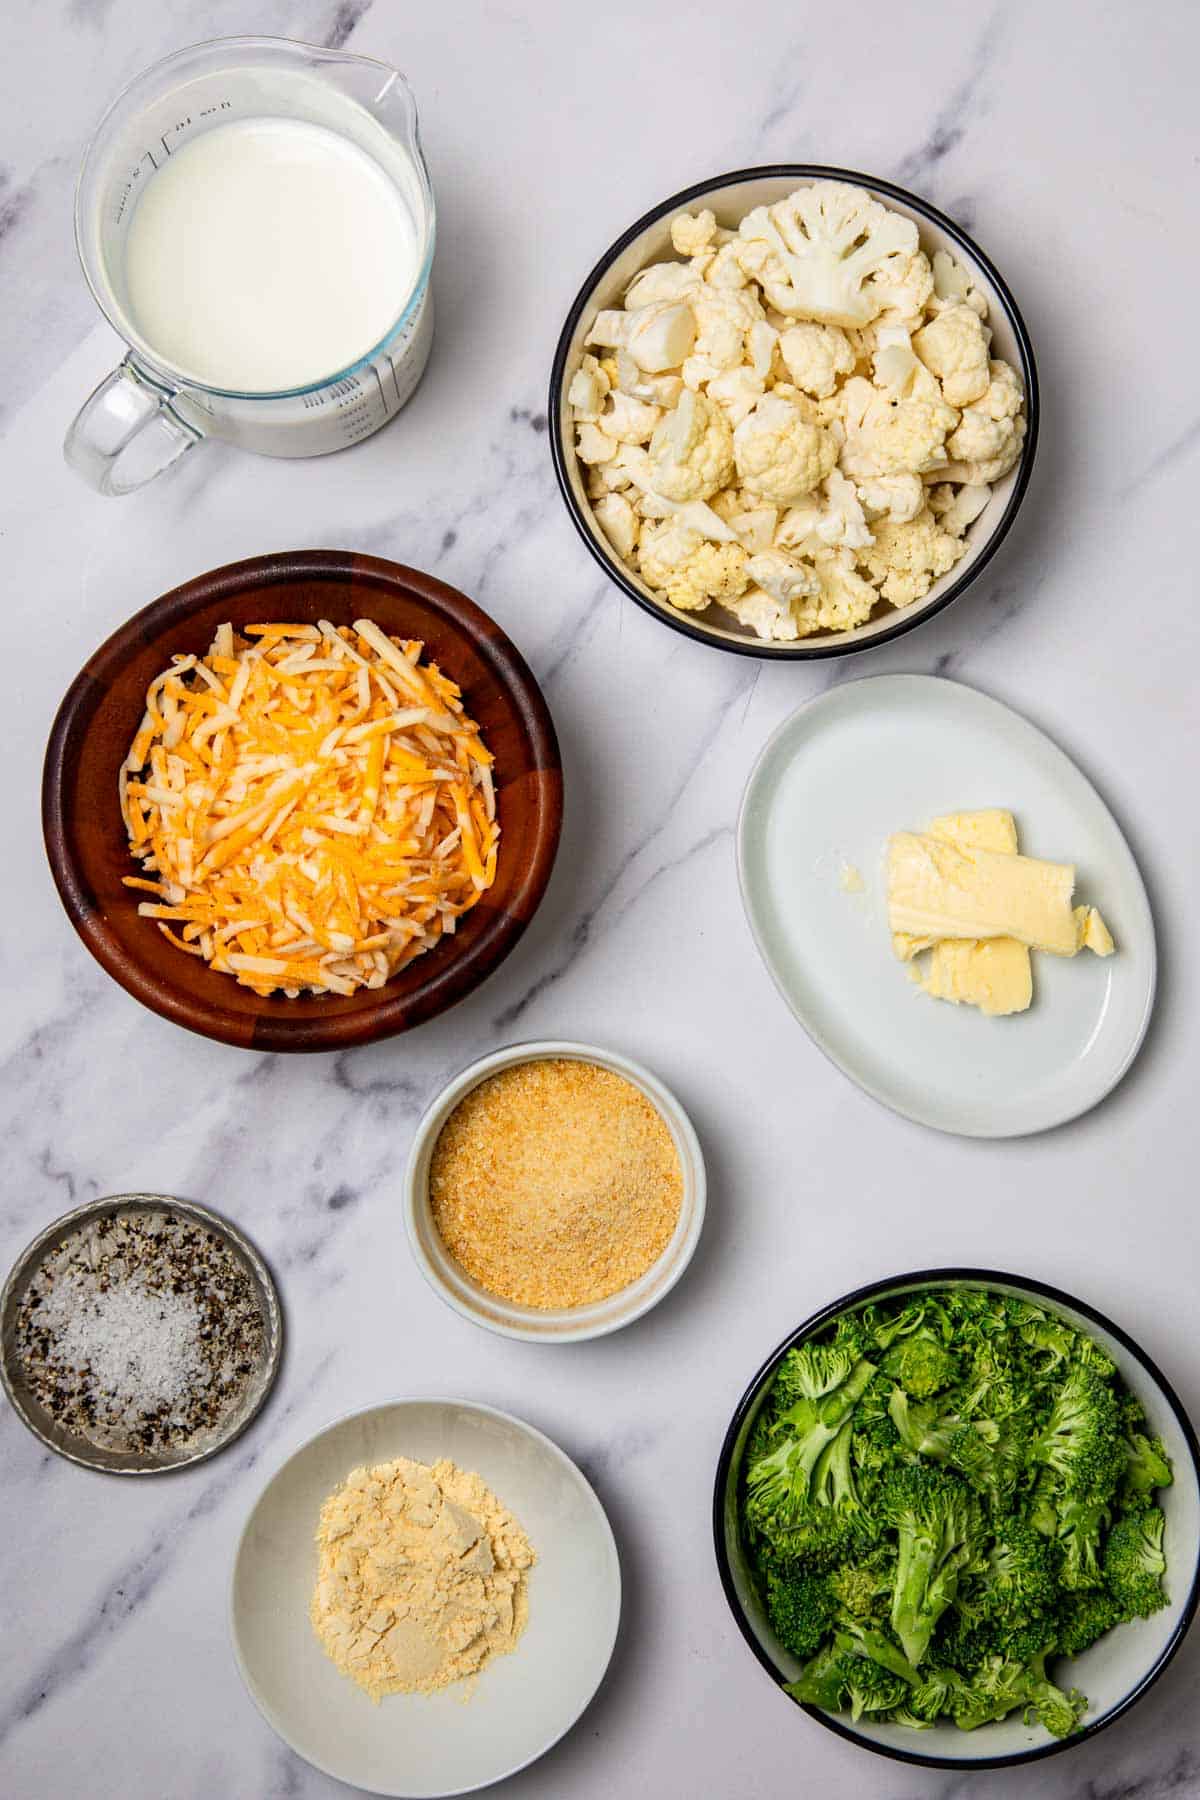
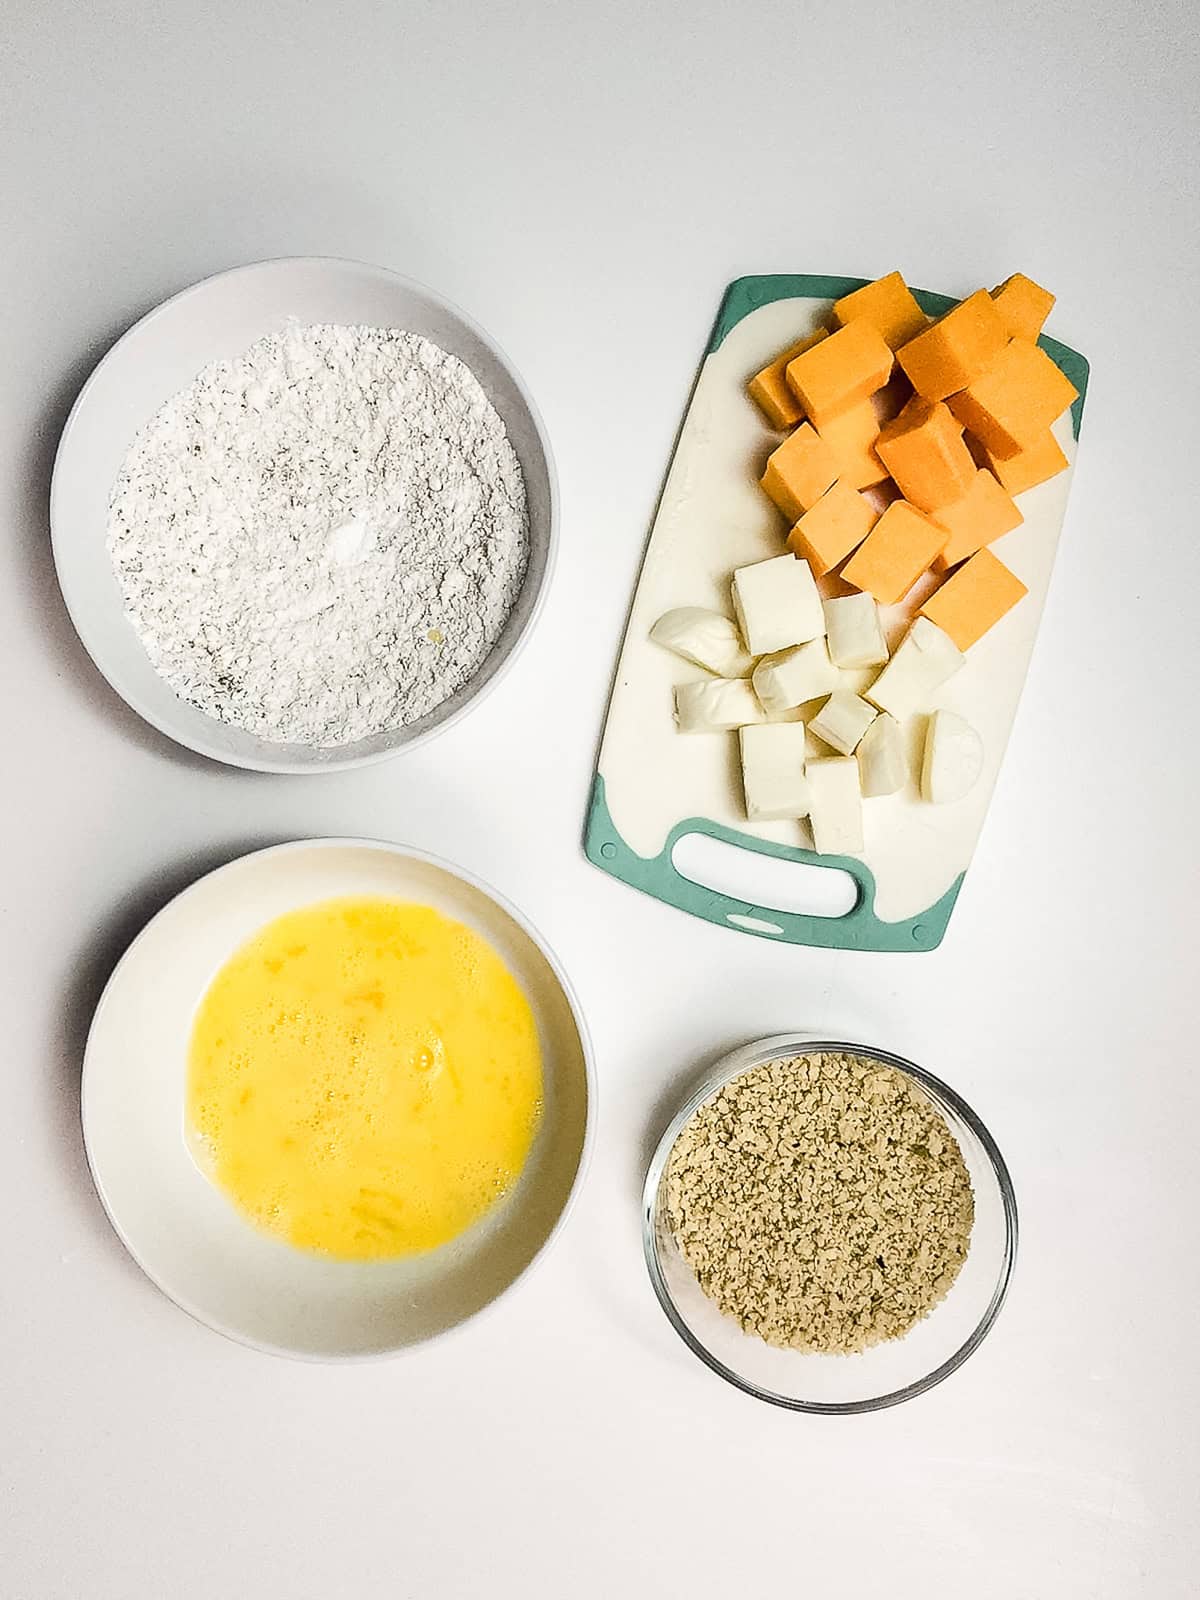
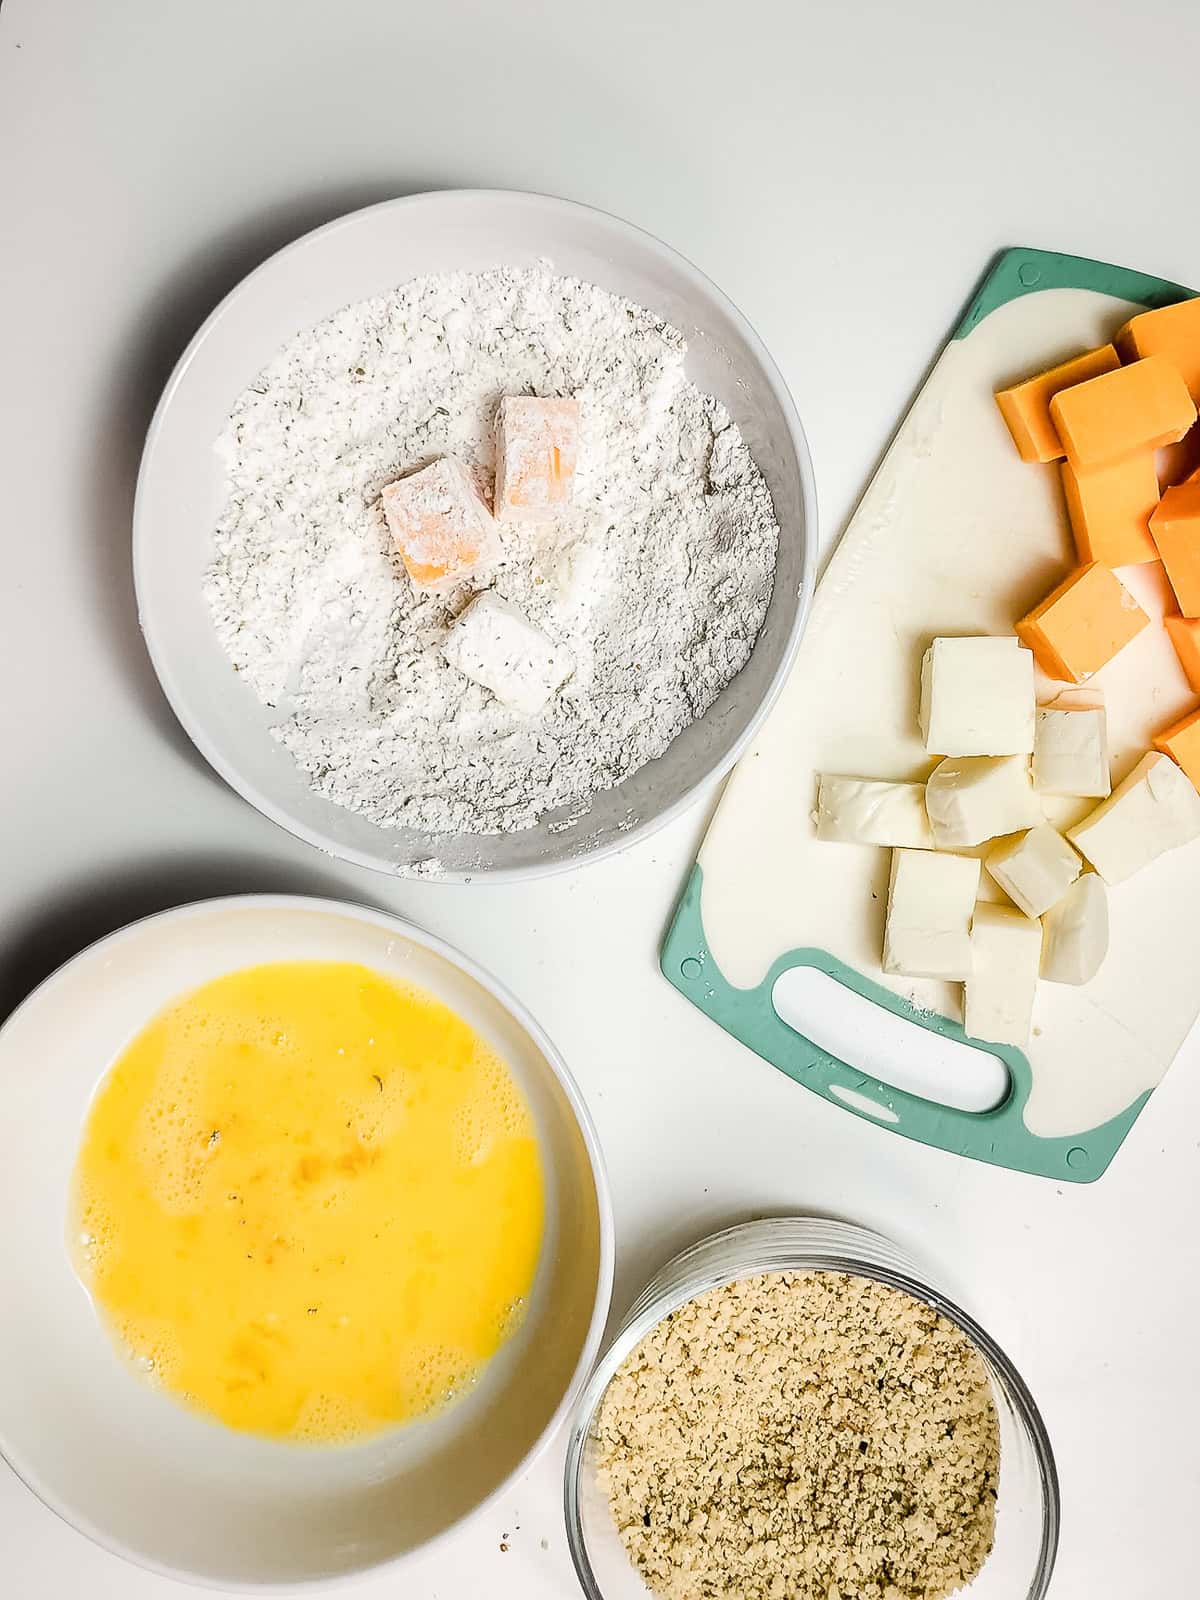
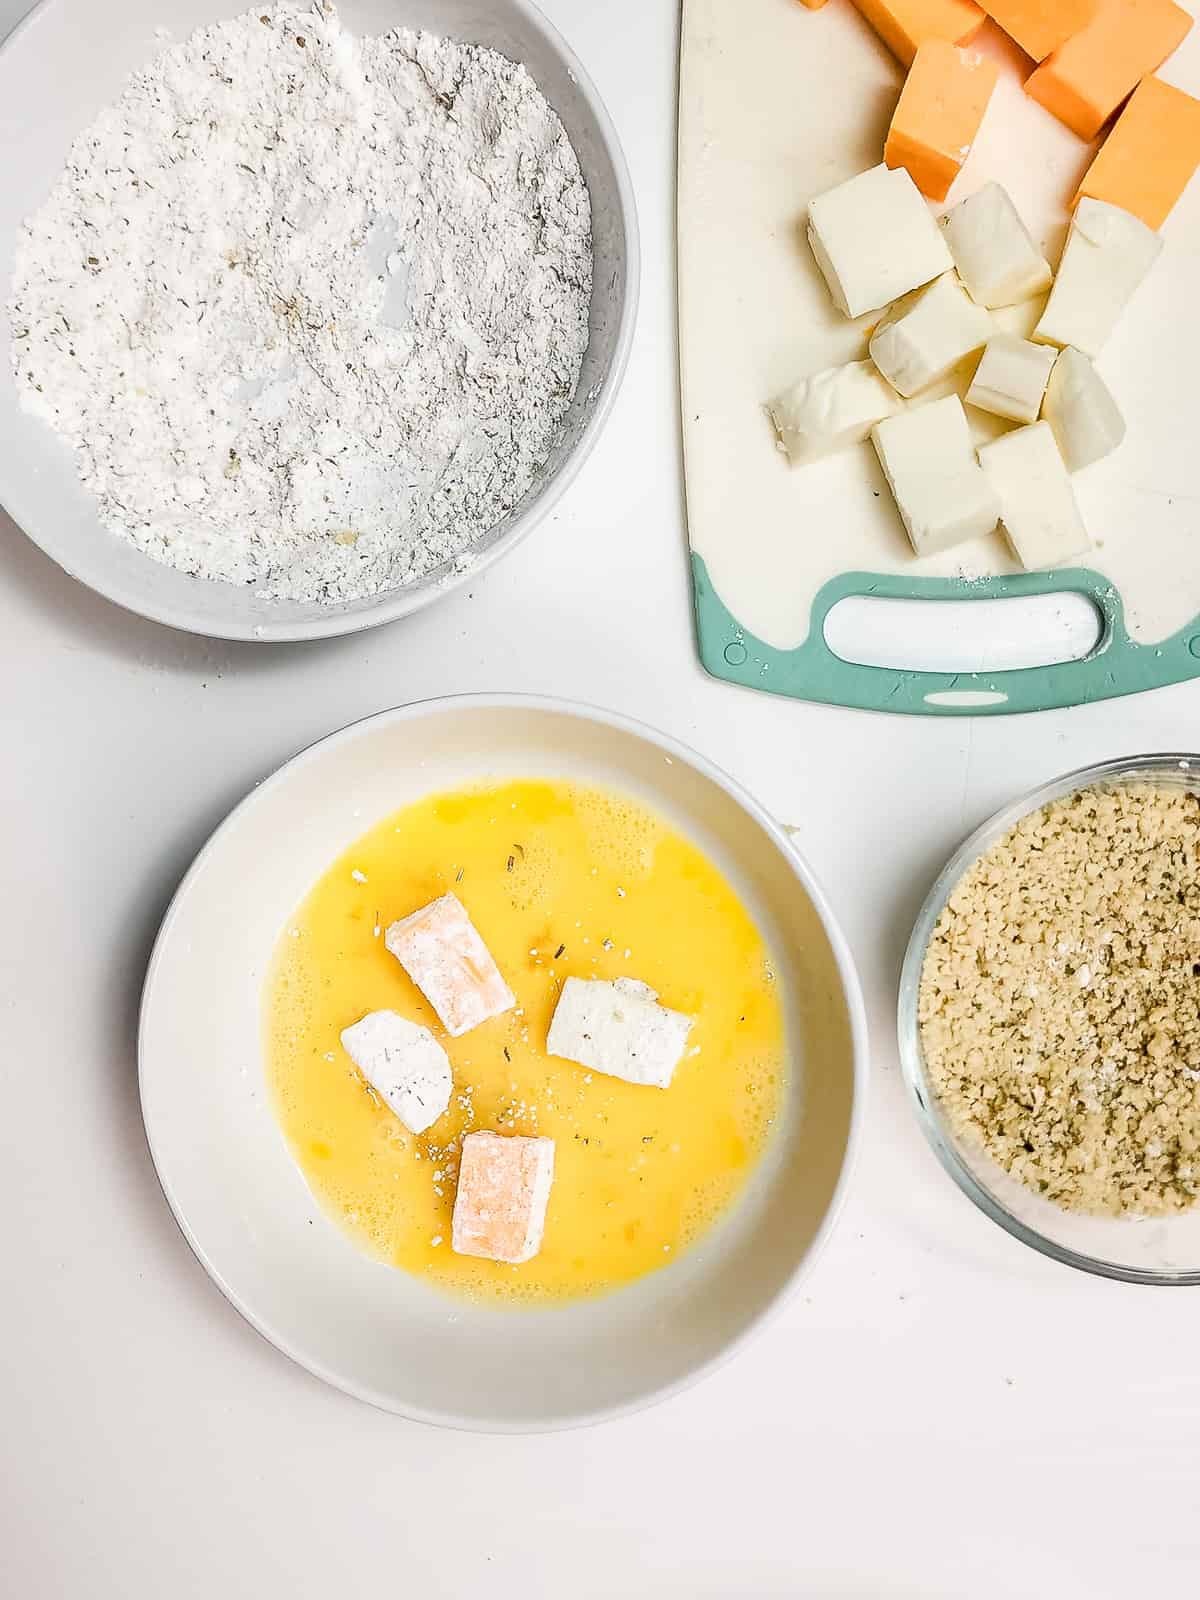
Broccoli and cauliflower give this casserole both texture and balance. Broccoli brings a slightly stronger, earthy flavor, while cauliflower is milder and softens beautifully when baked in the sauce. Using fresh florets helps them hold their shape during baking, but frozen vegetables can work if you thaw and drain them well so the casserole doesn't become watery.

Butter and all-purpose flour make a simple roux that thickens the milk and creates a smooth base that coats the vegetables evenly. Cooking the roux for about a minute removes the raw flour taste and helps the sauce develop a creamy texture.

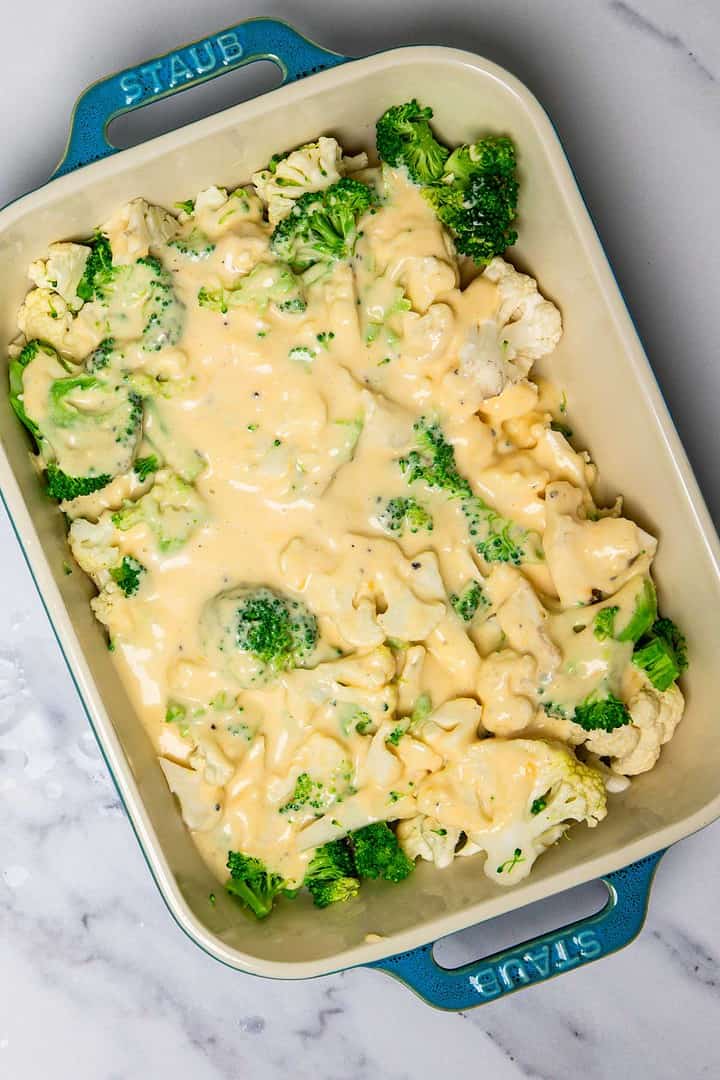
Sharp cheddar cheese gives the casserole its rich flavor. Freshly shredded cheese melts more smoothly than pre-shredded versions, which often have anti-caking agents that can affect the sauce. Most of the cheese gets stirred into the sauce, while the rest is sprinkled on top to create a bubbly, golden layer in the oven.

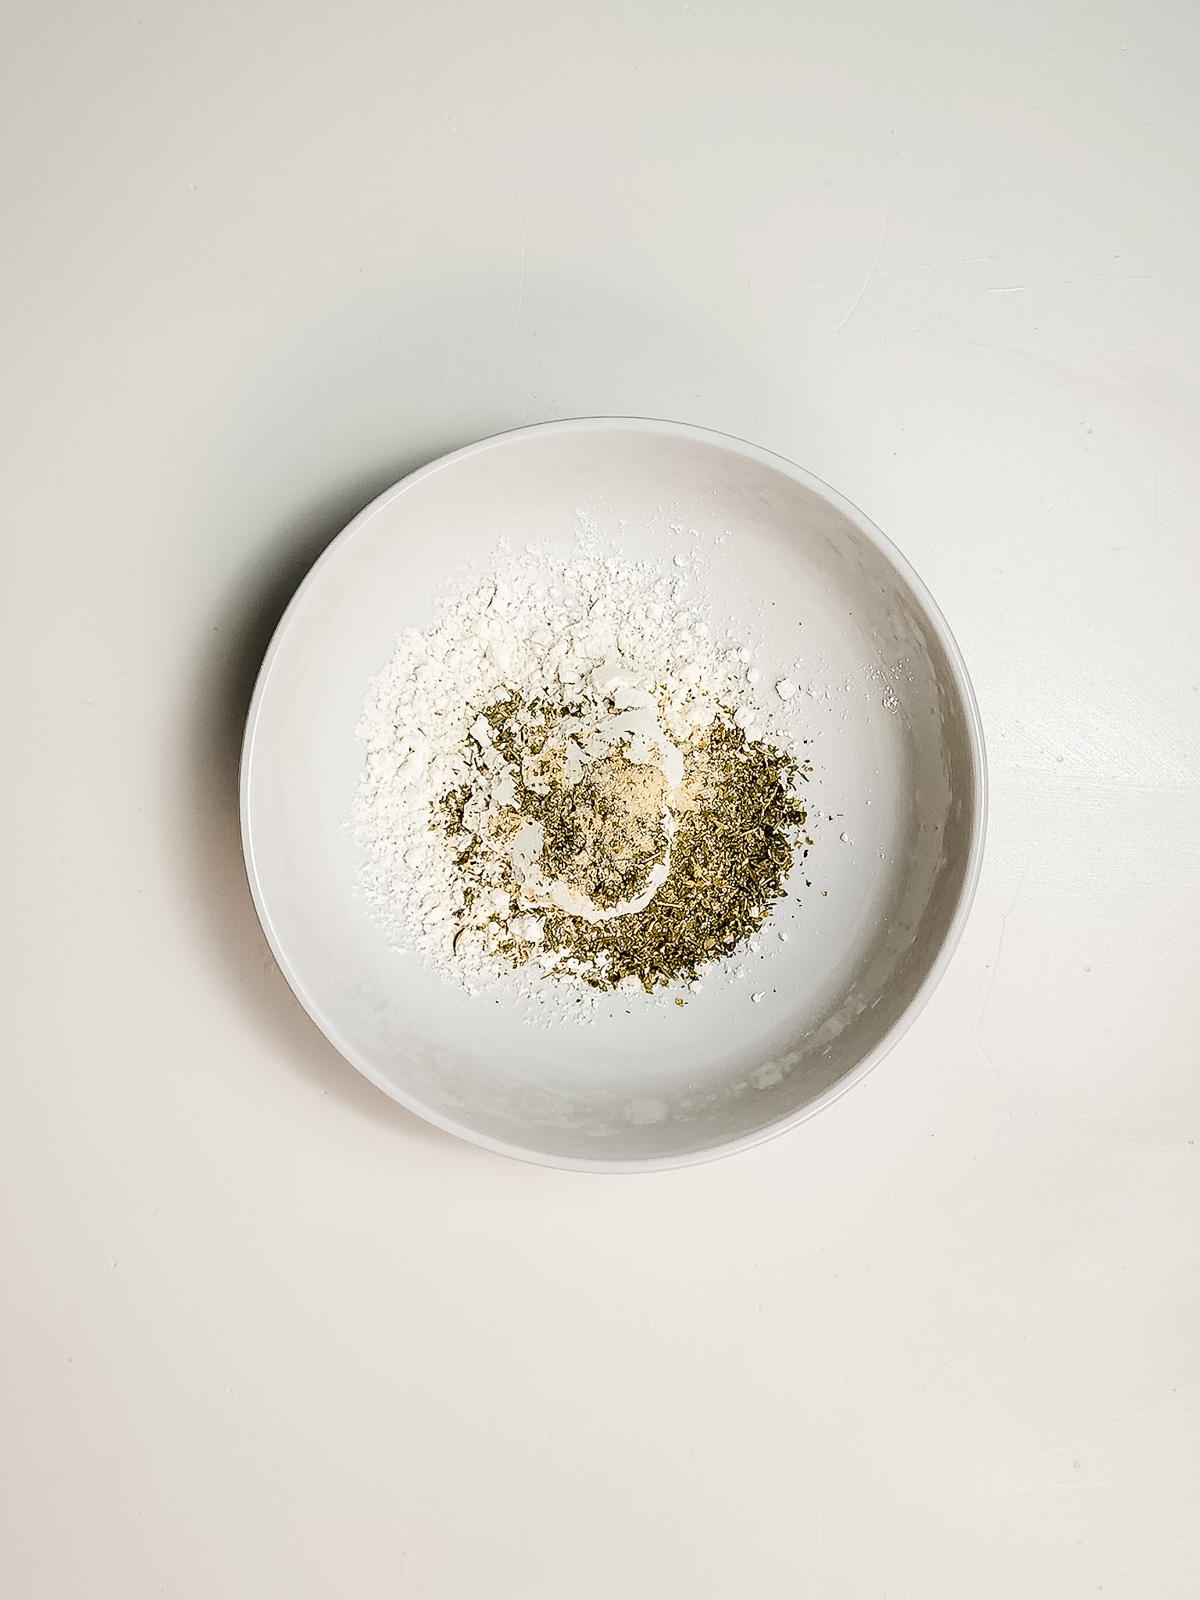
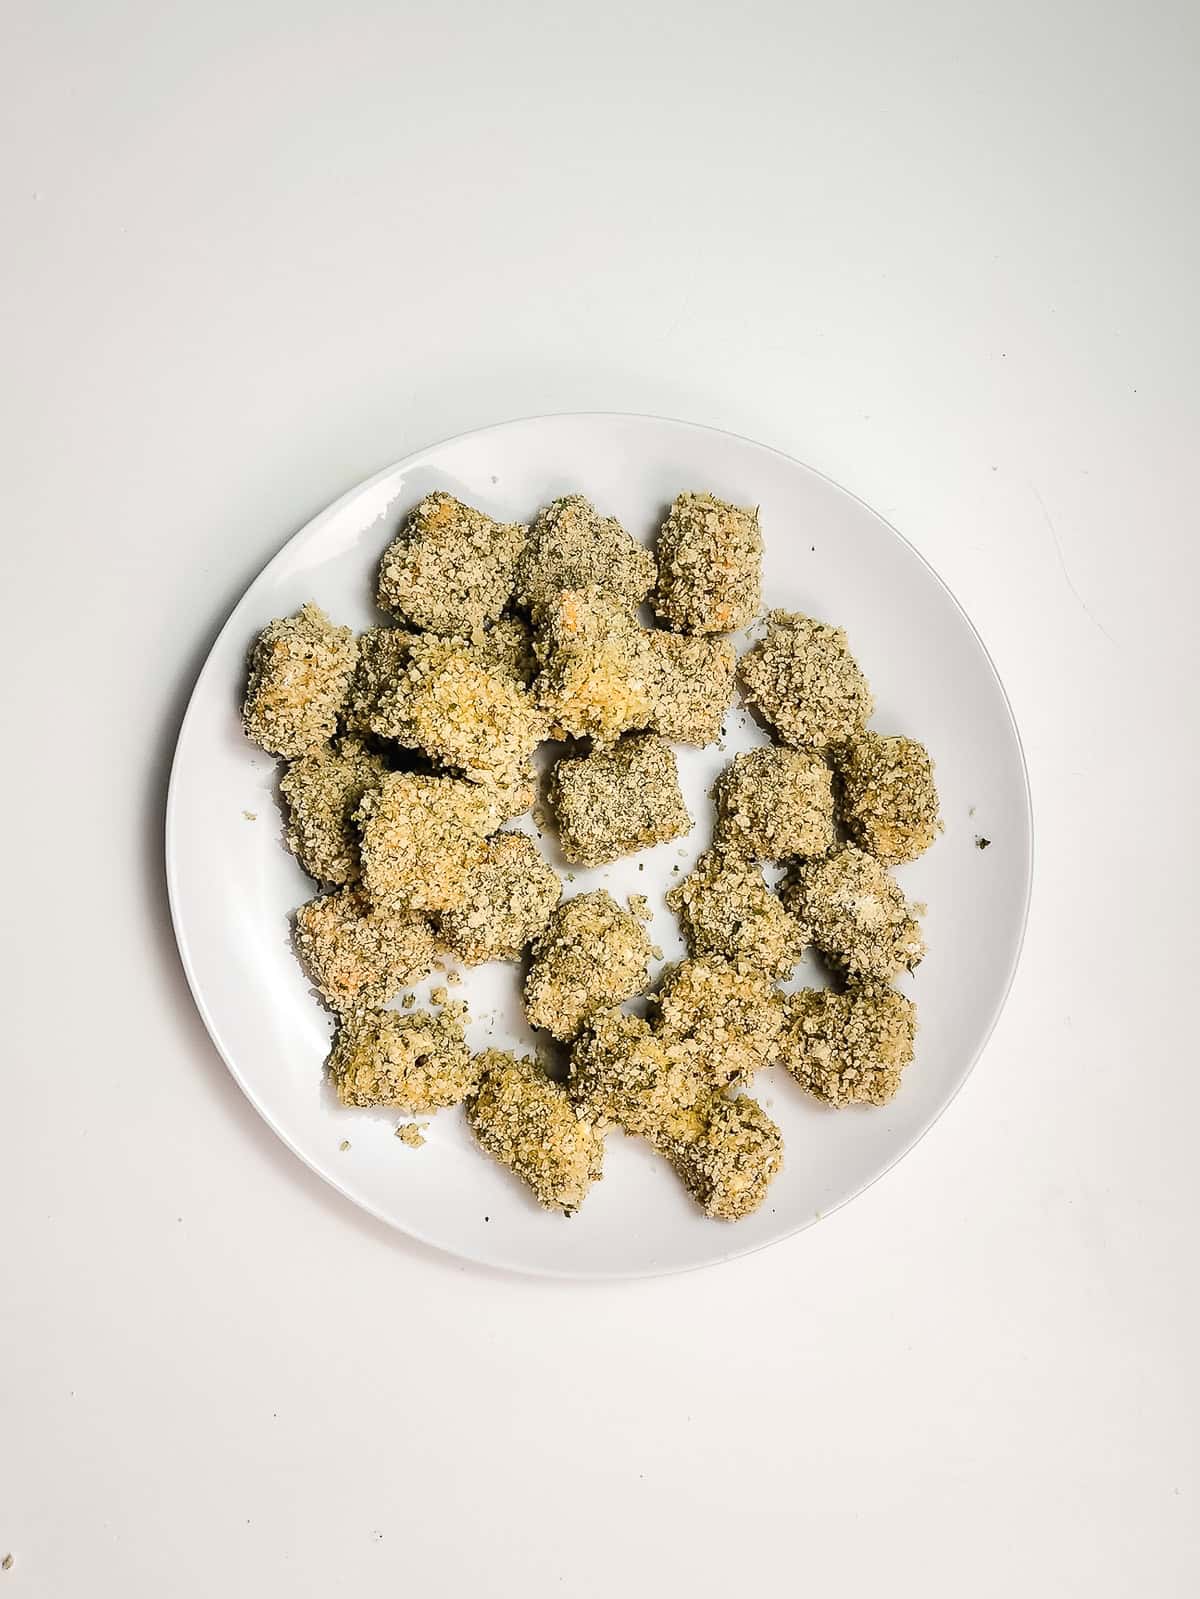
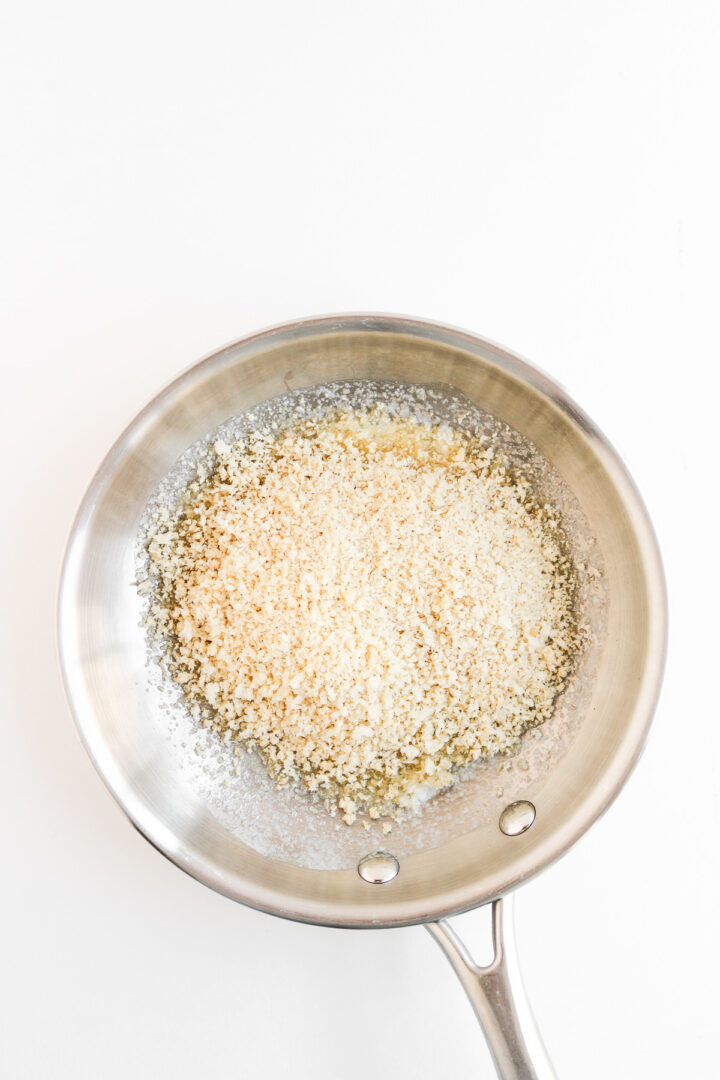
Breadcrumbs add the final contrast in texture. As the casserole bakes, they toast on the surface and create a light crunch that balances the creamy vegetables underneath. 

See the recipe card for exact quantities.

How to Make Broccoli Cauliflower Cheese Casserole?

Cheese casserole loaded with broccoli and cauliflower, topped with a golden baked cheese crust in a vibrant blue dish.

This broccoli cauliflower cheese casserole comes together in a few simple steps. The vegetables are lightly cooked first, then baked in a creamy cheddar sauce with a crisp breadcrumb topping.

Prepare the Oven and Baking Dish

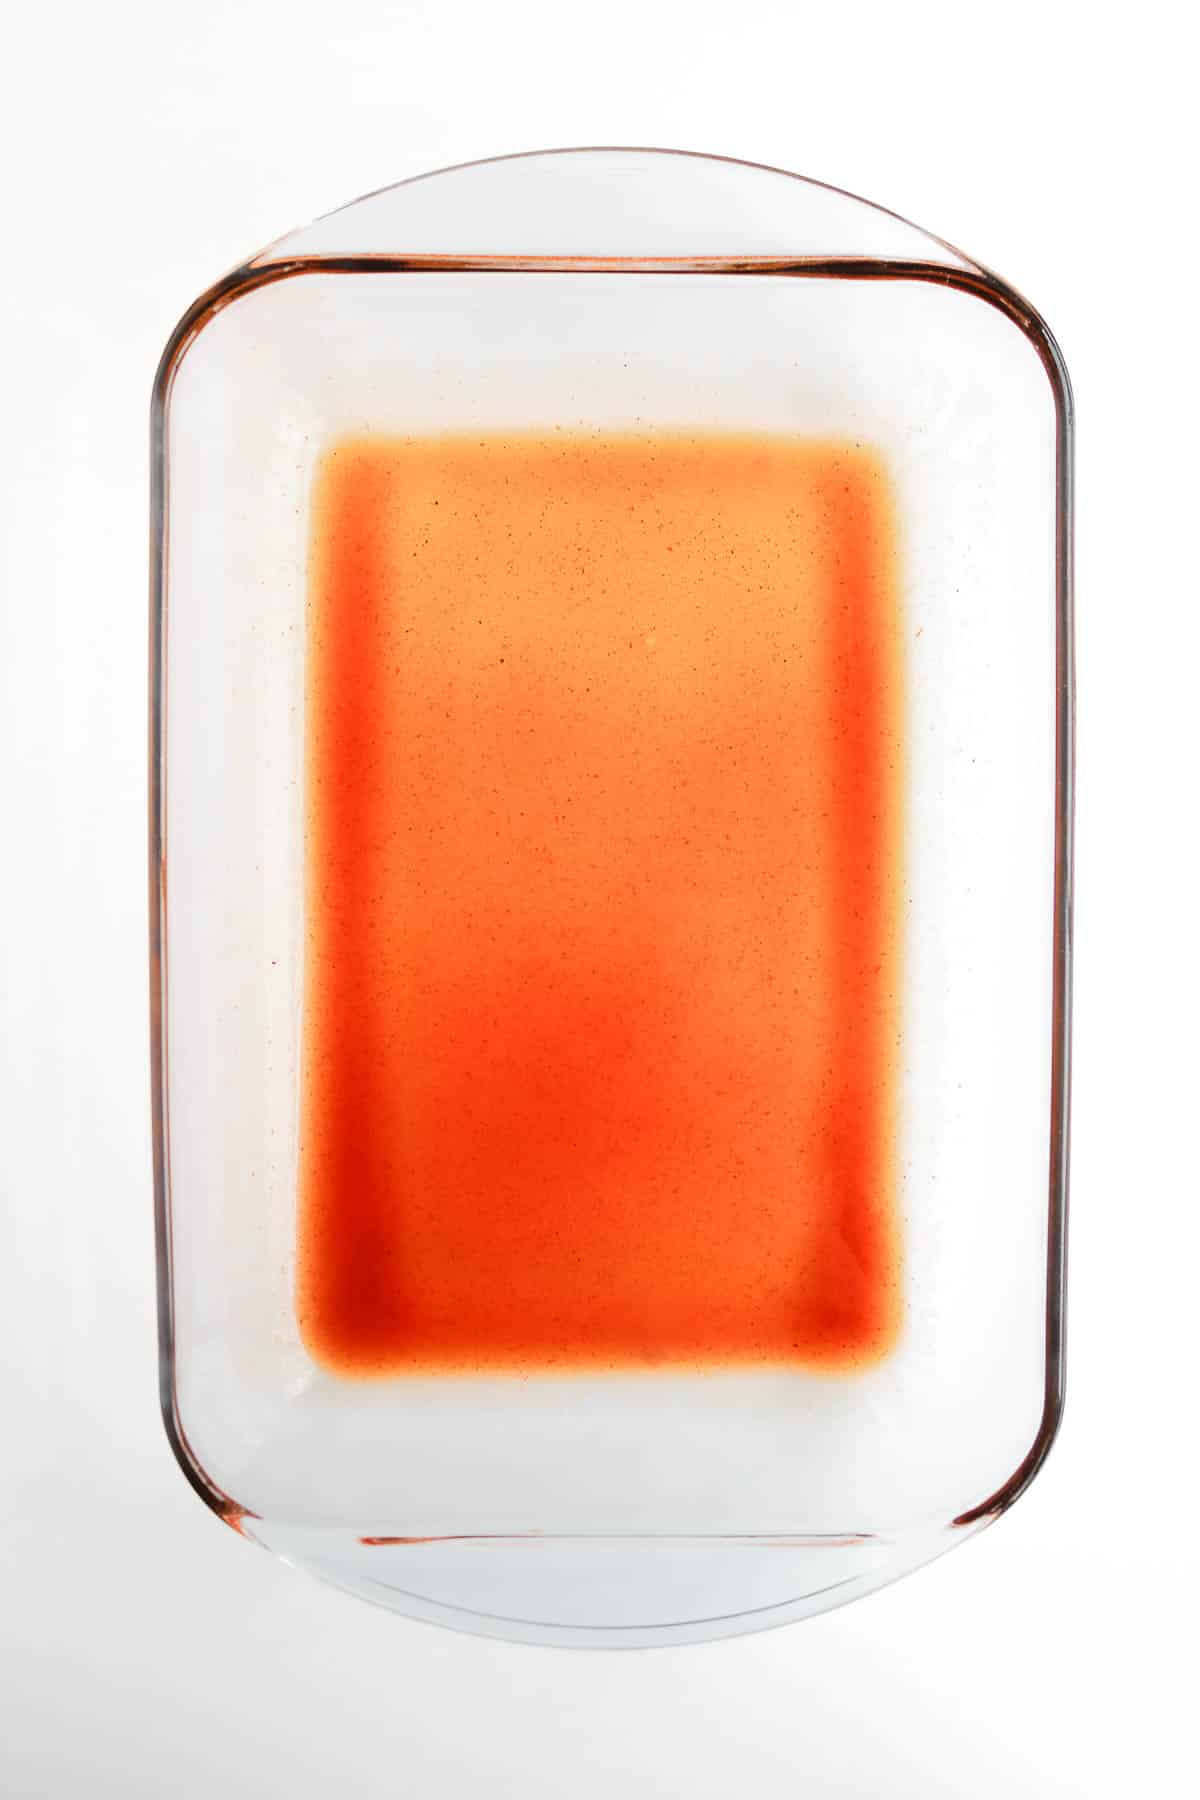
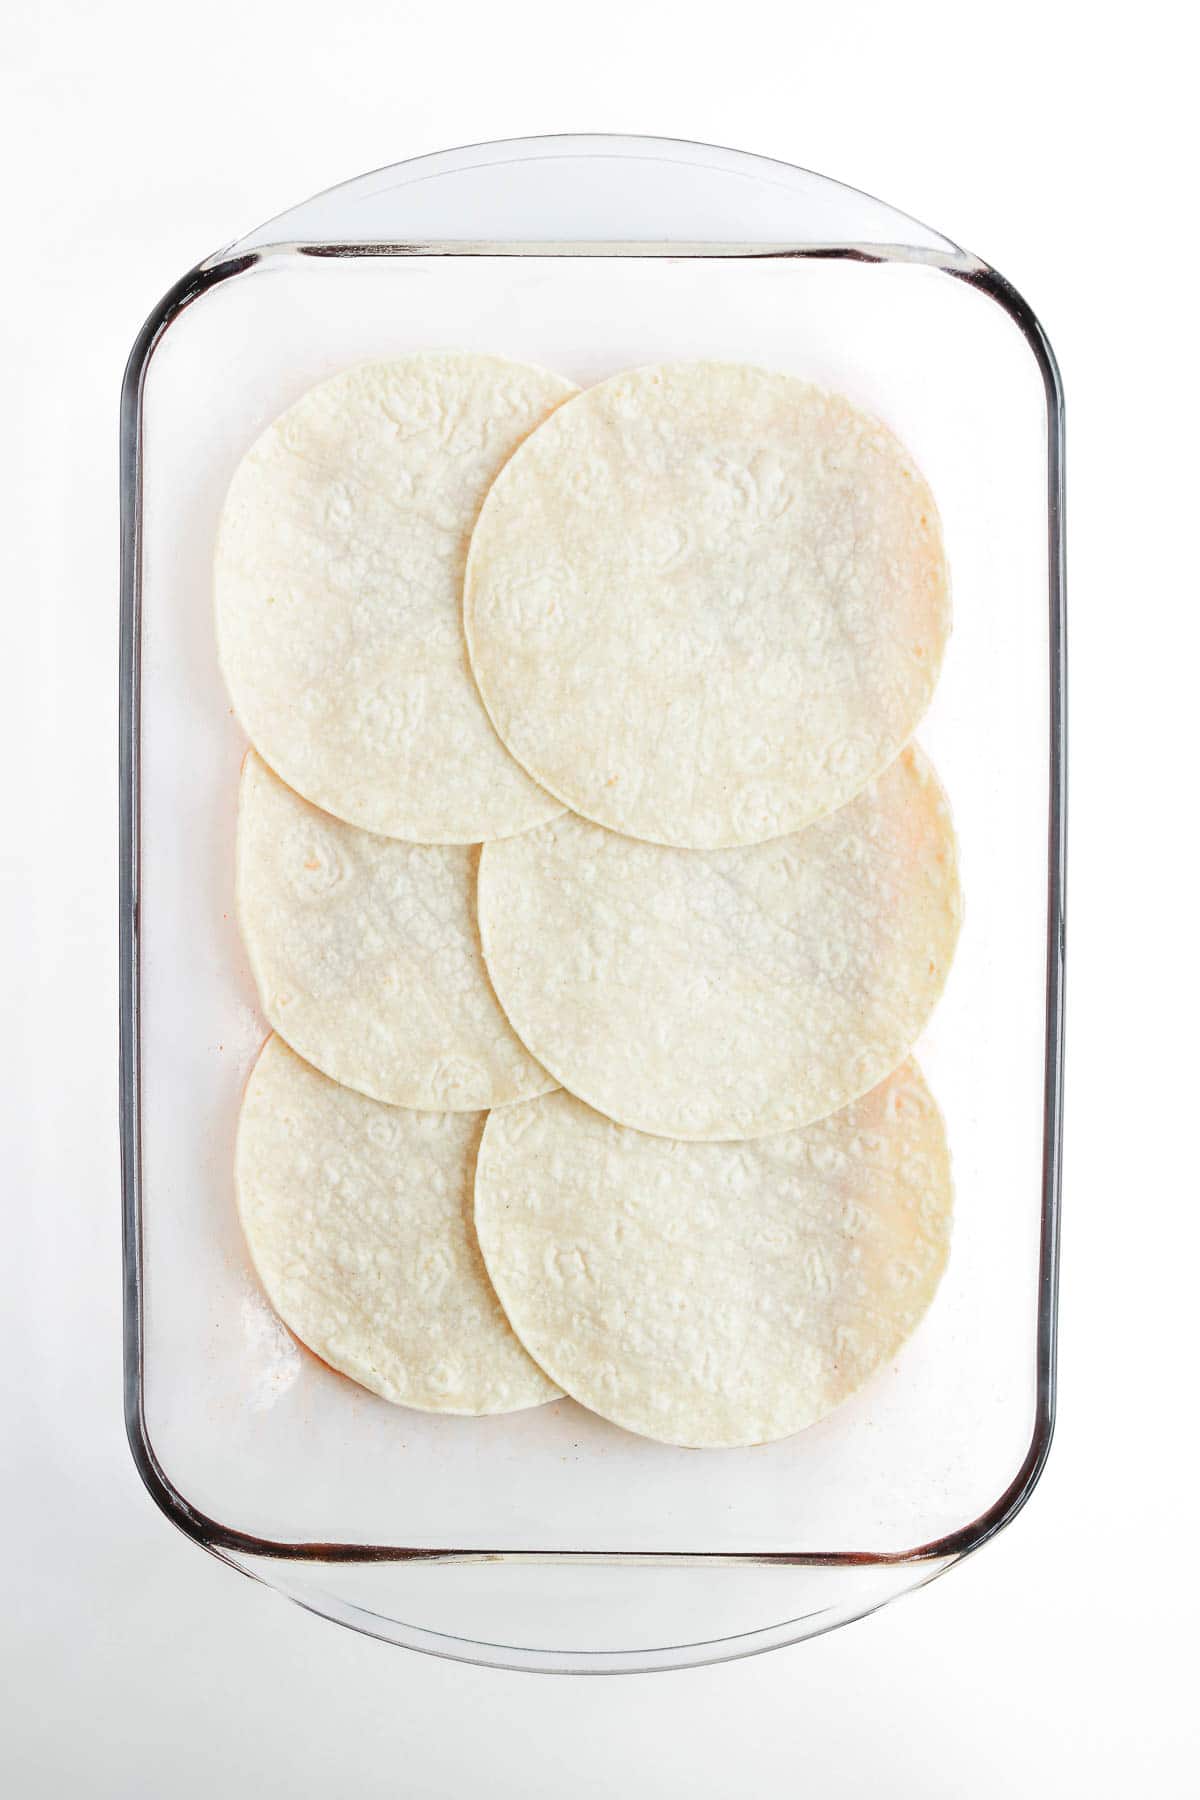
Preheat your oven to 375°F. Lightly grease a 9×13-inch baking dish with cooking spray or butter so the casserole does not stick during baking.

Cook the Vegetables

Large white pot with broccoli, cauliflower, and green sauce on a marble surface; perfect for making a cheesy broccoli and cauliflower casserole. Wooden spoon inside.

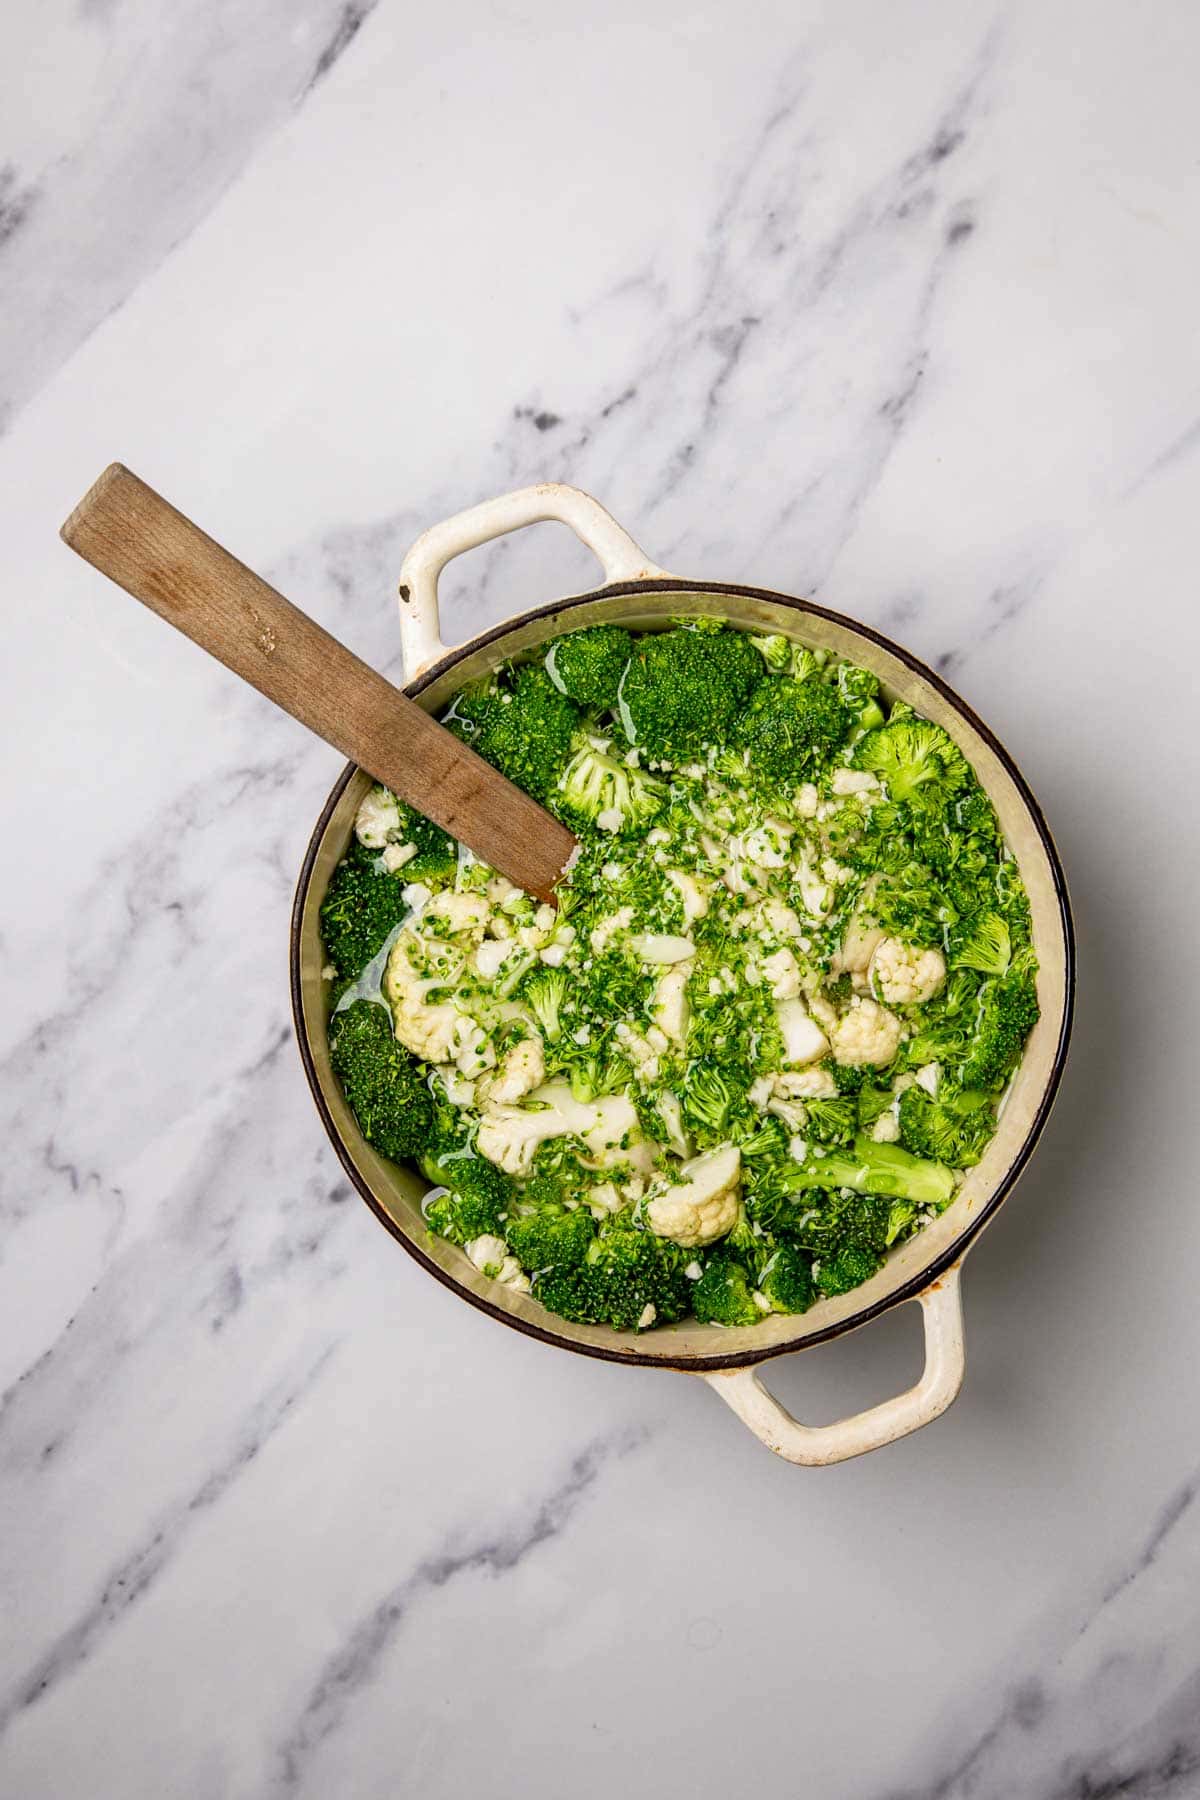
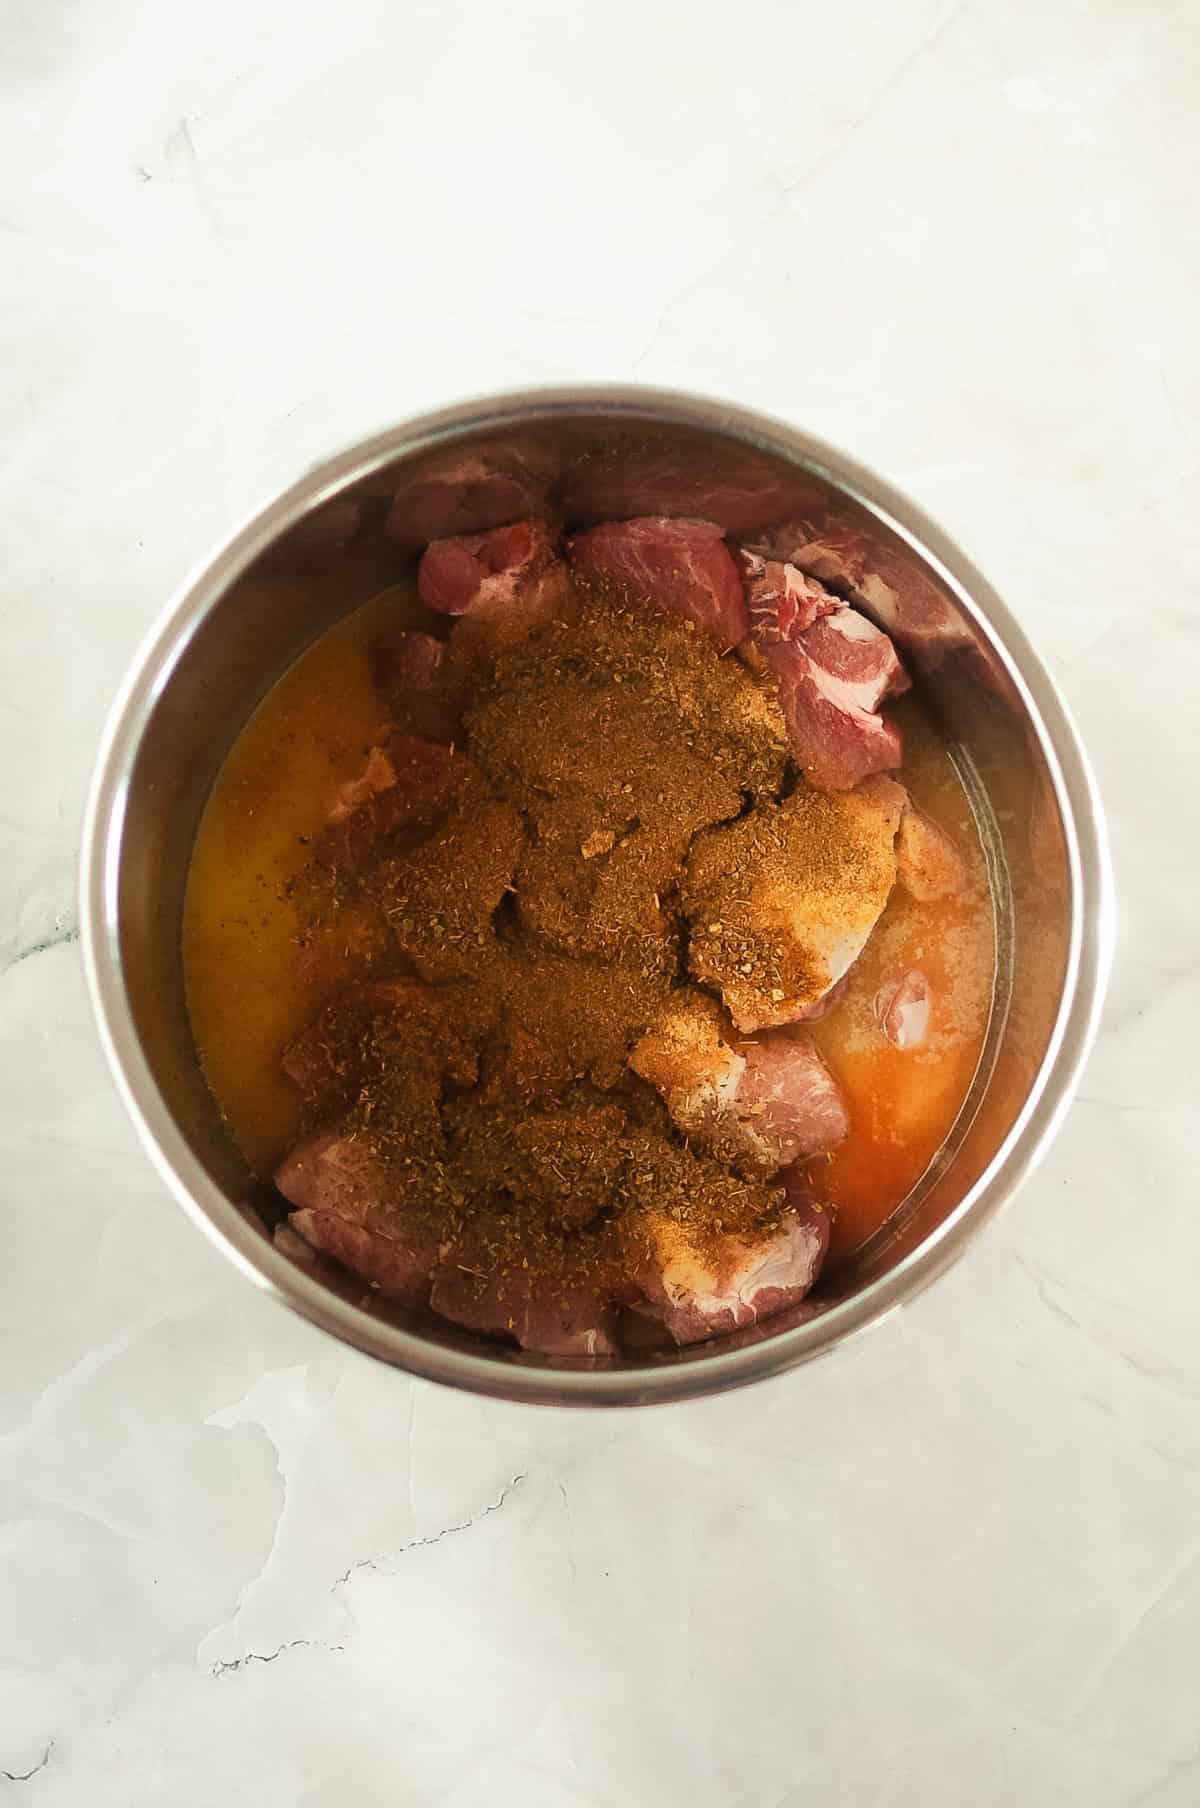
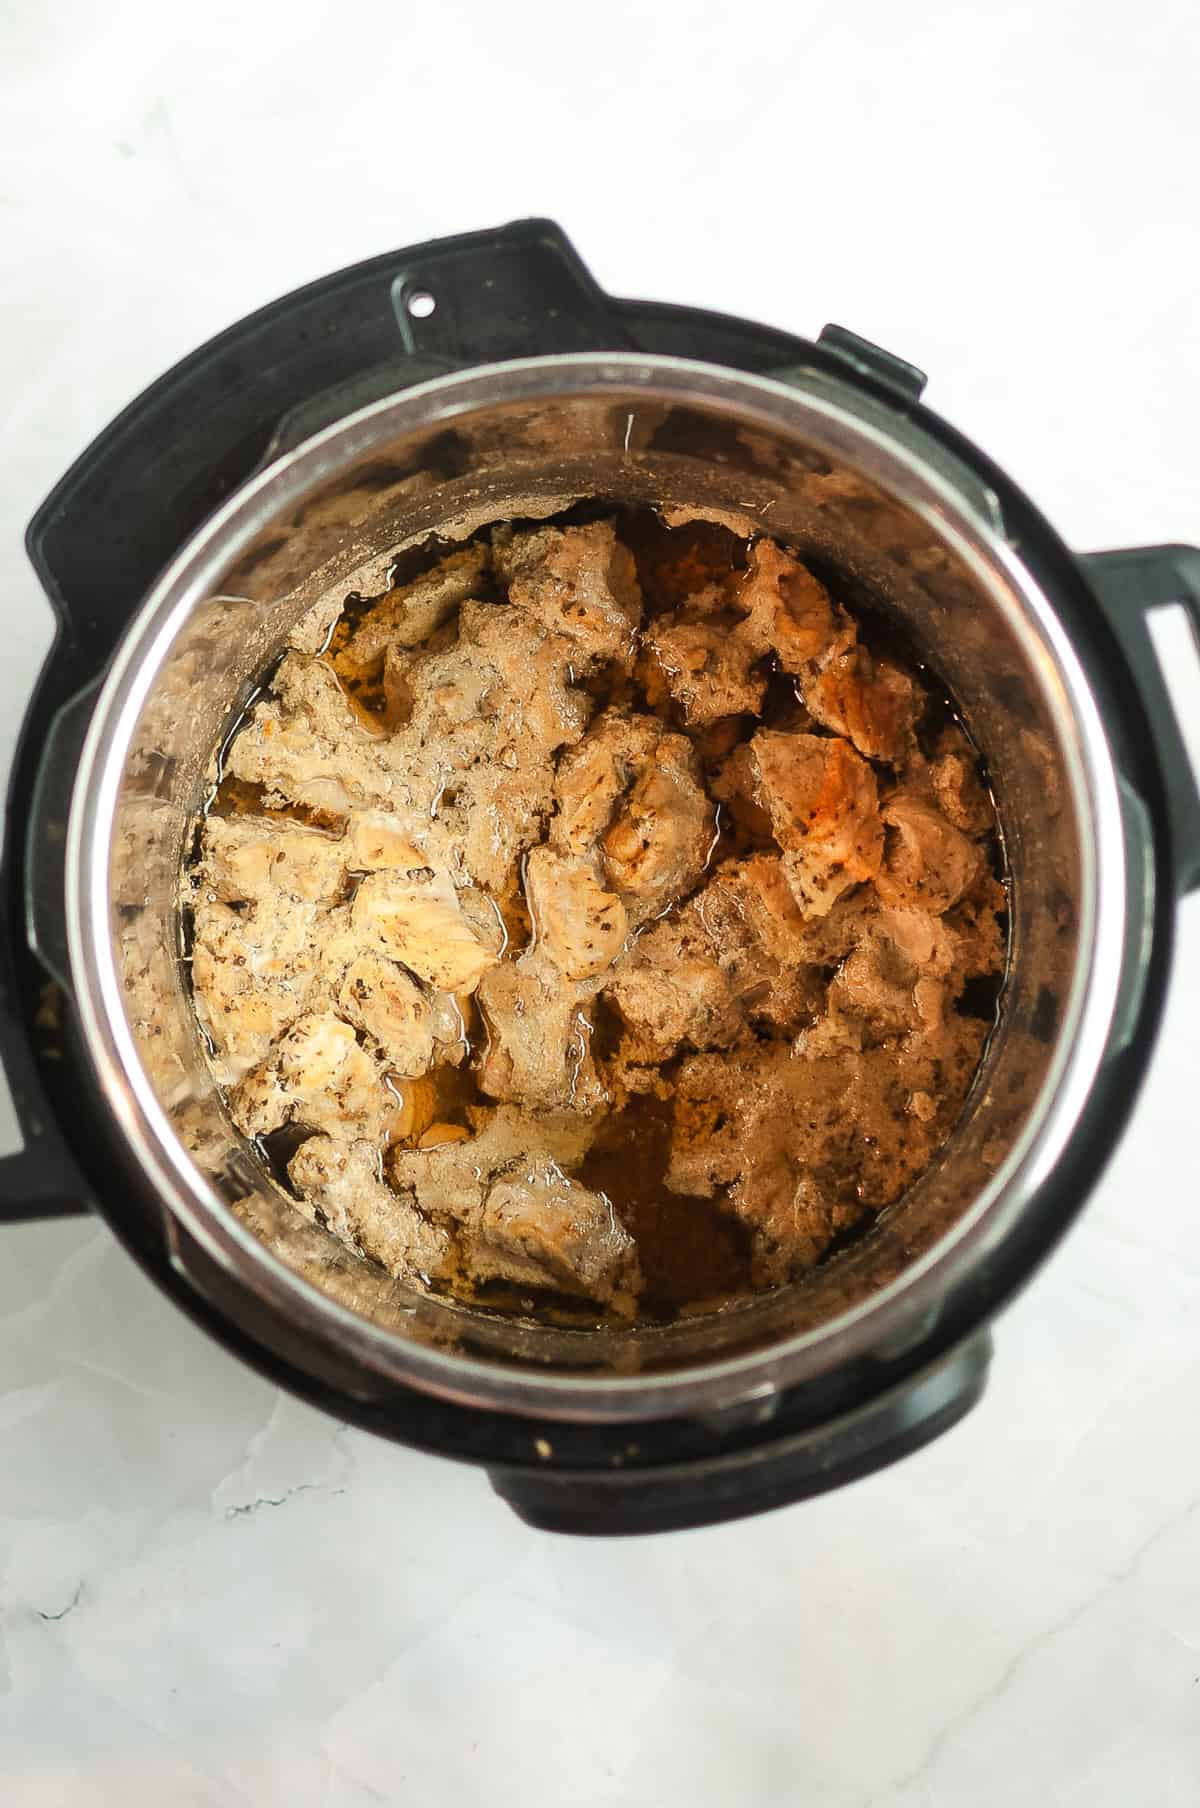
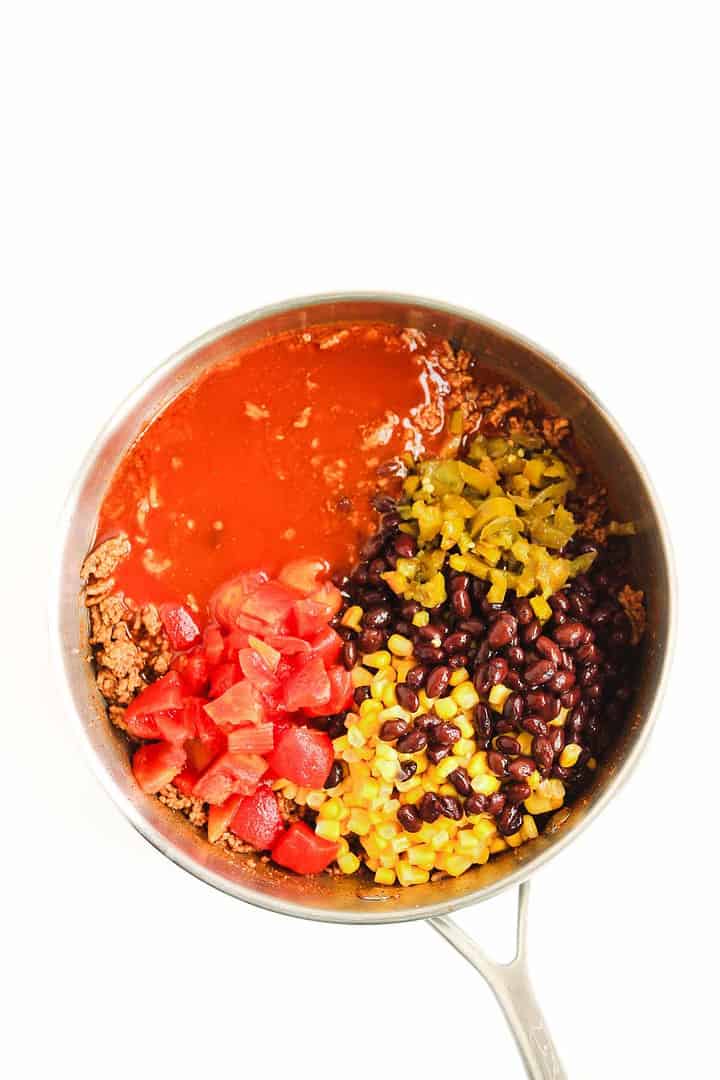
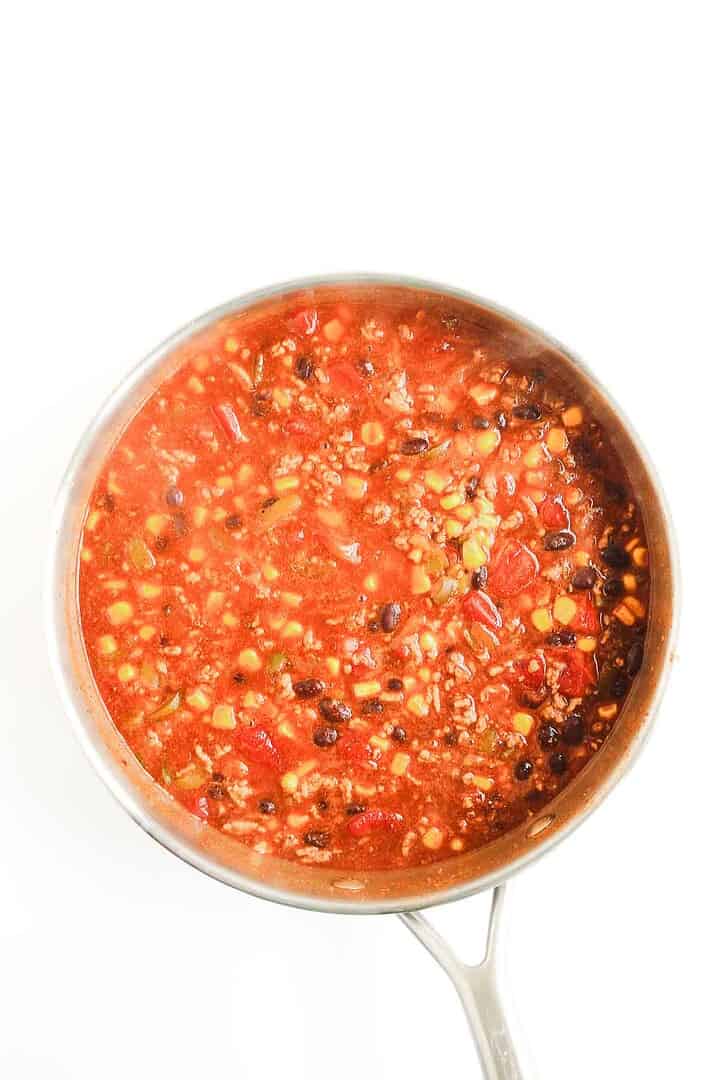
Bring a large pot of salted water to a boil. Add the broccoli and cauliflower florets and cook for about 5 minutes, just until they begin to soften.

Drain the vegetables well in a colander and let them sit for a minute so excess water drains away. This helps prevent the casserole from becoming watery.

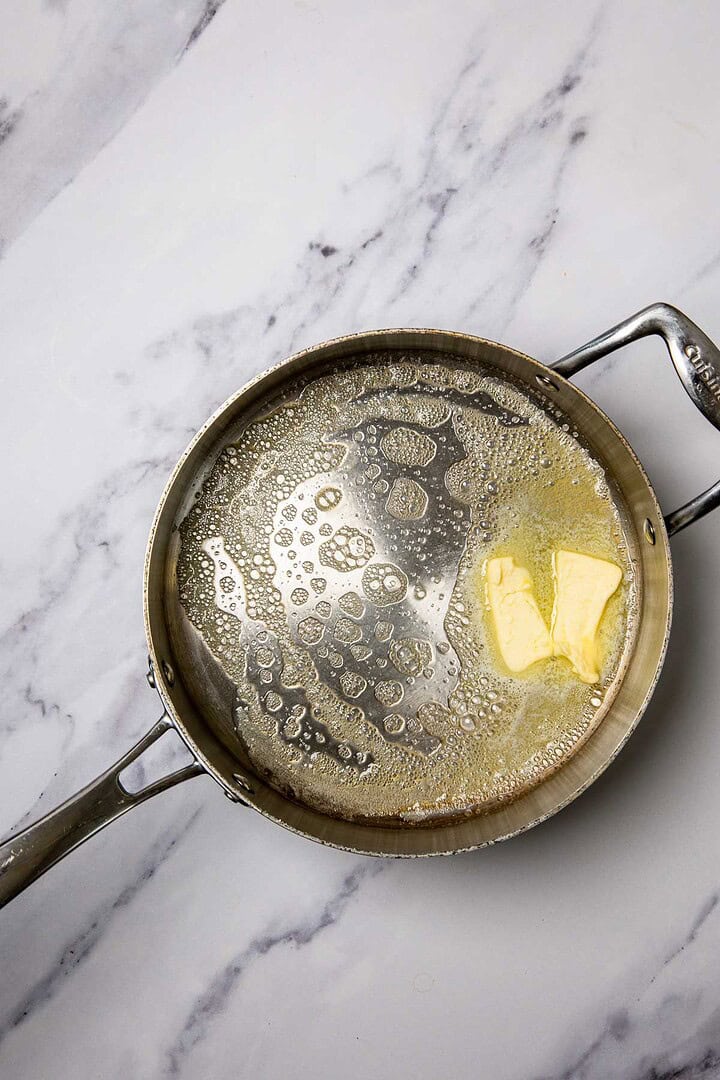
Make the Cheese Sauce

A metal skillet with melting butter on a marble countertop, perfect for starting a delicious cheese casserole with broccoli and cauliflower.
In a medium saucepan, melt the butter over medium heat. Once melted, whisk in the flour and cook for about 1 minute, stirring constantly. This forms the roux that thickens the sauce.
A hand whisking milk with yellow specks for a Cheese Casserole in a stainless steel pan on a marble countertop.
Slowly pour in the milk while whisking continuously to prevent lumps. Continue cooking and whisking for about 3 minutes, until the sauce thickens and becomes smooth.
A hand adds shredded cheese to a creamy sauce in a pan with a whisk on a marble countertop, ready to create a cheesy Broccoli and Cauliflower Casserole.
Remove the saucepan from the heat. Stir in 1½ cups of shredded cheddar cheese, along with the salt and black pepper.
A hand whisking creamy sauce in a stainless steel pan on a marble countertop, preparing the base for a delicious cauliflower and broccoli cheese casserole.
Continue stirring until the cheese melts completely and the sauce is smooth.

Assemble the Casserole
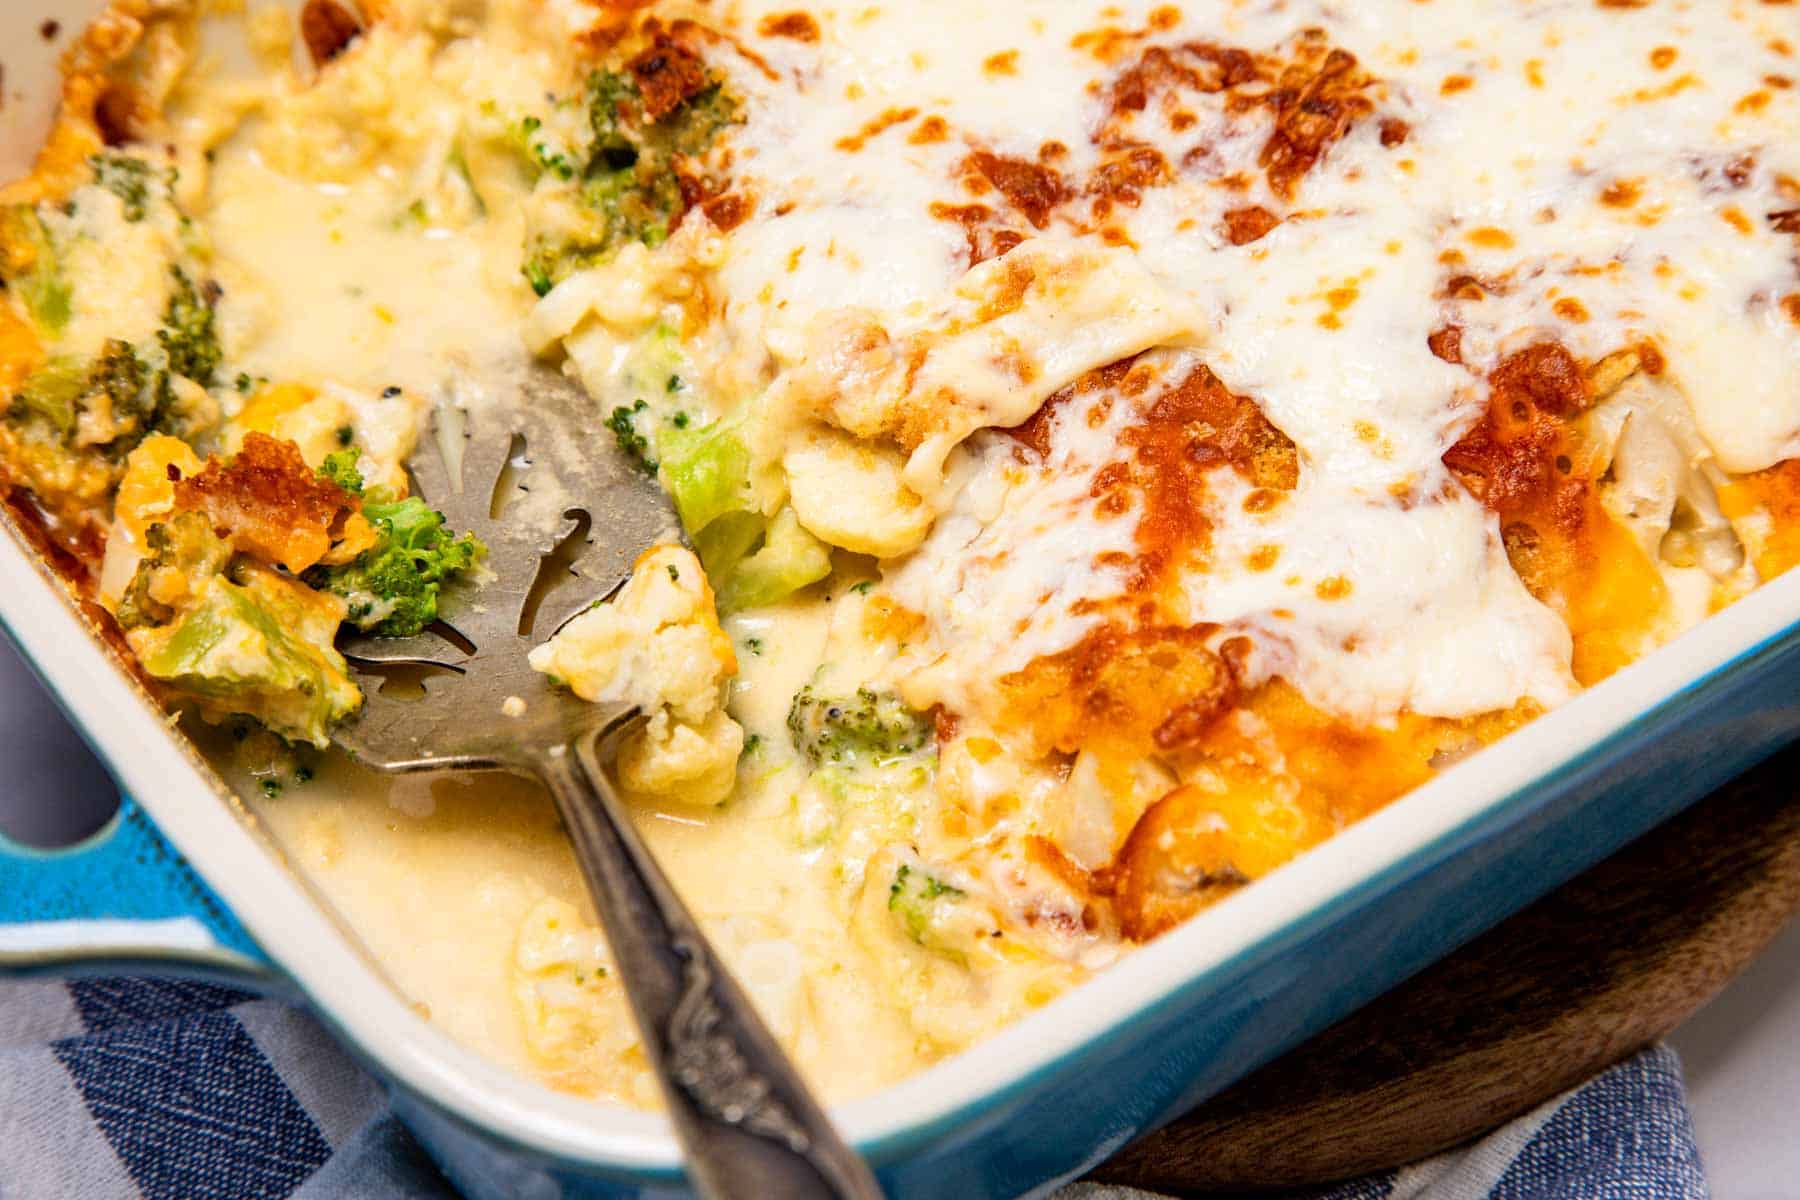
Casserole dish filled with steamed broccoli and cauliflower florets, perfect for a healthy cheese casserole, sits on a marble countertop.
Place the drained broccoli and cauliflower evenly into the prepared baking dish.
Broccoli and cauliflower florets in a baking dish topped with creamy cheese sauce, this Cheese Casserole is ready to be baked.
Pour the cheese sauce over the vegetables, spreading it gently so everything is coated.
Cheese casserole dish filled with broccoli and shredded cheese sits on a marble countertop.
Sprinkle the remaining ½ cup of cheddar cheese evenly over the top. Finish by sprinkling the breadcrumbs across the surface to create a light, crisp topping.

Bake and Serve

Baked lasagna in a blue Staub dish with melted cheese and golden brown spots on top, reminiscent of a classic cheese casserole.

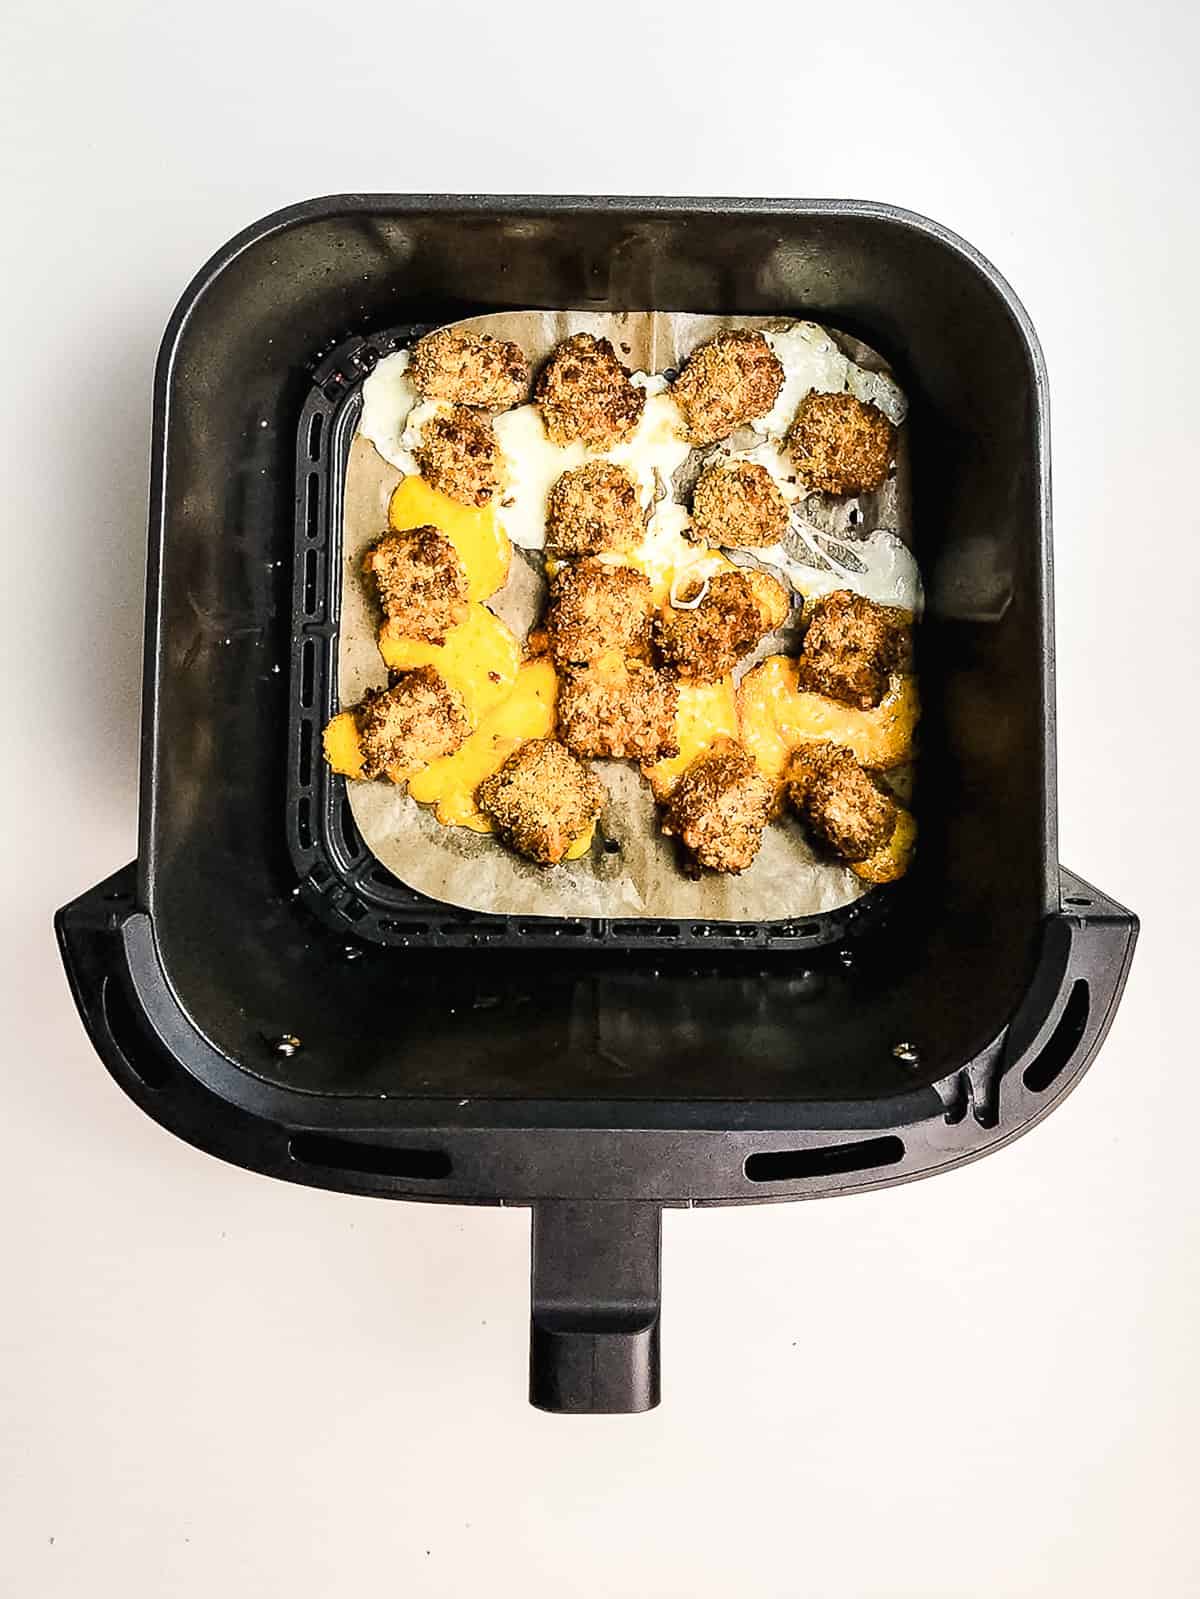
Place the dish in the oven and bake for 20 to 25 minutes, until the casserole is hot and bubbly and the top is golden.

A cheesy baked Cheese Casserole loaded with broccoli and cauliflower, served in a dish with two portions plated on a marble table, utensils nearby.

Remove from the oven and let it sit for a few minutes before serving. This helps the sauce settle and makes the casserole easier to scoop.

Storage

A spoon lifts a cheesy, baked cheese casserole with cauliflower and broccoli from a blue dish, with melted cheese stretching.

Let the casserole cool to room temperature before storing. Transfer leftovers to an airtight container or cover the baking dish tightly with foil or plastic wrap and refrigerate for up to 3–4 days.

To reheat, place portions in the microwave until heated through, or warm the casserole in a 350°F oven for about 10–15 minutes. If it looks dry, add a small splash of milk before reheating to help bring back the creamy texture.

Recipe

Tried and loved this recipe? Please leave a 5-star review below! Your reviews mean a lot to me, so if you've got any questions, please let me know in a comment.

A serving of cheesy broccoli and cauliflower casserole, made from a classic cheese casserole recipe, sits on a white plate with a fork.
Print Recipe
No ratings yet

Broccoli Cauliflower Cheese Casserole

Creamy broccoli cauliflower cheese casserole with tender vegetables, rich cheddar sauce, and a golden breadcrumb topping baked until hot and bubbly. 
Prep Time15 minutes mins
Cook Time25 minutes mins
Total Time40 minutes mins
Course: Main
Cuisine: American
Keyword: broccoli cauliflower cheese casserole
Servings: 6 servings
Calories: 266kcal
Author: Ksenia Prints

Ingredients

  • 3 cups fresh broccoli florets
  • 3 cups fresh cauliflower florets
  • 2 tablespoons butter
  • 2 tablespoons all-purpose flour
  • 1 ½ cups milk
  • 2 cups shredded cheddar cheese divided
  • ½ teaspoon salt
  • ¼ teaspoon black pepper
  • ½ cup breadcrumbs

Instructions

  • Preheat oven to 375°F. Grease a 9×13-inch baking dish.
  • Boil broccoli and cauliflower in salted water for 5 minutes until tender. Drain well.
  • Melt butter in saucepan over medium heat. Whisk in flour and cook 1 minute. Slowly add milk, whisking constantly. Cook until thickened, about 3 minutes.
  • Remove from heat. Stir in 1 ½ cups cheese, salt, and pepper until melted.
  • Place vegetables in baking dish. Pour cheese sauce over top. Sprinkle with remaining cheese and breadcrumbs.
  • Bake 20-25 minutes until bubbly and golden on top.

Video

Notes


Nutrition

Calories: 266kcal | Carbohydrates: 18g | Protein: 15g | Fat: 16g | Saturated Fat: 9g | Polyunsaturated Fat: 1g | Monounsaturated Fat: 3g | Cholesterol: 46mg | Sodium: 565mg | Potassium: 442mg | Fiber: 3g | Sugar: 6g | Vitamin A: 768IU | Vitamin C: 65mg | Calcium: 397mg | Iron: 1mg

Instant Pot Carnitas

Instant Pot carnitas made with tender pork shoulder, citrus, and spices, then broiled until crispy on the edges for juicy, flavorful tacos or bowls.

A taco with flavorful Instant Pot Carnitas, topped with onions and cilantro on a tortilla, served on a white plate.

I have plenty of Mexican friends in my community, and I started being included in Cinco de Mayo festivities a few years back. My family would be invited as guests, and I instantly fell in love with the culture, the food, and how everyone came together to celebrate. So I started learning recipes, tweaked a bit to make them easier, to contribute instead of just showing up empty-handed.

This Instant Pot carnitas is the perfect introduction for Cinco de Mayo recipes because it's incredibly flavorful but so much simpler than traditional methods.

The pork shoulder makes these carnitas so tender because it has enough fat to stay juicy during pressure cooking. I cut it into cubes, toss it with orange juice, lime juice, and spices, then let the Instant Pot do all the work for 30 minutes. The citrus doesn't just add flavor, it actually helps tenderize the meat and gives the carnitas that slightly bright taste that keeps them from feeling too heavy.

What I love about this recipe is how the cumin and oregano create that classic carnitas flavor without me having to measure out a bunch of different spices. After the pork pressure cooks and becomes fall-apart tender, I spread it on a baking sheet and broil it for a few minutes so the edges get crispy while the inside stays juicy. That's the step that really makes these taste authentic.

My Mexican friends were impressed when I brought these to a get together, and honestly, that meant everything to me. The instant pot makes it so much faster than slow-cooking all day, and drizzling some of the cooking juices over the crisped pork before serving adds extra flavor that makes everyone go back for seconds. These carnitas have become my go-to contribution for Cinco de Mayo, and I love how something that seemed intimidating at first turned into one of the easiest and most rewarding recipes I make.

Ingredients

Raw pork chunks in a tray, four spice jars, a cup of vinegar, and a jug of orange juice on a marble surface—perfect for making flavorful Carnitas in your Instant Pot.

Pork shoulder (sometimes labeled pork butt) makes these instant pot carnitas so tender because it has enough fat and connective tissue to stay juicy during pressure cooking. Leaner cuts like pork loin dry out and won't shred as easily. Cutting the pork into cubes helps it cook more evenly and lets the seasoning and citrus coat every piece.

Orange juice and lime juice do more than add flavor. The citrus helps tenderize the meat while it cooks and gives carnitas that slightly bright, balanced taste that keeps the pork from feeling too heavy. Fresh juice works best, but bottled orange juice works too if that's what you have.

Cumin and oregano give carnitas their classic savory flavor, while garlic powder and onion powder add depth without extra prep work. Using dried spices keeps the recipe quick and consistent, which is perfect for pressure cooking.

Oil helps keep the pork moist during cooking and contributes to that rich texture carnitas are known for. After pressure cooking, briefly broil the meat to crisp the edges while keeping the inside tender. This creates perfect carnitas for tacos, bowls, or burritos.

See the recipe card for exact quantities.

How to Make Instant Pot Carnitas?

Hand holding a taco filled with tender Instant Pot carnitas and chopped cilantro over a white plate.

Instant pot carnitas cook quickly under pressure, then finish under the broiler so the edges get lightly crisp while the inside stays tender. Most of the work happens in the instant pot, with a short step at the end for texture.

Add the Ingredients

Raw meat and spices in a metal pot with liquid, placed on a light-colored marble surface, ready to be cooked as Instant Pot Carnitas.

Place the cubed pork shoulder into the inner pot of your instant pot. Pour in the oil, orange juice, and lime juice.

Add the onion powder, garlic powder, oregano, and cumin. Stir everything together until the liquid and seasonings evenly coat the pork.

Pressure Cook the Carnitas

Place the lid on the instant pot and lock it into place. Make sure the pressure valve is set to sealed.

Set the instant pot to high pressure and cook for 30 minutes. Once the cooking time is finished, allow the pressure to release naturally. This usually takes about 20 minutes and helps keep the pork tender.

Prepare for Crisping

An Instant Pot filled with tender, browned carnitas and savory juices on a light countertop.

While the instant pot is naturally releasing, turn your oven broiler on so it is ready when the meat finishes cooking.

Once the pressure has fully released, carefully remove the lid. Transfer the cooked pork pieces to a baking sheet, spreading them out in an even layer.

Broil the Carnitas

Shredded cooked chicken, prepared in the Instant Pot, is spread evenly on a rectangular baking tray over a white marble surface.

Place the baking sheet under the broiler for a few minutes until the edges of the pork begin to brown and crisp. Keep a close eye on it so it does not burn.

Add Extra Flavor

For extra flavor, use a spoon or turkey baster to drizzle some of the cooking juices from the instant pot over the pork while it sits on the baking sheet.

You can also return the crisped pork to the instant pot and mix it with the remaining juices if you prefer a more saucy texture.

Serve

A tortilla topped with savory Instant Pot Carnitas, chopped onions, and cilantro on a white plate beside fresh cilantro—a delicious twist on the classic Carnitas recipe.

Serve the carnitas as they are, or use them for tacos, burritos, or bowls. Top with freshly diced onions and chopped cilantro if desired.

Storage

Corn tortilla topped with tender Instant Pot carnitas, onions, and cilantro on a plate, with herbs and seasoning nearby.

Allow the carnitas to cool to room temperature before storing. Transfer the pork along with some of the cooking juices to an airtight container and refrigerate for up to 4 days. Keeping a little of the juice with the meat helps prevent it from drying out.

This recipe works well made ahead. You can cook the carnitas in the Instant Pot, store the meat and juices in the refrigerator, and then crisp the pork under the broiler right before serving. The meat often tastes even better the next day because it has time to absorb more flavor.

To reheat, warm the carnitas in a skillet over medium heat with a splash of the cooking juices or broth. For crispy edges again, spread the reheated pork on a baking sheet and broil for a few minutes before serving.

Top Tips for Instant Pot Carnitas

Cut the pork into even cubes: Keeping the pork pieces roughly the same size helps them cook evenly in the Instant Pot and makes them easier to shred or crisp under the broiler.

Don’t skip the broiling step: Pressure cooking makes the pork very tender, but the quick broil at the end creates the classic carnitas texture with crispy edges and juicy centers.

Use some of the cooking juices: Spoon a little of the Instant Pot juices over the pork before or after broiling. This adds extra flavor and keeps the meat from drying out.

Recipe

Tried and loved this recipe? Please leave a 5-star review below! Your reviews mean a lot to me, so if you've got any questions, please let me know in a comment.

A tortilla topped with tender Carnitas, chopped onion, and cilantro on a white plate.
Print Recipe
No ratings yet

Instant Pot Carnitas

Instant Pot carnitas made with tender pork shoulder, citrus, and spices, then broiled until crispy on the edges for juicy, flavorful tacos or bowls.
Prep Time5 minutes mins
Cook Time55 minutes mins
Total Time1 hour hr
Course: Main
Cuisine: Mexican
Keyword: instant pot carnitas
Servings: 6 servings
Calories: 292kcal
Author: Ksenia Prints

Ingredients

  • 1.5 lbs pork shoulder or butt cubed
  • ½ cup Oil
  • 1 cup Orange juice
  • ½ Lime juice
  • 1 teaspoon Onion powder
  • 1 teaspoon garlic powder
  • ½ tablespoon Oregano
  • ½ tablespoon Cumin

Instructions

  • Add all of your ingredients to the inner pot of your instant pot. Mix well to combine.
  • Place the lid on your instant pot and close to secure. Move the valve to close.
  • Cook your Carnitas on high pressure for 30 minutes. When the time finishes continue to allow your instant pot to naturally release. This should take you about 20 minutes.
  • While you are waiting for your instant pot to naturally release, turn on your broiler.
  • Once your instant pot has released, transfer your Carnita meat to a baking sheet.
  • Put your Carnitas in the oven under the broiler for a couple minutes until your Carnita meat starts to brown and crisp up.
  • You can leave your meat on the baking sheet and, using a turkey baster, transfer some of the juices from the instant pot onto the Carnitas. Or you can transfer your Carnita meat back to the instant pot and serve in the juices.
  • Eat as is or as a Carnita taco. Top with freshly diced onions and fresh cilantro! Enjoy.

Notes


Nutrition

Calories: 292kcal | Carbohydrates: 6g | Protein: 14g | Fat: 24g | Saturated Fat: 3g | Polyunsaturated Fat: 6g | Monounsaturated Fat: 14g | Trans Fat: 0.1g | Cholesterol: 46mg | Sodium: 55mg | Potassium: 345mg | Fiber: 0.4g | Sugar: 4g | Vitamin A: 102IU | Vitamin C: 22mg | Calcium: 28mg | Iron: 1mg

Slow Cooker 4-Ingredient Enchilada Meatball Recipe

Our favorite midweek slow cooker enchilada meatballs are made with just 4 ingredients, giving you tender meatballs simmered in a rich sauce and finished with melted cheese for flavor.

A bowl of saucy Enchilada Meatball garnished with herbs, served with shredded cheese and a fork on a napkin—an easy 4 ingredient recipe perfect for your slow cooker.

I love slow-cooker recipes that are basically dump-and-go, but one with only 4 ingredients? That's music to the ears of a busy parent on a weeknight. This slow cooker enchilada meatball recipe is just that: frozen meatballs, taco seasoning, enchilada sauce, and shredded cheese. That's it.

It was inspired by my recent trip to Austin, Texas, where I got to taste the variety of Tex Mex cuisine. And let me tell, those enchiladas! There's just something about the sweet and smoky and sour flavor of the sauce, the combination with the melted cheese, and the fact my kids just LOVE it that makes enchiladas irresistible.

After coming back and looking in the freezer, I knew I had to take our favorite Tex-Mex enchiladas and make them into meatballs. We take frozen meatballs that are already cooked and tightly formed, so they hold their shape during slow cooking instead of crumbling apart as raw meat would. Fresh meatballs need extra prep time and tend to break down more because they're softer and haven't been pre-cooked to set their structure. When I tried using fresh homemade meatballs once, they started falling apart after a couple hours and turned the sauce cloudy, with loose meat bits floating around instead of staying intact.

Making these over and over again, I did learn some tips to improve the process. The enchilada sauce needs to be stirred directly with the taco seasoning before pouring it over the meatballs, or the seasoning just sits on top in dry clumps instead of mixing evenly throughout. Cooking on low for the full 4 hours lets the sauce thicken and cling to the meatballs rather than stay thin and watery, which happens if you rush it on high. The cheese has to go on at the very end with the heat turned off because adding it too early makes it separate and turn grainy instead of melting into that soft, stretchy layer. 

My family loves these meatballs served over rice for dinner, but they also work perfectly as an appetizer with toothpicks for game days or parties. This recipe has reminded me countless of times that a good, homemade meal doesn't have to be lengthy and tiring. Honestly, I'm not sure I can go back to recipes with long ingredient lists after remembering how good 4 ingredients can be.

Ingredients

Overhead view of a bowl of 4 ingredient enchilada meatballs, with bowls of sauce, shredded cheese, and a spice mix on a white surface.

Frozen homestyle meatballs are really the reason this works so well in a slow cooker. They hold their shape, stay tender, and soak up the sauce without falling apart. I've tried swapping in fresh meatballs before, and while they work, they tend to break down more and need extra prep time. A good-quality frozen option keeps things simple and consistent.

Enchilada sauce and taco seasoning do most of the heavy lifting for flavor. Mixing the two creates a thicker, well-seasoned coating that clings to the meatballs as they cook. If you prefer a milder version, you can use mild enchilada sauce or cut back slightly on the seasoning packet.

Shredded fiesta cheese goes on right at the end and melts into a soft, slightly stretchy layer over the meatballs. It adds just enough richness without making the dish heavy. A Mexican blend or even cheddar works just as well, but pre-shredded blends tend to melt more evenly for this kind of quick finish.

See the recipe card for exact quantities.

Top Tips for Slow Cooker Enchilada Meatball

Prep the slow cooker for easier cleanup: Lightly spray the inside with non-stick cooking spray before adding the meatballs. This helps prevent sticking and makes washing up much quicker.

Use high heat if you’re short on time: Cooking on HIGH for about 3 hours works well if you need a faster option. The meatballs will still heat through and absorb the sauce.

Switch up how you serve it: Serve with toothpicks for an easy appetizer, or spoon the meatballs and sauce over rice to turn it into a more filling meal.

How to Make Slow Cooker Enchilada Meatballs?

Tender 4 ingredient enchilada meatballs coated in a rich sauce and topped with shredded cheese, served in a dark dish. Perfect for the slow cooker!.

This recipe comes together with very little effort, and the slow cooker does most of the work. You’ll just coat the meatballs in sauce, let them cook, and finish with a layer of melted cheese.

Prep the meatballs and sauce

A white bowl with red sauce, topped with a heap of yellow powdered seasoning, holds savory Enchilada Meatball goodness—an easy 4 ingredient meal on a white marble surface.

Start by adding the frozen meatballs straight into your slow cooker. There’s no need to thaw them first. Spread them out so they cook evenly.

In a separate bowl, stir together the taco seasoning and enchilada sauce until smooth. Pour the sauce over the meatballs, then gently stir to coat everything well. Make sure all the meatballs are covered so they can absorb the flavor as they cook.

Slow cook until heated through

Slow Cooker Enchilada Meatballs—this 4 ingredient recipe features meatballs cooked in a slow cooker, with some covered in rich red enchilada sauce and others served plain for variety.

Cover the slow cooker with the lid and cook on low for about 4 hours. Give the meatballs a stir once or twice during cooking to keep the sauce evenly distributed and prevent any sticking along the edges.

You’ll know they’re ready when the meatballs are heated through and the sauce has thickened slightly.

Add cheese and finish

Slow Cooker filled with BBQ meatballs covered in shredded cheddar cheese—this 4 ingredient enchilada meatball recipe is perfect for easy, flavorful gatherings.

Once cooking is done, sprinkle the shredded cheese evenly over the top. Put the lid back on and let it sit for about 5 minutes, just until the cheese melts.

A bowl of saucy Enchilada Meatball garnished with herbs, beside shredded cheese and a fork on a napkin—an easy 4 Ingredient Recipe perfect for your slow cooker.

Serve right away while everything is hot and coated in sauce.

Storage

A bowl of 4 ingredient enchilada meatballs glazed to perfection and garnished with herbs, next to a small dish of shredded cheese on a woven placemat.

Store any leftovers in an airtight container in the fridge for up to 2–3 days. Reheat in the microwave in short intervals, stirring in between, or warm them in a saucepan over low heat until heated through.

Recipe

Tried and loved this recipe? Please leave a 5-star review below! Your reviews mean a lot to me, so if you've got any questions, please let me know in a comment.

A bowl filled with saucy meatballs, garnished with herbs, on a table with drinks and condiments in the background.
Print Recipe
5 from 1 vote

Slow Cooker Enchilada Meatballs

Slow cooker enchilada meatballs made with just 4 ingredients, tender meatballs simmered in a rich sauce and finished with melted cheese.
Prep Time5 minutes mins
Cook Time4 hours hrs
Total Time4 hours hrs 5 minutes mins
Course: Main
Cuisine: Mexican
Keyword: slow cooker enchilada meatballs
Servings: 6 servings
Calories: 532kcal
Author: Ksenia Prints

Ingredients

  • 32 oz bag of frozen homestyle meatballs
  • 1 packet of taco seasoning
  • 10 oz can of red enchilada sauce
  • 1 ½ cups of shredded fiesta cheese

Instructions

  • Add the entire bag of meatballs to an 8 quart slow cooker. To a medium bowl add the taco seasoning and enchilada sauce and stir. Pour over the meatballs and stir until the balls are completely coated.
  • Cook on low for 4 hours stirring every so often. Once done cooking, sprinkle the cheese all over top and place the lid on for 5 minutes until the cheese is melted.
  • Serve and enjoy!

Notes

 
  • Mix sauce & seasoning first to avoid dry clumps
  • Cook on low for 4 hours so sauce thickens and coats meatballs (high heat leaves it watery)
  • Add cheese at the end with heat off to prevent separation and graininess; ensures soft, stretchy textu
  • Mix sauce & seasoning first to avoid dry clumps.
  • Cook on low for 4 hours so sauce thickens and coats meatballs (high heat leaves it watery).
  • Add cheese at the end with heat off to prevent separation and graininess; ensures soft, stretchy texture.


Nutrition

Calories: 532kcal | Carbohydrates: 5g | Protein: 33g | Fat: 42g | Saturated Fat: 17g | Polyunsaturated Fat: 3g | Monounsaturated Fat: 16g | Cholesterol: 137mg | Sodium: 693mg | Potassium: 456mg | Fiber: 1g | Sugar: 3g | Vitamin A: 624IU | Vitamin C: 2mg | Calcium: 221mg | Iron: 2mg

Slow Cooker Tex Mex Pulled Pork 

This slow cooker Tex-Mex pulled pork is made with tender pork shoulder, bold spices, and a rich citrusy sauce, making it perfect for easy sandwiches.

Two slow cooker Tex Mex pulled pork sandwiches with coleslaw and tomatoes on a board, served with fresh limes and tomatoes on the side.

My husband is a big fan of pulled pork sandwiches. Actually, he's a big fan of pork everything, which is where we differ greatly. But out of love, I try to switch up the flavor every time I make pulled pork.

I know he'll eat any pulled pork sandwich I make, but I want to make things different and surprise him each time, so he doesn't get bored with the same old barbecue flavor on repeat. Keeping it fresh, you know?

After visiting Austin, Texas for the first time, I couldn't stop imagining Tex-Mex flavors. The pickled jalapenos, the pico, the refried beans, and sweet and smoky flavors captivated me.

That's how this slow-cooker Tex-Mex pulled pork came to be. It has become one of my favorite go-to variations because the pork shoulder stays so tender and juicy after hours in the slow cooker. The spice rub with chili powder, smoked paprika, cumin, garlic powder, and brown sugar creates this balance of savory, slightly smoky, and lightly sweet notes that's different from other pulled pork recipes we've tried. Pressing the rub into the meat helps it form a flavorful crust, especially if I take the extra step to sear the pork before slow cooking.

I go back to this version, despite loving my BBQ pulled pork recipe, because the onion, bell pepper, and garlic soften as they cook and add depth to the sauce. The combination of broth and light beer (Modelo or Corona preferred!) keeps the pork moist, while adding extra flavor that you just don't get from other liquids. The lime juice squeezed in at the end cuts through the richness perfectly, and topping the sandwiches with coleslaw, diced tomato, and cilantro makes them feel fresh and balanced instead of heavy.

My husband always gets excited when he sees me pulling out the slow cooker and sees pork shoulder on the kitchen counter. He loves how the pork shreds easily, and how every version I make tastes different and even better than the last. Though he does make fun of me for never making the same thing twice exactly the same way! This pulled pork sandwich has definitely become a favorite in our rotation, and I love that I can make him happy with minimal effort, while still keeping him on his toes about what flavor he's getting next.

Ingredients

Raw pork, sliced onions, chopped red bell peppers, garlic, beer, apple cider vinegar, spices, and lime—perfect for making slow cooker Tex Mex pulled pork.

Pork shoulder (also called pork butt) is well-marbled, which means it stays tender and juicy after hours in the slow cooker. Leaner cuts won't shred as easily and can turn dry, so pork shoulder is the best choice for that soft, pull-apart texture.

Salt, pepper, chili powder, smoked paprika, cumin, garlic powder, and brown sugar create the spice rub that builds the flavor from the start. This mix gives you savory, slightly smoky, and lightly sweet notes. Pressing the rub into the meat helps it form a flavorful crust, especially if you sear the pork first.

The other key ingredient here is the light beer, ideally Corona or Modelo, which keep the pork moist while adding extra flavor. If you don't want to use beer, you can replace it with more broth, though the beer adds subtle richness.

For assembling the sandwiches, I like to pair it with Coleslaw, diced tomato, and cilantro are fresh toppings that add freshness and texture when serving the pork on sandwich buns.

See the recipe card for exact quantities.

Top Tips for Slow Cooker Tex Mex Pulled Pork 

Sear for better flavor: While optional, searing the pork before slow cooking adds a deeper, richer flavor and helps create a better texture in the final dish.

Remove the bone after cooking: If using a bone-in pork shoulder, it will slide out easily once the pork is done. Remove it before shredding for easier serving.

Simmer the sauce for a thicker finish: If you want a thicker, more concentrated sauce, let the juices cook uncovered on HIGH for 15–20 minutes before adding the lime juice and mixing everything together.

Adjust the heat level: For a spicier version, add a pinch of cayenne or toss in a chopped jalapeño with the vegetables at the start of cooking.

How to Make Slow Cooker Tex Mex Pulled Pork?

Two slow cooker Tex Mex pulled pork sandwiches with slaw on a board, garnished with lime halves and cherry tomatoes.

This slow cooker Tex-Mex pulled pork builds flavor in layers, starting with a simple spice rub and finishing with tender, shredded meat soaked in a rich, savory sauce. Most of the work is hands-off, with the slow cooker doing the heavy lifting.

Make the Spice Rub

A glass bowl with various ground spices and seasonings on a light marble surface, perfect for preparing slow cooker Tex Mex pulled pork.
A glass bowl with a seasoned raw pork roast coated in dry rub, ready to become flavorful slow cooker Tex Mex pulled pork, sits on a light marble surface.

In a small bowl, combine the salt, black pepper, chili powder, smoked paprika, cumin, garlic powder, and brown sugar.

Mix until everything is evenly blended. This spice mix will coat the pork and create the base flavor for the entire dish.

Season the Pork

Place the pork shoulder on a large plate or cutting board. Sprinkle the spice rub over the meat and press it in firmly, making sure all sides are well coated.

Take a moment to really work the seasoning into the surface so it sticks and forms a flavorful crust as it cooks.

Sear the Pork (Optional but Recommended)

A seasoned piece of meat, reminiscent of slow cooker Tex Mex pulled pork, cooking in a black cast iron skillet on a light marble surface.

Heat a little oil in a large skillet over medium-high heat. Once hot, add the pork and sear it on all sides for about 2 to 3 minutes per side, until browned.

This step adds extra flavor and helps seal in the juices, but you can skip it if you’re short on time.

Prepare the Slow Cooker Base

Sliced onions, red bell peppers, and minced garlic in a black slow cooker—perfect for starting your slow cooker Tex Mex pulled pork—on a marble surface.
A seasoned slow cooker Tex Mex pulled pork roast rests on a bed of sliced onions and red bell peppers in a black slow cooker.

Add the sliced onion, bell pepper, and minced garlic to the bottom of the slow cooker. Spread them out evenly to create a base layer.

Place the seared pork on top of the vegetables.

Add the Cooking Liquid

Pour the broth and beer into the slow cooker, pouring it around the pork rather than directly on top. This helps keep the spice rub in place.

Cook the Pork

A flavorful slow cooker Tex Mex pulled pork with vegetables and savory broth, served in a black slow cooker on a marble countertop.

Cover the slow cooker with the lid and cook on low for 8 to 9 hours or high for 4 to 5 hours.

The pork is ready when it is very tender and easily pulls apart with a fork.

Shred and Combine

Slow cooker Tex Mex pulled pork, shredded and ready to serve with a golden fork on a white oval plate, set on a light-colored surface.
Slow cooker Tex Mex pulled pork and savory sauce in a black slow cooker on a light-colored countertop.

Carefully remove the pork from the slow cooker and place it on a cutting board or large plate.

Use two forks to shred the meat into bite-sized pieces. Return the shredded pork to the slow cooker and stir it into the juices and vegetables.

Add the lime juice and mix well so the flavor is evenly distributed.

Serve

Slow cooker Tex Mex pulled pork sandwich with slaw and tomatoes on a bun, served with lime wedges on a wooden board.

Spoon the pulled pork onto sandwich buns and top with coleslaw, diced tomatoes, and fresh cilantro.

Serve warm, adding extra juices from the slow cooker if you want the meat more saucy.

Storage

Slow cooker Tex Mex pulled pork sandwiches with lime wedges, tomatoes, and a checkered napkin on a wooden table.

Let the pulled pork cool to room temperature before storing. Transfer it along with some of the cooking juices to an airtight container and refrigerate for up to 3–4 days. Keeping a bit of the liquid helps the meat stay moist when reheated.

You can also prep this ahead of time. Rub the pork with the spices, cover it, and refrigerate overnight. You can even slice the vegetables in advance and store everything in the fridge until you’re ready to start cooking the next day.

Recipe

Tried and loved this recipe? Please leave a 5-star review below! Your reviews mean a lot to me, so if you've got any questions, please let me know in a comment.

Slow cooker Tex Mex pulled pork sandwich topped with red cabbage slaw and tomatoes on a bun, served with lime wedges on the side.
Print Recipe
No ratings yet

Slow Cooker Tex Mex Pulled Pork 

Slow cooker Tex Mex pulled pork made with tender pork shoulder, bold spices, and a rich citrus-kissed sauce, perfect for easy sandwiches.
Prep Time15 minutes mins
Cook Time8 hours hrs
Total Time8 hours hrs 15 minutes mins
Course: Main
Cuisine: Mexican
Servings: 8 servings
Calories: 141kcal
Author: Ksenia Prints

Ingredients

  • 2.2 lbs 1 kg pork shoulder or pork butt (trimmed of excess fat)
  • 2 teaspoons kosher salt
  • 1 teaspoon ground black pepper
  • 1 tablespoon chili powder
  • 1 teaspoon smoked paprika
  • 1 teaspoon ground cumin
  • 1 teaspoon garlic powder
  • 1 tablespoon light brown sugar
  • 1 medium yellow onion thinly sliced
  • 1 red bell pepper thinly sliced
  • 3 cloves garlic minced
  • ½ cup low-sodium beef or chicken broth
  • ½ cup light beer or substitute with more broth
  • Juice of 1 lime
  • Sandwich buns
  • Classic coleslaw
  • Diced tomato
  • Chopped fresh cilantro

Instructions

  • In a small bowl, mix together the salt, pepper, chili powder, smoked paprika, cumin, garlic powder, and brown sugar.
  • Rub the seasoning all over the pork shoulder, pressing it in to coat all sides.
  • Heat a little oil in a large skillet over medium-high heat and sear the pork on all sides until golden brown, about 2–3 minutes per side.
  • Add the sliced onion, bell pepper, and garlic to the bottom of the slow cooker, then place the pork on top.
  • Pour the broth and beer around the pork, avoiding the top so the seasoning stays in place.
  • Cover and cook on LOW for 8–9 hours or HIGH for 4–5 hours, until the pork is tender and shreds easily.
  • Remove the pork, shred with two forks, then return it to the slow cooker. Stir in the lime juice and mix with the juices and vegetables.
  • Serve on sandwich buns topped with coleslaw, diced tomato, and cilantro.

Notes


Nutrition

Calories: 141kcal | Carbohydrates: 6g | Protein: 16g | Fat: 6g | Saturated Fat: 2g | Polyunsaturated Fat: 1g | Monounsaturated Fat: 3g | Cholesterol: 51mg | Sodium: 713mg | Potassium: 361mg | Fiber: 1g | Sugar: 3g | Vitamin A: 895IU | Vitamin C: 21mg | Calcium: 27mg | Iron: 2mg

Slow Cooker Birria Meatballs

Slow cooker birria meatballs simmered in a rich, spiced sauce with chipotle and beef stock, finished with fresh toppings for bold flavor.

A bowl of spicy falafel, reminiscent of slow cooker meatballs, garnished with lime, jalapeño slices, red onion, and fresh parsley.

Birria is one of those foods that are so good but so lengthy to make, so I only make it once in a while because of how much work it takes. But thanks to slow cookers, I'm able to have one of my favorite Mexican dishes even on a weeknight. This slow-cooker birria meatballs recipe skips all the complicated steps without settling for an unsatisfying version.

Frozen meatballs work better here than fresh homemade ones because they've already been cooked and formed tightly, which means they hold their shape during hours of slow cooking instead of falling apart into crumbles. When I tried using fresh meatballs once, thinking they'd taste better, they broke down completely by the time the sauce was done, and I ended up with something closer to meat sauce than actual meatballs.

The birria seasoning needs to be whisked into liquid first, or it clumps up in spots instead of distributing evenly through the sauce, leaving some meatballs bland and others overly spiced. Cooking on low for the full 6 hours gives the meatballs time to absorb the sauce deeply instead of just sitting in it, which is what creates that rich, soaked-through flavor. Rushing it on high for less time means the outside gets saucy, but the inside stays plain.

The little hands-on time it requires won me over instantly. I whisk the sauce ingredients together in a bowl, pour it over the meatballs and chopped onion in the slow cooker, and let everything cook on low for 6 hours or high for 4 hours. The onion softens and melts into the sauce while the meatballs soak up all those flavors. And when it's done, the house smells so good, and I haven't had to do anything else all day.

The fresh toppings really make this feel authentic. Red onion, fresh cilantro, lime juice, and jalapeños bring freshness and crunch that contrast perfectly with the rich, saucy meatballs. I serve these over rice, in tortillas for easy birria tacos, or just on their own with extra sauce spooned over the top. This recipe has completely changed how often I can enjoy birria at home.

Want to try another birria recipe? Try my slow cooker birria tacos!

Ingredients

Bowls of Birria Meatballs, chopped onions, tomato paste, sauce, broth, yellow sauce, and seasoning on a marble surface. Perfect for making flavorful meatballs in your slow cooker.

Frozen meatballs make this recipe quick to assemble without sacrificing flavor. They hold up well during slow cooking and absorb the rich birria-style sauce as they simmer. If you prefer, you can use homemade meatballs, but frozen ones are a reliable shortcut that still turn out tender.

Birria seasoning and chipotle in adobo liquid give this dish its signature flavor. The seasoning blend brings in those deep, savory spices typically found in birria. On the other hand, the chipotle liquid adds subtle smoky heat. If you want more spice, you can add a bit more chipotle liquid or even blend in a whole chipotle pepper.

Beef stock and tomato paste create the sauce that coats the meatballs. The stock keeps everything rich and savory, while the tomato paste thickens the sauce and adds depth that balances the spices. Garlic adds aromatic flavor. Onion cooks alongside the meatballs and softens as everything simmers.

Red onion, cilantro, lime, and jalapeños are fresh toppings that bring contrast to the rich meatballs. The onion adds crunch, cilantro adds freshness, and lime juice brightens the whole dish right before serving.

See the recipe card for exact quantities.

How to Make Slow Cooker Birria Meatballs?

A bowl of spicy birria meatballs garnished with sliced jalapeños, lime, and fresh herbs sits on a wooden table.

This slow cooker birria meatballs recipe is simple to set up and builds flavor as it cooks. The sauce comes together quickly, then the slow cooker does the rest, giving you tender meatballs coated in a rich, slightly spicy broth.

Add the Meatballs and Onion

Slow cooker filled with saucy birria meatballs on a white marble countertop.

Place the frozen meatballs directly into the slow cooker. Add the chopped onion over the top, spreading it out so it cooks evenly and softens into the sauce as it simmers.

Make the Birria Sauce

In a small bowl, combine the minced garlic, birria seasoning, beef stock, tomato paste, and chipotle liquid.

Whisk everything together until the tomato paste is fully blended and the sauce is smooth. This helps make sure the flavor is evenly distributed once added to the slow cooker.

Combine Everything

Birria-inspired meatballs in a slow cooker, topped with jalapeño slices, lime wedges, and red onion.

Pour the prepared sauce over the meatballs and onion in the slow cooker.

Gently stir to coat the meatballs evenly with the sauce. Thoroughly combine the ingredients so the meatballs absorb the flavors as they cook.

Cook the Meatballs

Birria-inspired spicy meatballs simmer in a slow cooker, topped with lime slices, jalapeño, red onion, and fresh herbs.

Cover the slow cooker with the lid and cook on low for 6 hours or high for 4 hours.

During this time, the meatballs will heat through and soak up the rich birria-style sauce, while the onion softens and blends into the mixture.

Finish and Garnish

A bowl of spicy falafel garnished with lime, jalapeño slices, and red onion sits alongside herbs and utensils—perfect inspiration for making Birria Meatballs in your slow cooker.

Once cooking is complete, give the meatballs a gentle stir.

Top with diced red onion, chopped cilantro, fresh lime juice, and sliced jalapeños just before serving. These toppings add freshness and balance the richness of the sauce.

Serve

A bowl of spicy birria meatballs garnished with lime slices, jalapeños, and herbs rests on a patterned napkin. Perfect for preparing in a slow cooker for rich, bold flavor.

Serve the birria meatballs on their own, over rice, or in tortillas for easy tacos. Spoon extra sauce over the top for more flavor in every bite.

Storage

A bowl of spicy falafel garnished with lime slices, red onion, and jalapeño peppers sits on a patterned cloth—perfect alongside slow cooker birria meatballs for a flavorful spread.

Let the meatballs cool to room temperature before storing. Transfer them along with the sauce to an airtight container and refrigerate for up to 3 days.

To reheat, warm in a skillet over medium heat or in a saucepan, adding a splash of beef stock if needed to loosen the sauce. You can also reheat individual portions in the microwave.

These meatballs also freeze well. Store in a freezer-safe container for up to 2 months, then thaw in the refrigerator overnight before reheating.

Top Tips for Slow Cooker Birria Meatballs

Use homemade meatballs if you prefer: If using homemade, brown them lightly in a pan first so they hold their shape and add extra flavor before going into the slow cooker.

Don’t skip the sauce mix step: Whisking the sauce separately helps the tomato paste fully dissolve and keeps the flavor evenly distributed throughout the dish.

Add fresh toppings right before serving: The red onion, cilantro, lime, and jalapeños bring freshness and balance, so adding them at the end makes a big difference in the final flavor.

Recipe

Tried and loved this recipe? Please leave a 5-star review below! Your reviews mean a lot to me, so if you've got any questions, please let me know in a comment.

A bowl of spicy meatballs, inspired by birria flavors, garnished with lime slices, jalapeños, red onion, and fresh herbs.
Print Recipe
No ratings yet

Slow Cooker Birria Meatballs

Slow cooker birria meatballs simmered in a rich, spiced sauce with chipotle and beef stock, finished with fresh toppings for bold flavor.
Prep Time5 minutes mins
Cook Time4 hours hrs
Total Time4 hours hrs 5 minutes mins
Course: Main
Cuisine: Mexican
Keyword: slow cooker birria meatballs
Servings: 6 servings
Calories: 621kcal
Author: Ksenia Prints

Ingredients

  • 48 oz frozen meatballs
  • 1 small onion chopped
  • 3 cloves garlic minced
  • 1 1 oz packet birria seasoning
  • 1 cup beef stock
  • ¼ cup tomato paste
  • 2 tablespoons liquid from chipotle in adobo
  • Red onion cilantro, lime, and jalapeños (for topping)

Instructions

  • Add meatballs and onion to your slow cooker.
  • In a small bowl, whisk together garlic, birria seasoning, beef stock, tomato paste, and chipotle liquid.
  • Stir to combine.
  • Cover and cook on low for 6 hours or on high for 4 hours.
  • Garnish with red onion, cilantro, lime, and jalapeños.
  • Serve and enjoy!
  • Tips & Tricks
  • Store leftovers in an airtight container in the refrigerator for up to 3 days.
  • You can use homemade meatballs; just brown them slightly first.
  • Serve as an appetizer or as a main dish over rice.

Notes


Nutrition

Calories: 621kcal | Carbohydrates: 5g | Protein: 40g | Fat: 48g | Saturated Fat: 18g | Polyunsaturated Fat: 4g | Monounsaturated Fat: 21g | Cholesterol: 163mg | Sodium: 307mg | Potassium: 868mg | Fiber: 1g | Sugar: 2g | Vitamin A: 198IU | Vitamin C: 6mg | Calcium: 46mg | Iron: 3mg

Instant Pot Raspberry Lemon Cheesecake Recipe

Instant Pot raspberry lemon cheesecake with creamy filling, fresh raspberry swirl, and tangy lemon topping. Easy, rich, and impressive.

A slice of Raspberry Lemon Cheesecake topped with raspberries sits on a plate, accompanied by a glass of milk and more fresh berries—an irresistible treat you can easily make with this Instant Pot recipe.

Cheesecakes are one of my favorite kinds of cakes, and when I started making mine at home, I barely order them outside anymore. It may sound intimidating, but the result is rewarding every time, and honestly, my kids even prefer this over the cafe I always order cheesecakes from.

The cream cheese has to be fully softened to room temperature or it won't blend smoothly and you end up with lumps in the filling that don't go away no matter how long you mix.

When I tried making this once with cream cheese straight from the fridge because I was impatient, the filling had these grainy bits throughout that ruined the smooth texture cheesecake is supposed to have. The crust needs to be pressed firmly and evenly into the pan or it bakes up with loose spots that crumble apart when you try to slice the cheesecake. Chilling the crust before adding the filling helps it set so it doesn't mix with the cream cheese layer and create a soggy bottom. The cheesecake has to cool completely at room temperature before going in the fridge or the sudden temperature change causes cracks across the top. I learned this when I put a warm cheesecake straight in the fridge once and it cracked in three places, completely ruining the presentation.

This cheesecake is so good because of how the lemon juice and lemon zest work together. The juice adds brightness, while the zest contributes a stronger, more concentrated lemon note that makes the whole thing taste fresh and vibrant. The fresh raspberries blended with sugar create this smooth swirl mixture that spreads easily and gives way stronger flavor than whole berries would.

The lemon topping cooked separately until thickened and finished with butter creates this smooth, glossy layer that makes the whole cheesecake feel so luxurious. My kids love the fresh raspberries on top, and after making this a few times and seeing how excited they get, I realized I don't need to order cheesecake from cafes anymore. This tastes better, costs less, and the Instant Pot makes it so much easier than I ever thought making cheesecake at home could be.

Ingredients

Baking ingredients on a wooden table: eggs, sugar, lemon, raspberries, cream cheese, juice, and zest—everything you need for a delicious Raspberry Lemon Cheesecake recipe. Perfect for making in your Instant Pot!.

Graham cracker crumbs mixed with melted butter and brown sugar create the crust. The brown sugar adds a slightly deeper flavor than white sugar alone. Pressing it firmly into the pan and chilling it first keeps it from falling apart once the filling is added.

Softened cream cheese is essential for a smooth filling. If it's too cold, it won't blend properly and can leave small lumps. Lemon juice and lemon zest give the cheesecake its flavor. The juice adds brightness, while the zest brings a stronger, more concentrated lemon note. Using only one or the other makes the flavor feel flat or too mild.

Flour mixed into the filling helps it set properly, especially with the pressure cooking method. It gives the cheesecake a more stable texture without making it dense. Sour cream adds slight tang and helps keep the filling soft after cooking. Eggs bind everything together.

Fresh raspberries blended with granulated sugar create a smooth swirl mixture that spreads easily and gives stronger flavor than whole berries.

For the lemon topping, eggs, sugar, lemon zest, and lemon juice are cooked together until thickened, then finished with butter for a smoother consistency. Fresh raspberries on top add texture and a brighter finish right before serving.

See the recipe card for exact quantities.

How to Make Raspberry Lemon Cheesecake?

A slice of Raspberry Lemon Cheesecake with raspberries on a plate, next to stacked dishes, forks, and a checkered towel—perfect for trying your favorite Instant Pot recipe.

This cheesecake is perfect for spring. It's made in layers, starting with the crust, then the filling and swirl, and finished with a lemon topping after it cools. 

Prepare the pan

Cut a circle of parchment paper to fit the bottom of a 7-inch springform pan. This helps the cheesecake release cleanly after chilling.

Make the crust

Glass bowl of graham cracker crumbs with a spoon, next to melted butter and brown sugar on a wooden table—the perfect start for your Instant Pot Raspberry Lemon Cheesecake recipe.
A wooden spoon holds a scoop of crumbly graham cracker mixture above a bowl, ready to become the delicious base for this Raspberry Lemon Cheesecake Instant Pot recipe.

In a bowl, mix the graham cracker crumbs, melted butter, and sugar until the mixture looks like wet sand.

Crushed graham cracker crust pressed into a round cake pan on a wooden surface, ready for a delicious Raspberry Lemon Cheesecake Instant Pot recipe.

Press it firmly into the bottom and slightly up the sides of the pan, making sure it’s even and compact. Place the crust in the freezer while you prepare the filling so it sets and holds its shape.

Make the cheesecake filling

Thick, creamy white mixture being whisked in a bowl—perfect for starting a Raspberry Lemon Cheesecake recipe or preparing an Instant Pot dessert.

In a large bowl, beat the softened cream cheese until smooth and fluffy. This step helps avoid lumps.

Add the sugar, flour, lemon zest, lemon juice, and sour cream. Mix until fully combined and smooth.

A whisk mixing a raw egg and creamy white batter in a clear bowl, preparing the base for a delicious Raspberry Lemon Cheesecake recipe.

Add the eggs one at a time, mixing after each addition just until incorporated. Avoid overmixing at this stage to keep the texture smooth.

Add the raspberry swirl

A glass bowl of fresh raspberries and a small dish of sugar on a rustic wooden surface, perfect for topping your favorite Raspberry Lemon Cheesecake recipe.
A glass of bright red raspberry smoothie on a wooden surface with scattered raspberries around it, perfect for pairing with a Raspberry Lemon Cheesecake recipe or your next Instant Pot creation.

In a food processor, blend the raspberries and sugar until smooth.

A Raspberry Lemon Cheesecake in a pan with a red and white swirled pattern on top, sitting on a rustic wooden surface—perfect for trying as your next Instant Pot recipe.

Drop spoonfuls of the raspberry mixture over the cheesecake filling. Use a butter knife to gently swirl it through the batter, keeping the pattern light so the layers don’t fully mix together.

Prepare for pressure cooking

A foil-covered pan sits on a wooden surface in front of an Instant Pot, ready for a delicious Raspberry Lemon Cheesecake recipe.

Cover the pan tightly with foil and poke a small hole in the center to allow steam to escape.

Pour 1 cup of water into the Instant Pot. Place the cheesecake on the trivet and carefully lower it into the pot.

Cook the cheesecake

Seal the lid and cook on high pressure for 55 minutes.

When the time is up, allow the pressure to release naturally. After that, release any remaining pressure, then carefully remove the cheesecake from the pot. Take off the foil and let it cool on a wire rack.

Make the lemon topping

A saucepan with eggs and sugar sits next to bowls of raspberries and butter on a wooden table, perfect for preparing a Raspberry Lemon Cheesecake recipe.

Lightly beat the eggs in a bowl.

In a saucepan, combine the eggs, sugar, lemon zest, and lemon juice. Cook over medium-low heat, stirring constantly, until the mixture becomes smooth and slightly thick.

Lower the heat and continue cooking until it thickens enough to coat the back of a spoon. Remove from heat and stir in the butter until fully melted and smooth. Let the topping cool.

Assemble and chill

A delicious Raspberry Lemon Cheesecake is topped with yellow lemon curd using a black spatula, next to a bowl of raspberries—a tempting scene for any recipe lover.

Once the cheesecake has cooled, spread the lemon topping evenly over the surface.

A slice of Raspberry Lemon Cheesecake with yellow topping and raspberries is lifted from the cake; an Instant Pot sits in the background, hinting at the easy recipe behind this delicious dessert.

Top with fresh raspberries, then refrigerate until fully chilled before slicing. This step helps the cheesecake set and makes it easier to cut clean slices.

Storage

A slice of Raspberry Lemon Cheesecake topped with lemon curd and fresh raspberries on a white plate—try this irresistible cheesecake recipe for your next dessert craving.

Store the cheesecake in the fridge, covered or in an airtight container, for up to 4–5 days. Keep it chilled until ready to serve so it holds its shape and texture.

For longer storage, you can freeze individual slices or the whole cheesecake. Wrap tightly and freeze for up to 2–3 months. Thaw overnight in the fridge before serving.

Top Tips for Instant Pot Raspberry Lemon Cheesecake

Use room temperature ingredients: Softened cream cheese and room temperature eggs mix more smoothly and help prevent lumps in the filling.

Don’t overmix after adding eggs: Mix just until combined to keep the texture smooth and avoid too much air, which can affect how the cheesecake sets.

Let it cool fully before chilling: Cooling at room temperature first helps prevent condensation and keeps the topping from separating once it’s refrigerated.

Recipe

Tried and loved this recipe? Please leave a 5-star review below! Your reviews mean a lot to me, so if you've got any questions, please let me know in a comment.

A slice of Raspberry Lemon Cheesecake with yellow topping and fresh raspberries on a white plate—perfect for trying a new recipe.
Print Recipe
No ratings yet

Instant Pot Raspberry Lemon Cheesecake 

Instant Pot raspberry lemon cheesecake with creamy filling, fresh raspberry swirl, and tangy lemon topping. Easy, rich, and impressive.
Prep Time30 minutes mins
Cook Time55 minutes mins
Chill Time6 hours hrs
Total Time7 hours hrs 25 minutes mins
Course: cake, Dessert, Snack
Cuisine: American
Keyword: instant pot raspberry lemon cheesecake
Servings: 8 servings
Calories: 846kcal
Author: Ksenia Prints

Ingredients

Crust

  • 1¾ cup graham cracker crumbs
  • 12 tablespoon butter melted
  • 2 tablespoon brown sugar

Swirl

  • 1 cup fresh raspberries washed and dried with paper towel
  • 1½ tablespoon granulated sugar

Cheesecake Filling

  • 24 oz cream cheese softened
  • 1 cup granulated sugar
  • 3 tablespoon flour
  • ⅓ cup lemon juice
  • 1 tablespoon lemon zest
  • 1 cup sour cream
  • 3 large eggs

Lemon Topping

  • 3 large eggs
  • ⅔ cup granulated sugar
  • 1 tablespoon lemon zest
  • ⅓ cup lemon juice
  • 4 tablespoon butter
  • 1 cup fresh raspberries

Instructions

Cheesecake Crust

  • Cut a circle of parchment paper to fit the bottom of a 7-inch springform pan.
  • In a bowl, mix the graham cracker crumbs, butter, and sugar until the mixture resembles wet sand. Press firmly into the bottom and up the sides of the pan.
  • Place the crust in the freezer while preparing the filling.

Cheesecake Filling

  • In a large bowl, beat the cream cheese until fluffy. Add the sugar, flour, lemon zest, lemon juice, and sour cream, and mix until smooth.
  • Add the eggs one at a time, mixing after each addition until fully incorporated. Pour the filling into the prepared crust.
  • In a food processor, blend the raspberries and sugar until smooth. Drop spoonfuls over the cheesecake and use a butter knife to gently swirl.
  • Cover the pan tightly with foil and poke a small hole in the center to allow steam to escape.
  • Pour 1 cup of water into the Instant Pot. Place the cheesecake on the trivet and lower it into the pot.
  • Seal and cook on high pressure for 55 minutes. Allow the pressure to release naturally, then release any remaining pressure. Remove the cheesecake, take off the foil, and let it cool on a wire rack.

Lemon Topping

  • Lightly beat the eggs to combine.
  • In a saucepan, combine the eggs, sugar, lemon zest, and lemon juice. Cook over medium-low heat, stirring constantly, until the mixture becomes creamy. Reduce the heat to low and continue cooking until thickened enough to coat the back of a spoon.
  • Remove from heat and stir in the butter until fully blended. Let the topping cool.

Finish

  • Spread the cooled lemon topping over the cooled cheesecake. Arrange fresh raspberries on top.
  • Chill thoroughly before slicing. Store leftovers in the refrigerator.

Notes


Nutrition

Calories: 846kcal | Carbohydrates: 75g | Protein: 13g | Fat: 58g | Saturated Fat: 32g | Polyunsaturated Fat: 3g | Monounsaturated Fat: 15g | Trans Fat: 1g | Cholesterol: 272mg | Sodium: 589mg | Potassium: 318mg | Fiber: 3g | Sugar: 58g | Vitamin A: 2049IU | Vitamin C: 18mg | Calcium: 172mg | Iron: 2mg

Slow Cooker Matzo Ball Soup Recipe

Slow cooker matzo ball soup with tender chicken, soft matzo balls, and vegetables in a rich broth, a comforting classic made easy.

A bowl of chicken and dumplings soup with three dumplings, on a striped cloth and wooden board—reminiscent of a classic matzo ball soup recipe.

Matzo ball soup is a staple soup recipe in my home growing up. My mom would prepare it during Passovers, and my sister and I would fight over the last matzo ball all the time. On nights when it was colder than usual, or when one of us had a cold or was just feeling sickly, this would be ready in the kitchen right away. The perfect comfort food, a beloved tradition that I've brought to my own family now.

The chicken has to cook directly in the broth, or you lose that deep flavor that makes this soup taste right. Cooking the chicken separately and adding it later results in a bland broth that tastes watery rather than rich and savory. When I tried using pre-cooked rotisserie chicken once to save time, the broth came out thin and missing that full-bodied chicken flavor I remember from my mom's version, and it just wasn't the same.

The vegetables need the full slow-cooker time to break down and sweeten, which creates that classic foundation. Cutting them too small makes them disintegrate into mush. But cutting them too large leaves them hard in the center, even after hours of cooking. The matzo meal mixture absolutely has to chill for at least 30 minutes before you roll it into balls, or the dough is too sticky and soft to shape properly. Without chilling, the balls fall apart when you drop them into the soup instead of holding together and puffing up the way they should.

What I love about using the slow cooker is how hands-off it is. I can add everything in the morning, let it cook all day, then make the matzo balls while the soup finishes.

My kids now argue over the last matzo ball just like my sister and I used to, and honestly, it makes me so happy to see this tradition continuing. The soup tastes like home, like being taken care of when you're not feeling well, and like those Passover dinners where the whole family gathered around the table. Bringing this recipe to my own family feels like passing down something important, and I love that the slow cooker makes it accessible enough to make any time we need that comfort.

For my other favorite Passover recipes, check my matzo lasagna with cottage cheese and Mexican matzo brei chilaquiles.

Ingredients

Raw chicken, chopped onions, carrots, celery, eggs, broth, oil, breadcrumbs, garlic, and seasonings on a white surface—perfect ingredients to start your favorite Matzo Ball Soup recipe.

Chicken breasts gently cook in the broth and become tender enough to shred. While you can use rotisserie chicken for convenience, cooking the chicken directly in the slow cooker lets it flavor the broth as it cooks, giving the soup a deeper, more traditional taste.

Onion, celery, and carrots create the classic foundation for this soup. These vegetables slowly soften and release their flavor into the broth over several hours. Cutting them into even pieces helps them cook at the same rate and keeps the texture consistent.

Chicken stock and water keep the broth balanced. Using only stock can make the soup too heavy or salty, while adding water helps mellow it out while still keeping a rich flavor. 

For the matzo balls, matzo meal, baking powder, eggs, vegetable oil, and water combine to create the dough. Fresh parsley garnishes the finished soup.

See the recipe card for exact quantities.

How to Make Slow Cooker Matzo Ball Soup?

A bowl of chicken and dumplings soup with three dumplings, served on a striped napkin—a comforting recipe reminiscent of classic Matzo Ball Soup.

This slow cooker matzo ball soup comes together with very little hands-on time. The broth simmers gently while the matzo balls are prepared separately, then everything finishes together for a classic, comforting bowl.

Add Ingredients to the Slow Cooker

Slow cooker filled with raw chicken, chopped onions, and celery in broth—perfect for a comforting Recipe inspired by Matzo Ball Soup, with a measuring cup of dry quinoa nearby.

Place the chicken breasts, diced onion, chopped celery, chopped carrots, and minced garlic into the slow cooker. Sprinkle in the salt and pepper.

Pour in the chicken stock and water, then add the bay leaf. Give everything a light stir to combine.

Cook the Soup Base

Cover the slow cooker with the lid and cook on low for 6 hours or high for 4 hours, until the chicken is fully cooked and the vegetables are tender.

Prepare the Matzo Ball Mixture

A mixing bowl with eggs, flour, sugar, and other baking ingredients on a white countertop—perfect for prepping a new recipe or adding to your favorite Matzo Ball Soup tradition.
While the soup is cooking, make the matzo balls. In a mixing bowl, combine the matzo meal, baking powder, salt, pepper, water, vegetable oil, and eggs.
Yellow grainy batter in a stainless steel mixing bowl on a white marble surface, ready to be transformed into matzo balls for a classic Matzo Ball Soup recipe.
Mix until everything is well combined. The mixture will be thick.

Cover the bowl and refrigerate for at least 30 minutes. This step helps the mixture firm up so it’s easier to shape.

Form the Matzo Balls

Eight unbaked biscuit dough balls on a parchment-lined baking sheet, ready to go in the oven—perfect for pairing with your favorite slow cooker recipe or a warm bowl of matzo ball soup.

Once chilled, take the mixture out of the refrigerator and roll it into small balls using your hands.

Place the formed matzo balls on a plate and keep them refrigerated until the soup is ready.

Shred the Chicken

A comforting recipe for chicken soup with shredded chicken, diced onions, and vegetables in a slow cooker with savory broth—perfect for those who love classic flavors or a twist like matzo ball soup.

When the soup has finished cooking, remove the chicken breasts from the slow cooker. Use two forks to shred the chicken into bite-sized pieces.

Return the shredded chicken back to the slow cooker and stir to combine.

Add the Matzo Balls

Seven matzo balls in broth with chopped onions and herbs simmer in a slow cooker, topped with fresh parsley.

About 30 minutes before serving, gently place the matzo balls into the soup. Try not to overcrowd them so they have space to expand.

Cover the slow cooker again and cook for another 30 minutes, until the matzo balls are cooked through and tender.

Serve

A bowl of chicken and dumplings soup, reminiscent of matzo ball soup, sits on a striped napkin, with wooden utensils and green glasses in the background—a comforting recipe perfect for the slow cooker.

Remove the bay leaf if needed. Ladle the soup into bowls, making sure each serving gets chicken, vegetables, and matzo balls.

Garnish with chopped parsley if desired and serve warm.

Make it Better

Three large matzo balls in chicken soup, garnished with chopped parsley in a white bowl—an inviting Matzo Ball Soup recipe perfect for your slow cooker.

You can easily adjust this soup depending on what you have or how rich you want it. If you prefer a deeper, more flavorful broth, swap the chicken breasts for chicken thighs. For a lighter or vegetarian version, use vegetable stock, skip the chicken, and add more vegetables to keep the soup hearty. When making the matzo balls, using melted schmaltz instead of vegetable oil gives them a more traditional flavor and a slightly richer texture. For garnish, parsley is classic, but fresh dill, thyme, or chives all work well if that’s what you have on hand.

There are also a few simple ways to change things up. Adding extra vegetables like parsnips, turnips, or leeks gives the broth more depth and a slightly more traditional feel. For a brighter finish, stir in a little lemon juice right before serving. If you like a bit of heat, a pinch of cayenne or red pepper flakes can add a subtle kick without overpowering the soup. You can also mix chopped fresh herbs like parsley or dill directly into the matzo ball mixture for added flavor in every bite.

Storage

A bowl of Matzo Ball Soup featuring three matzo balls, chicken, and vegetables sits on a striped napkin and wooden board—perfect for trying a new recipe or making in your slow cooker.

Let the soup cool to room temperature before storing. Transfer it to an airtight container and refrigerate for up to 3 to 4 days. For best results, store the matzo balls separately from the broth if possible, as they will continue to absorb liquid and can become too soft over time. If already combined, just note that the texture will be softer when reheated.

This soup can be frozen without the matzo balls for up to 2 months. Add freshly made matzo balls when reheating for the best texture.

Top Tips for Slow Cooker Matzo Ball Soup Recipe

Chill the matzo ball mixture: Letting the mixture rest in the fridge for at least 30 minutes helps the matzo meal absorb the liquid properly. This leads to softer, lighter matzo balls.

Keep the lid closed: Once the matzo balls are in the slow cooker, avoid opening the lid. Releasing steam can affect how they cook and may keep them from setting properly.

Use a scoop for even sizing: A small cookie scoop makes it easier to portion the matzo balls evenly. This helps them cook at the same rate.

Have extra broth ready: Matzo balls absorb quite a bit of liquid as they cook. So, adding a little extra chicken stock before serving keeps the soup from getting too thick.

Recipe

Tried and loved this recipe? Please leave a 5-star review below! Your reviews mean a lot to me, so if you've got any questions, please let me know in a comment.

A bowl of chicken and dumplings soup with shredded chicken, vegetables, and three large dumplings on top, perfect for a cozy slow cooker recipe.
Print Recipe
No ratings yet

Slow Cooker Matzo Ball Soup 

Slow cooker matzo ball soup with tender chicken, soft matzo balls, and vegetables in a rich broth, a comforting classic made easy.
Prep Time10 minutes mins
Cook Time4 hours hrs
Total Time4 hours hrs 10 minutes mins
Course: Main, Soups
Cuisine: Jewish
Keyword: slow cooker matzo ball soup
Servings: 4 servings
Calories: 1598kcal
Author: Ksenia Prints

Ingredients

  • 1.5 boneless skinless chicken breasts
  • 1 cup diced onion
  • 2 stalks celery chopped
  • 2 carrots chopped
  • 3 cloves garlic minced
  • 1 teaspoon salt
  • ½ teaspoon pepper
  • 4 cups chicken stock
  • 2 cups water
  • 2 cups matzo meal
  • 2 teaspoons baking powder
  • 2 teaspoons salt
  • 1 teaspoon pepper
  • ½ cup water
  • ½ cup vegetable oil
  • 8 eggs beaten

Instructions

  • To your slow cooker add the chicken, onion, celery, carrot, garlic, salt, pepper, chicken stock, water and bay leaf.
  • Cover and cook on low for 6 hours or high for 4 hours.
  • To make the matzo balls in a mixing bowl combine the matzo meal, baking powder, salt, pepper, water, vegetable oil, and eggs.
  • Mix until well combined and refrigerate for at least 30 minutes.
  • Roll the matzo mixture into balls and place back into the refrigerator until your soup is ready.
  • Shred the chicken breasts and add back to the slow cooker.
  • Thirty minutes before serving add the matzo balls to the soup cover and cook for 30 minutes.
  • Garnish with parsley.
  • Serve!

Notes


Nutrition

Calories: 1598kcal | Carbohydrates: 73g | Protein: 209g | Fat: 46g | Saturated Fat: 14g | Polyunsaturated Fat: 6g | Monounsaturated Fat: 18g | Trans Fat: 0.03g | Cholesterol: 853mg | Sodium: 2839mg | Potassium: 3615mg | Fiber: 3g | Sugar: 6g | Vitamin A: 522IU | Vitamin C: 4mg | Calcium: 247mg | Iron: 9mg

Sausage, Egg, and Cheese Breakfast Muffins

Fluffy sausage, egg, and cheese breakfast muffins with sautéed veggies. Easy to prep ahead and perfect for quick weekday mornings.

Savory breakfast muffins with vegetables, herbs, egg and cheese in paper liners, arranged on a woven tray.

It's safe to say that there are mornings where breakfasts can be too much, but there are certain days, holidays, especially Easter, where the morning feels brighter and lighter and you have all the energy to make a large breakfast spread. This Sausage, Egg, and Cheese Breakfast Muffins recipe is one of my kids' favorite breakfasts because they're easy and taste so good.

The sausage has to be cooked and drained (leave a little grease) before mixing it with the eggs or the grease pools in the muffin cups and makes them oily instead of fluffy. When I rushed this once and didn't drain it well enough, the tops came out greasy and the bottoms had puddles of fat that made them unpleasant to eat.

The bell pepper and spinach need to be sautéed first to release their moisture before adding them to the batter or they'll make the muffins too wet and they won't set properly in the oven. Raw vegetables release water as they cook, and that extra liquid prevents the eggs from firming up the way they should. The Bisquick gives structure without needing a separate batter, but overmixing after you add it makes the muffins tough and dense instead of light and tender. Stirring just until combined is enough because the eggs will do the rest of the work.

I love how I can also make this ahead and treat it as a "lazy breakfast" when the day before has been super hectic and I wake up tired in the morning. I can bake these on a Sunday, store them in the fridge for up to 4 days, and my kids can just grab one and reheat it in the microwave for 20–30 seconds on busy school mornings.

These have become a staple for holiday mornings especially when I don't want to stand over the stove making individual servings. My kids love how they can eat them with their hands, and I love how versatile they are. I can swap the cheddar for pepper jack if I want more heat, or use Monterey Jack for something milder. They're one of those recipes that makes breakfast feel effortless even when life has been anything but, truly my go-to on photo and video shoot weekends.

Ingredients

Ingredients on a white surface: eggs, spinach, milk, ground meat for sausage, flour, shredded carrot, red bell pepper, and spices—perfect for making savory Cheese Breakfast Muffins.

Eggs and Bisquick give these muffins structure without needing a separate batter. The eggs hold everything together, while the Bisquick adds just enough body so the muffins don't turn out too soft or wet in the center.

Ground sausage is the main source of flavor, so it's worth choosing one you like. It seasons the whole mixture as it cooks, which means you don't need much extra seasoning. Mild sausage keeps it balanced, while a spicy version adds more heat without extra effort.

Shredded cheddar melts into the muffins and helps bind everything together. It also adds richness that makes them feel more filling. You can swap in a different cheese like Monterey Jack or a Mexican blend, but cheddar gives a stronger flavor that stands out against the eggs.

Bell pepper and spinach add texture and keep the muffins from feeling too heavy. Cooking them first removes excess moisture so the muffins set properly. You can switch in other vegetables like mushrooms or onions, just make sure they're cooked down before adding so they don't water out the batter.

See the recipe card for exact quantities.

How to Make Sausage, Egg, and Cheese Breakfast Muffins?

Egg, Sausage, Cheese Breakfast Muffins with visible herbs and vegetables in white paper liners, arranged closely together.

These muffins come together in a few simple steps. You’ll cook the sausage and vegetables first, mix everything into a batter, then bake until set.

Prepare the oven and pan

A muffin tin with 12 white paper cupcake liners arranged in each cup, perfect for baking breakfast muffins or savory egg and cheese muffins.

Preheat your oven to 350°F. Line a muffin pan with paper liners or lightly grease each cup so the muffins release easily after baking.

Cook the sausage

Raw ground meat and egg in a stainless steel frying pan on a white background.

Place a large skillet over medium-high heat and cook the ground sausage until fully browned. Break it up into small pieces as it cooks so it distributes evenly in the muffins.

Once done, remove the sausage from the pan and set it aside. Leave a small amount of grease in the skillet to cook the vegetables.

Cook the vegetables

Diced red bell peppers and spinach sautéing in a stainless steel skillet on a white background, perfect for adding to savory Breakfast Muffins or pairing with classic Egg and Cheese.
Chopped spinach, red bell pepper, and sausage sizzle in a metal frying pan—perfect ingredients for egg breakfast muffins—set on a white background.

Chop the bell pepper into small pieces and roughly chop the spinach.

Add both to the same skillet and cook for about 3–4 minutes, stirring occasionally, until softened. This step removes excess moisture and helps the vegetables blend better into the muffins.

Mix the batter

Glass bowl with cracked eggs, flour, and a brown mixture, ready to be mixed on a white surface—perfect for making savory egg and cheese muffins or hearty sausage breakfast muffins.
Clear glass bowl filled with a lumpy, yellowish Cheese Breakfast Muffins batter on a white background.

In a large mixing bowl, whisk together the cooked sausage, eggs, milk, Bisquick, salt, black pepper, garlic powder, and onion powder until everything is well combined.

A glass bowl with cracked eggs, flour, and brown mixture on a white surface, ready to be mixed for delicious sausage egg and cheese muffins.
A glass bowl filled with a colorful, mixed vegetable and cheese batter—perfect for making savory egg and cheese muffins—sits on a white surface.

Fold in the cooked vegetables and shredded cheddar cheese. Stir just until evenly mixed.

Fill the muffin pan

A muffin tin filled with unbaked breakfast muffins batter, featuring visible chopped vegetables, cheese, and bits of sausage ready to become delicious sausage breakfast muffins.

Scoop the mixture into the prepared muffin pan, filling each cup all the way to the top. The mixture won’t rise much, so filling them fully gives you a better shape.

Bake and cool

Egg and cheese muffins with vegetables and herbs on a wicker tray, garnished with parsley, two forks beside them—these savory breakfast muffins are perfect for a hearty start to your day.

Bake on the center rack for 18–20 minutes, or until the muffins are set in the middle and lightly golden on top.

Remove from the oven and let them cool in the pan for about 5 minutes. Then transfer to a cooling rack to finish cooling.

Garnish with fresh parsley before serving, if desired.

Storage

Cheese Breakfast Muffins with sausage, egg, and vegetables are garnished with fresh parsley and served on a white surface.

Store the muffins in an airtight container in the fridge for up to 4 days. Reheat in the microwave for 20–30 seconds or until heated through.

For longer storage, freeze the muffins in a single layer until solid, then transfer to a freezer-safe container or bag. Reheat straight from frozen in the microwave in short intervals until warmed through.

To make ahead, prepare and bake the muffins as directed, then let them cool completely before storing. You can also mix the batter the night before. Keep it covered in the fridge, then portion and bake in the morning.

Top Tips for Sausage, Egg, and Cheese Breakfast Muffins

Cook off excess grease: After browning the sausage, drain off any extra grease if there’s a lot in the pan. Too much fat can make the muffins feel heavy and affect how they set.

Chop vegetables small: Cut the bell pepper and spinach into small pieces. This will enable them to mix evenly into the batter and cook through fully in the oven.

Change up the cheese: Swap cheddar for mozzarella for a milder option. Or use pepper jack if you want a bit more heat and flavor.

Recipe

Tried and loved this recipe? Please leave a 5-star review below! Your reviews mean a lot to me, so if you've got any questions, please let me know in a comment.

Savory breakfast muffins with herbs and vegetables on a wicker surface, garnished with fresh parsley.
Print Recipe
5 from 1 vote

Sausage, Egg, and Cheese Breakfast Muffins

Fluffy sausage, egg, and cheese breakfast muffins with sautéed veggies. Easy to prep ahead and perfect for quick weekday mornings.
Prep Time10 minutes mins
Cook Time35 minutes mins
Total Time45 minutes mins
Course: Breakfast
Cuisine: American
Keyword: sausage, egg, and cheese breakfast muffins
Servings: 12 muffins
Calories: 277kcal
Author: Ksenia Prints

Ingredients

  • 1 lb uncooked ground sausage
  • 1 cup Bisquick
  • 6 large eggs
  • 2 cups shredded cheddar cheese
  • ½ cup milk
  • ¼ teaspoon salt
  • ¼ teaspoon black pepper
  • 1 teaspoon garlic powder
  • 1 teaspoon onion powder
  • 1 red bell pepper
  • 1 cup fresh spinach

Instructions

  • Preheat the oven to 350°F. Line a muffin pan with paper liners or grease lightly.
  • In a large skillet over medium-high heat, cook sausage until browned. Remove sausage from the pan, leaving a little grease behind.
  • Chop the bell pepper and roughly chop the spinach.
  • Sauté the bell pepper and spinach in the same skillet until softened, about 3–4 minutes.
  • In a large mixing bowl, whisk together the sausage, eggs, milk, Bisquick, salt, pepper, garlic powder, and onion powder.
  • Fold in the sautéed vegetables and cheddar cheese.
  • Scoop the mixture evenly into the prepared muffin pan, filling each cup full.
  • Bake for 18–20 minutes, or until muffins are set and golden on top.
  • Remove from the oven and let cool in the pan for 5 minutes before transferring to a cooling rack.
  • Garnish with fresh parsley before serving.

Notes


Nutrition

Calories: 277kcal | Carbohydrates: 8g | Protein: 14g | Fat: 20g | Saturated Fat: 8g | Polyunsaturated Fat: 2g | Monounsaturated Fat: 8g | Trans Fat: 0.1g | Cholesterol: 129mg | Sodium: 577mg | Potassium: 210mg | Fiber: 1g | Sugar: 2g | Vitamin A: 898IU | Vitamin C: 14mg | Calcium: 183mg | Iron: 1mg

Beef Enchilada Casserole Recipe

Beef enchilada casserole layered with tortillas, seasoned beef, beans, and melted cheese, baked until bubbly for an easy, hearty dinner.

A plate of cheesy Beef Enchilada Casserole with beans and herbs, garnished with cilantro and lime, makes a flavorful casserole recipe for any occasion.

If you know me personally and we meet up at a Mexican restaurant, you know you'll see me with my plate of enchiladas. They're always my go-to order, and honestly, I've never met an enchilada I didn't like. This beef enchilada casserole is one I make at home every time I crave it because it gives me all those enchilada flavors I love without having to roll each one individually. I love it as much as I love my chicken enchilada dip.

Corn tortillas are the only option here because flour tortillas get gummy and pasty when they soak up liquid instead of softening into that classic enchilada texture. The first time I made this with flour tortillas because that's what I had on hand, they turned into this thick, doughy layer that was unpleasant to eat and nothing like actual enchiladas. The tortillas need sauce on both sides or the exposed parts dry out and get hard and crispy instead of staying soft and tender.

Layering the enchilada sauce throughout instead of just pouring it on top means every layer gets moisture, which is what keeps the whole casserole from drying out in the oven. The 80/20 ground beef has enough fat to stay flavorful and juicy during baking, but leaner beef dries out and tastes bland because there's nothing to keep it moist. Draining the beef after browning matters because too much grease pools in the casserole and makes it oily instead of letting the flavors come through cleanly.

The reason why this casserole is so good is because of how the mild cheddar and pepper jack cheese melt together into this creamy, slightly spicy layer on top. Everything bakes in one dish, which means way less work than making traditional enchiladas but the same satisfying result.

My family requests this constantly because it tastes like restaurant enchiladas but I can have it on the table in about 50 minutes. I always top mine with sour cream, cilantro, and a squeeze of lime, and it always satisfies that enchilada craving every single time without me having to leave the house.

Ingredients

Taco ingredients: ground beef, tortillas, beans, corn, rice, cheese, tomatoes, sauce, seasoning, jalapeños, water—perfect for a Beef Enchilada Casserole or your favorite taco casserole recipe.

Ground beef cooks quickly and soaks up the seasoning well. Using an 80/20 blend gives the best balance of flavor without making the dish too greasy. If you want a lighter option, ground turkey or chicken can work, but you may want to add extra seasoning to boost the flavor.

Enchilada sauce and taco seasoning build most of the flavor in this recipe. The enchilada sauce adds richness and moisture to each layer, while the taco seasoning gives the beef a well-rounded, savory taste without needing to measure multiple spices.

Corn tortillas are essential for layering and give the casserole its structure. They soften as they bake and absorb the sauce, creating that classic enchilada texture. Flour tortillas can be used, but they tend to become softer and slightly doughy.

Black beans, corn, diced tomatoes, and jalapeños add texture and balance the richness of the beef and cheese. Beans make the casserole more filling, while corn adds a slight sweetness. Jalapeños add mild heat, but you can adjust the amount or leave them out if you prefer it milder.

Mild cheddar cheese and pepper jack cheese bring everything together. Using both gives you a mix of creamy and slightly spicy flavors. If you want something milder, you can use all cheddar or swap in Monterey Jack for a smoother melt.

Lime, sour cream, avocado, and cilantro are optional toppings.

See the recipe card for exact quantities.

How to Make Beef Enchilada Casserole?

A glass baking dish with a cheesy Beef Enchilada Casserole, topped with sour cream, lime slices, and chopped cilantro.

This beef enchilada casserole comes together in layers, with a rich, saucy filling and soft tortillas that bake into a hearty, sliceable dish. Everything cooks in one pan, making it a great option for an easy dinner.

Preheat and Prepare the Dish

Preheat your oven to 350°F. Lightly grease a 9×13-inch casserole dish so the casserole doesn’t stick and is easier to serve later.

Cook the Ground Beef

Raw ground beef in a stainless steel skillet on a white background, perfect for starting your favorite casserole recipe like a classic Beef Enchilada Casserole.
Cooked ground beef in a stainless steel skillet on a white background, perfect for preparing Beef Enchilada Casserole or your favorite casserole recipe.

Heat a large skillet over medium-high heat. Add the ground beef and cook for about 7 to 10 minutes, breaking it apart as it cooks, until fully browned.

Once cooked, drain any excess grease from the pan to prevent the casserole from becoming too oily.

Add Seasoning and Build the Filling

Cooked ground beef in a skillet with a pile of taco seasoning in the center, ready to be mixed—perfect for starting your favorite Beef Enchilada Casserole.
Ground beef with savory sauce simmers in a stainless steel pan—perfect for a classic Beef Enchilada Casserole recipe—set on a white background.

Stir in the taco seasoning and water, mixing well so the beef is evenly coated.

Overhead view of a pot with ground beef, tomato sauce, diced tomatoes, black beans, corn, and green chilies—perfect for making a hearty Beef Enchilada Casserole.
A pot of chili with ground meat, beans, tomatoes, and vegetables on a white background—perfect as inspiration for your next Beef Enchilada Casserole or favorite enchilada casserole recipe.

Add 1½ cans of enchilada sauce, along with the diced tomatoes, black beans, corn, and jalapeños. Stir everything together, then reduce the heat to medium and bring the mixture to a gentle simmer.

Let it cook for about 5 minutes so the flavors combine and the mixture thickens slightly.

Start the Layers

Rectangular glass dish with a small amount of reddish-orange liquid at the bottom, perfect for serving a Beef Enchilada Casserole, on a white background.

Pour the remaining enchilada sauce into the bottom of the prepared baking dish, spreading it out evenly.

Six corn tortillas arranged flat in a glass baking dish, ready to become the base for a delicious Beef Enchilada Casserole recipe.

Place 6 corn tortillas over the sauce, overlapping them slightly so they cover the bottom.

Add the First Layer of Filling

A glass baking dish with a layered Beef Enchilada Casserole, topped with cheese, beans, corn, and vegetables—a delicious casserole recipe perfect for any gathering.

Spread about ⅔ of the beef mixture evenly over the tortillas.

Sprinkle half of the cheddar and pepper jack cheeses over the top.

Add the Second Layer

Rectangular glass dish with a layered Beef Enchilada Casserole of ground beef, corn, black beans, and diced tomatoes—a comforting casserole recipe perfect for any meal.

Add another layer of 6 tortillas over the filling.

A glass baking dish filled with a layered Beef Enchilada Casserole, topped with shredded cheese, beans, and tomatoes—a flavorful casserole recipe perfect for dinner.

Spread the remaining beef mixture on top, then finish with the remaining cheese, making sure it is evenly distributed.

Bake the Casserole

A delicious Beef Enchilada Casserole recipe featuring layers of black beans, diced red peppers, and melted cheese, baked to perfection in a glass dish.

Place the dish in the oven and bake uncovered for 25 to 30 minutes, or until the cheese is fully melted, bubbly, and lightly golden on top.

Cool and Serve

A cheesy beef enchilada casserole with black beans, corn, and melted cheese, topped with sour cream and chopped herbs.

Remove the casserole from the oven and let it sit for a few minutes before serving. This helps it set and makes it easier to slice.

Garnish with your favorite toppings like sour cream, cilantro, or extra jalapeños, then serve warm.

Storage

A plate of cheesy beef enchilada casserole with black beans, corn, and cilantro, served on a brown-rimmed dish—a classic beef enchilada casserole recipe.

Let the casserole cool to room temperature before storing. Cover the dish tightly with foil or transfer leftovers to an airtight container and refrigerate for up to 3 days.

To reheat, warm individual portions in the microwave until heated through, or place the casserole in a 350°F oven for about 10–15 minutes until hot and bubbly. If reheating a larger portion, cover it loosely with foil to keep the top from over-browning.

Top Tips for Beef Enchilada Casserole

Warm the tortillas slightly before layering: This makes them more flexible and easier to layer without cracking, helping the casserole hold together better.

Let it rest before slicing: After baking, give the casserole about 5–10 minutes to sit so the layers can set and slice cleanly.

Adjust the heat to your taste: Use hot enchilada sauce or add fresh jalapeños if you want more spice, or stick with mild sauce for a more balanced flavor.

Recipe

Tried and loved this recipe? Please leave a 5-star review below! Your reviews mean a lot to me, so if you've got any questions, please let me know in a comment.

A serving of cheesy Beef Enchilada Casserole with beans and vegetables on a plate, garnished with fresh cilantro.
Print Recipe
5 from 1 vote

Beef Enchilada Casserole

Beef enchilada casserole layered with tortillas, seasoned beef, beans, and melted cheese, baked until bubbly for an easy, hearty dinner.
Prep Time10 minutes mins
Cook Time40 minutes mins
Total Time50 minutes mins
Course: Main
Cuisine: Mexican
Servings: 8 servings
Calories: 606kcal
Author: Ksenia Prints

Ingredients

  • 1 lb ground beef
  • 1 oz packet taco seasoning
  • ¼ cup water
  • 15.25 oz can black beans rinsed and drained
  • 15.25 oz can corn rinsed and drained
  • 4 oz can diced jalapeño peppers
  • 14.5 oz can diced tomatoes drained
  • 12 corn tortillas
  • 2 cans red enchilada sauce
  • 1 cup shredded mild cheddar cheese
  • 1 cup shredded pepper jack cheese

Instructions

  • Preheat the oven to 350°F and lightly grease a 9×13-inch casserole dish.
  • Heat a large skillet over medium-high heat. Add the ground beef, breaking it apart as it cooks, until browned, about 7–10 minutes. Drain excess grease.
  • Stir in the taco seasoning and water until well combined.
  • Add 1½ cans of enchilada sauce along with the diced tomatoes, black beans, corn, and jalapeños. Stir to combine, reduce heat to medium, and bring to a simmer. Let simmer for 5 minutes.
  • Pour the remaining enchilada sauce into the bottom of the casserole dish, then layer 6 tortillas over the top (they should overlap).
  • Spread ⅔ of the beef mixture over the tortillas and sprinkle with half of the cheddar and pepper jack cheeses.
  • Add another layer of 6 tortillas, followed by the remaining filling and remaining cheese.
  • Bake uncovered for 25–30 minutes, or until the cheese is melted, bubbly, and lightly golden.
  • Garnish with your favorite toppings and enjoy!

Notes


Nutrition

Calories: 606kcal | Carbohydrates: 81g | Protein: 23g | Fat: 22g | Saturated Fat: 10g | Polyunsaturated Fat: 1g | Monounsaturated Fat: 8g | Trans Fat: 1g | Cholesterol: 67mg | Sodium: 947mg | Potassium: 546mg | Fiber: 8g | Sugar: 48g | Vitamin A: 800IU | Vitamin C: 25mg | Calcium: 284mg | Iron: 4mg

Classic Amish Country Casserole Recipe

Quick to assemble and comforting to serve, this Amish country casserole fits perfectly into a full evening.

A plate of Amish Country Casserole with cheesy layers of ground beef, peas, and noodles sits on a checkered napkin, with a drink in the background.

Easter week always feels a little fuller than expected. There are eggs to dye, grocery lists that keep growing, and two kids who suddenly remember every holiday activity the night before. Leo had already asked three times when we were coloring eggs, and Lin was sitting at the table with markers spread everywhere while I tried to figure out dinner before the evening ran away from me.

That’s the kind of night when casseroles quietly solve a problem.

I had ground beef in the fridge and a half-open bag of egg noodles in the pantry. My husband was helping set up the table and the camera while I browned the beef and stirred onions into the pan. Nothing complicated. Its a kind of cooking where you can pause to answer homework questions or wipe marker off the table.

One thing I’ve always liked about Amish-style recipes is how practical they are. The meals tend to stretch a handful of pantry ingredients into something filling enough for a whole family. This casserole follows that same idea with noodles cooked right in the sauce, the beef carries most of the flavor, and the oven takes over while everyone settles down for the evening.

A plate of Amish Country Casserole with ground meat, peas, melted cheese, and herbs on top, served on a red checkered cloth.

The covered baking step matters here. It lets the noodles soften in the sauce first, so the casserole stays creamy instead of dry. Then the cheese goes on at the end for the final few minutes.

During weeks like this I often rotate a few simple casseroles so dinner doesn’t feel like another project. Our green bean casserole usually appears around Easter alongside the main meal, and the ground beef zucchini and rice casserole is another one I cook when the fridge has random vegetables that need to be used. On colder nights the sweet potato ground beef casserole ends up in the oven.

This recipe works on a crowded Easter night, which is exactly when dinner needs the most help.

Ingredients

Bowls of ground beef, shredded cheese, peas, cream soup, spices, milk, chopped onion, and uncooked egg noodles—a hearty start for making classic Amish Country Casserole.

Ground beef and diced onion form the base of this casserole and cook together quickly in one pan. Ground turkey or chicken can work if that’s what you have in the fridge.

Cream of mushroom soup mixed with milk creates the creamy sauce that cooks the noodles while the casserole bakes. Cream of chicken soup can be used if mushroom isn’t popular in your house.

Egg noodles go into the casserole uncooked so they soften directly in the sauce. This step saves boiling a separate pot. Frozen peas add a simple vegetable without extra prep. Corn or mixed vegetables can work the same way.

Garlic salt and onion powder season the filling, and shredded cheddar cheese melts over the top during the final minutes in the oven. Colby jack or mozzarella can work as well if that’s what you have on hand.

See the recipe card for exact quantities.

How to Make this Amish Country Casserole?

A plate of Amish Country Casserole topped with melted cheese, peas, and parsley, on a checkered napkin with a gold fork.

If you’re looking for a dinner that comes together while the kids are finishing homework or coloring at the table, this casserole hits that sweet spot. It uses simple ingredients you probably already have, and the steps are straightforward enough to follow without pausing too often. Here’s how to get it from the skillet to the oven:

Preheat the Oven

Preheat the oven to 350°F and lightly grease a 9×13 baking dish with non-stick spray. Set the dish aside while you prepare the filling.

Cook the Beef and Onion

Raw ground beef and chopped onions in a white skillet on a marble countertop, ready to be cooked for a comforting Amish Country Casserole.

Heat a large pan over medium-high and add the ground beef with the diced onion. Cook until the beef is fully browned and onions are soft. Drain any grease. Watch for any browned bits sticking to the pan, they can give a slightly bitter taste if left too long. The beef should be broken into small pieces, not clumps, so it mixes evenly later.

Mix the Cream Base

A bowl with milk, black pepper, and a dollop of creamy soup on a white surface—perfect beginnings for an Amish Country Casserole.

In a medium bowl, combine the milk, cream of mushroom soup, garlic salt, onion powder, and pepper. Stir until smooth. The mixture should pour easily but coat the back of a spoon, this is what helps the noodles absorb flavor without getting soggy.

Combine with Noodles and Veggies

A skillet with ground beef, egg noodles, green peas, and creamy sauce comes together for a comforting Amish Country Casserole on a white background.

Add the cream mixture to the pan with the beef and onions, then fold in the uncooked egg noodles and frozen peas. Stir gently to coat everything evenly. The noodles will be softening slightly from the moisture of the sauce, which ensures they cook through in the oven. Avoid over-stirring or breaking the noodles.

Transfer to Baking Dish

Amish Country Casserole with ground meat, noodles, creamy sauce, and green peas baked together in a glass dish.

Pour the mixture into your prepared baking dish, spreading it evenly. The surface should be smooth, with the noodles just covered by the sauce. Uneven layering can cause some noodles to dry out.

Bake Covered

Casserole dish filled with creamy Amish Country Casserole, featuring tender noodles, ground meat, and green peas.

Cover the dish with foil and bake for 25 minutes. The noodles will absorb the sauce, becoming tender but not mushy. Check after 20 minutes. If the sauce looks too thin or noodles are sticking out, gently push them down.

Add Cheese and Finish Baking

An Amish Country Casserole dish filled with baked food and topped with a golden layer of melted shredded cheddar cheese.

Remove the foil, sprinkle the shredded cheese over the top, and bake uncovered for 5–8 minutes until the cheese melts and starts to lightly bubble. The topping will form a thin layer that holds the casserole together when serving. Avoid baking longer than needed. Cheese can brown quickly and dry out the edges.

Rest and Serve

A spatula lifts a cheesy Amish Country Casserole with beef, noodles, peas, and melted cheddar from a glass baking dish.

Let the casserole sit for a few minutes after removing from the oven. This helps the filling settle, making it easier to cut portions without spilling. Serve warm while the noodles are tender and the cheese is soft but set.

Storage

Amish Country Casserole with ground meat, peas, and melted cheese on a white plate, garnished with parsley.

Let the casserole cool completely before storing. Cover the dish with foil or move leftovers to an airtight container. It will stay good in the fridge for 2–3 days.

For longer storage, portion it out, wrap in foil or freezer-safe wrap, and freeze for up to 2 months.

To reheat, place refrigerated portions in a 350°F (180°C) oven for about 15–20 minutes until heated through. Frozen portions (unwrapped) take about 30–35 minutes until hot and the cheese is melted again.

A plate of shepherd’s pie, inspired by Amish Country Casserole, topped with mashed sweet potatoes and garnished with parsley on a red gingham napkin.

Top Tips for Amish Country Casserole

Use frozen peas for convenience: They mix in easily and don’t need thawing, which saves a few extra minutes on busy nights.

Cover while baking: Keeping the casserole covered for most of the bake helps the noodles soften evenly in the sauce.

Add cheese at the end: Sprinkle the shredded cheese on top after removing the foil so it melts without overcooking or drying out.

Recipe

Tried and loved this recipe? Please leave a 5-star review below! Your reviews mean a lot to me, so if you've got any questions, please let me know in a comment.

A plate of Amish Country Casserole with cheesy noodles, ground meat, and peas, garnished with chopped parsley.
Print Recipe
No ratings yet

Amish Country Casserole

 Simple Amish country casserole with beef, noodles, and cheese.
Prep Time10 minutes mins
Cook Time30 minutes mins
Total Time40 minutes mins
Course: Dinner, Lunch
Cuisine: American
Keyword: Amish Country Casserole
Servings: 4 servings
Calories: 608kcal
Author: Ksenia Prints

Equipment

  • Large skillet or frying pan
  • Medium mixing bowl
  • 9x13 inch Baking Dish
  • Spoon or spatula
  • Foil

Ingredients

  • 1 lb ground beef
  • 1 onion diced
  • 1 ¼ cup milk
  • 1 10 oz can of cream of mushroom soup
  • 1 teaspoon garlic salt
  • 1 teaspoon onion powder
  • 1 teaspoon pepper
  • 1 cup uncooked egg noodles
  • 1 cup frozen peas
  • 2 cups shredded cheddar cheese

Instructions

  • Preheat the oven to 350°. Spray a 9x13 baking dish with non-stick cooking spray and set aside. To a large pan add the ground beef and onion and cook on a medium to high heat until the beef is fully cooked. (Drain any grease)
  • In a medium sized bowl add the milk, cream of mushroom, garlic salt, onion powder and pepper, stir till it’s fully combined.
  • Add that mixture to the pan with the beef and onions, add the egg noodles and peas and stir.
  • Add everything to the baking dish. Spread around evenly.
  • Cover the top of the baking dish with foil and place in the oven for 25 minutes. Once the 25 minutes are up remove from the oven and sprinkle the cheese all over top. Place in the oven uncovered for about 5-8 minutes. Serve and enjoy!

Nutrition

Calories: 608kcal | Carbohydrates: 13g | Protein: 38g | Fat: 45g | Saturated Fat: 21g | Polyunsaturated Fat: 1g | Monounsaturated Fat: 15g | Trans Fat: 1g | Cholesterol: 146mg | Sodium: 1059mg | Potassium: 604mg | Fiber: 3g | Sugar: 7g | Vitamin A: 970IU | Vitamin C: 17mg | Calcium: 534mg | Iron: 3mg

Teriyaki Chicken Fried Rice Recipe

Teriyaki chicken fried rice with tender chicken, fluffy rice, garlic, ginger, and vegetables, all coated in a glossy sweet-savory teriyaki sauce.

A pan of fried rice with peas, corn, chopped green onions, and diced Teriyaki Chicken sits on a wooden surface.

To me, teriyaki fried chicken always sounds good. When I was younger, whenever we'd go to an Asian restaurant, this would always catch my attention, and I'd contemplate whether to order it or try a different dish. Half of the time, I'd get it because you can never go wrong with teriyaki chicken.

Then I started making it for my family, and we all love having rice meals every once in a while. This teriyaki chicken fried rice has become a staple because it's easy and foolproof, but the technique actually matters more than I realized at first.

The rice technique matters more than I expected when I first started making this. Instead of using pre-cooked rice like traditional fried rice, the uncooked rice cooks directly in the same pan with the chicken and broth. This lets the grains absorb all the flavor as they simmer instead of just getting coated afterward. When I tried rushing the process once and didn’t give the rice enough time to cook properly, some of the grains stayed firm while others turned soft, and the texture wasn’t nearly as good. Letting the rice simmer covered until it’s almost tender before adding the vegetables makes a big difference and keeps everything light and evenly cooked.

The chicken needs to brown properly in the pan before anything else goes in, which means not moving it around too much. Constant stirring steams it instead of creating that golden crust that adds texture and flavor to every bite. Garlic and ginger go in after the chicken because they burn fast. If you add them too early, they turn bitter and acrid instead of fragrant and savory.

The teriyaki sauce goes in at the very end so it coats everything without making the rice soggy. Pouring it in too early just creates wet fried rice instead of that slightly caramelized, glossy finish you're looking for.

My family loves how flavorful this is, and I love how I can have dinner ready in about 30 minutes with just one pan to wash. You can probably tell by now that chicken and rice are a massive staple in our house! When we are craving a cozy, cheesy dinner in a hurry, I almost always rely on my Chicken and Rice Casserole with Minute Rice. If we want something a bit more rich and savory, my French Onion Chicken and Rice Casserole is a huge hit, and on days when I just want the kitchen to do all the work for me, I toss together an easy 5-ingredient crockpot chicken and rice. But there is something incredibly special about this teriyaki version. Turns out, the dishes you loved as a kid sometimes taste even better when you figure out how to make them yourself!

Ingredients

Boneless skinless chicken breast keeps this teriyaki chicken fried rice light while still filling. It cooks quickly and absorbs the sauce well as the rice finishes cooking. If you prefer darker meat, boneless chicken thighs work too and will stay a little juicier.

Fresh garlic and fresh ginger build the base flavor. Cooking them briefly in oil releases their aroma and gives the rice a savory, slightly spicy backbone that balances the sweetness of the teriyaki sauce. Using freshly grated ginger makes a noticeable difference compared to powdered versions.

Jasmine or basmati rice work well because the grains stay separate and fluffy while cooking. Short-grain rice can become sticky and clump together, which makes the final dish heavier instead of light.

Low-sodium soy sauce, honey (or your sweetener of choice), and sesame oil form the teriyaki-style sauce. Low-sodium soy sauce helps keep it from becoming too salty, especially since it cooks down. Frozen stir-fry vegetables make this recipe fast and practical because they cook quickly and add color and texture without extra prep work. 

See the recipe card for exact quantities.

How to Make Teriyaki Chicken Fried Rice?

A plate of fried rice with vegetables, chicken pieces, and green onions, featuring a hint of teriyaki chicken flavor, served with chopsticks on the side.

This teriyaki chicken fried rice cooks in one pan and builds flavor step by step. The chicken browns first, the rice cooks in the same skillet, and everything finishes together with the sauce and vegetables.

Cook the Garlic and Ginger

Heat the olive oil in a large skillet or deep sauté pan over medium-high heat. Once the oil is hot, add the minced garlic and grated ginger. Cook for about 1 to 2 minutes, stirring frequently so they do not burn. This step releases their aroma and builds the base flavor of the dish.

Brown the Chicken

Small pieces of chicken sizzle in a black frying pan on a gray countertop, perfect for a teriyaki chicken recipe.
Chopped teriyaki chicken and green onions sizzle in a black skillet on a gray countertop—perfect for your next fried rice recipe.

Add the chicken breast to the skillet with the garlic and ginger. Cook while stirring occasionally until the chicken begins to brown on the outside. The chicken does not need to be fully cooked at this stage because it will continue cooking with the rice.

Toast the Rice

Raw rice, chopped chicken, and green onions in a black skillet on a gray countertop—perfect ingredients for a delicious teriyaki chicken fried rice recipe.

Stir the uncooked rice into the skillet with the chicken. Mix it well so the grains are coated with the oil and cooking juices. Let the rice toast for about 1 minute while stirring. This step adds flavor and helps the rice cook up fluffy instead of sticky.

Simmer the Rice

Pour in the water or broth and stir gently. Bring the mixture to a boil over medium-high heat. Once it begins to boil, reduce the heat to low.

Cover the skillet with a lid and let the rice simmer for about 10 minutes. During this time, the rice will absorb most of the liquid and become almost fully cooked.

Make the Teriyaki Sauce

White bowl filled with a dark brown teriyaki chicken sauce, placed on a gray textured surface.

While the rice cooks, prepare the sauce. In a small bowl, whisk together the soy sauce, honey (or maple syrup, brown sugar, or agave), and sesame oil. Mix until smooth and set aside.

Add the Vegetables

A skillet filled with fried rice, peas, corn, carrots, and shredded teriyaki chicken creates a flavorful recipe on a gray surface.

After the rice has simmered for about 10 minutes, stir the frozen stir-fry vegetables into the skillet. Spread them evenly through the rice mixture.

Cover the skillet again and continue cooking for about 5 minutes. The vegetables will heat through and soften while the chicken finishes cooking.

Add the Sauce

A skillet filled with flavorful fried rice, mixed with peas, corn, carrots, and chopped green onions—an easy recipe perfect alongside teriyaki chicken.

Pour the prepared teriyaki sauce over the rice, chicken, and vegetables. Stir well so everything is evenly coated.

Cook for another 2 to 3 minutes, stirring occasionally. This allows the sauce to warm through and soak into the rice.

Garnish and Serve

A plate of crispy fried rice garnished with green onions, served with chopsticks on a wooden table—a classic recipe perfect for any meal.

Remove the skillet from the heat. Sprinkle the chopped scallion greens over the top for freshness and a mild onion flavor.

Serve the teriyaki chicken fried rice hot directly from the pan.

Storage

A plate of fried rice with peas, corn, carrots, and chopped green onions—perfect as a side or main dish. Try this recipe with Teriyaki Chicken for a delicious meal combo.

Let the teriyaki chicken fried rice cool to room temperature before storing. Transfer leftovers to an airtight container and refrigerate for up to 3–4 days.

To reheat, warm the rice in a skillet over medium heat with a small splash of water or soy sauce to restore moisture. Stir occasionally until heated through. The flavor may change slightly after refrigeration, but it will still be very good.

Top Tips for Teriyaki Chicken Fried Rice

Use pre-cooked chicken to save time: Rotisserie or leftover chicken works well here. Just shred or dice it and add it to the skillet with the vegetables so it heats through without overcooking.

Choose vegetables that cook quickly: Frozen stir-fry blends are convenient, but fresh vegetables like bell peppers, broccoli, snap peas, or carrots work well too. Cut them into small pieces so they soften while still keeping a bit of texture.

Add an egg for a classic fried rice touch: Scramble the egg in the skillet before adding the rice, or stir it into the rice mixture near the end of cooking so it coats the grains lightly.

Recipe

Tried and loved this recipe? Please leave a 5-star review below! Your reviews mean a lot to me, so if you've got any questions, please let me know in a comment.

A plate of fried rice with peas, carrots, tender teriyaki chicken pieces, and green onions, served with chopsticks on the side—a delicious recipe perfect for any meal.
Print Recipe
No ratings yet

Teriyaki Chicken Fried Rice Recipe

Teriyaki chicken fried rice with tender chicken, fluffy rice, garlic, ginger, and vegetables, all coated in a glossy sweet-savory teriyaki sauce.
Prep Time10 minutes mins
Cook Time20 minutes mins
Total Time30 minutes mins
Course: Main
Cuisine: American, Japanese
Keyword: teriyaki chicken fried rice
Servings: 4 servings
Calories: 470kcal
Author: Ksenia Prints

Ingredients

  • 1 chicken breast boneless skinless
  • 1 tablespoon olive oil
  • 2 teaspoon garlic minced
  • 1 teaspoon ginger grated
  • 1 ½ cup uncooked rice basmati or jasmine
  • 2 ½ water or vegetable/chicken broth
  • 2 cups frozen stir-fry vegetables
  • 1 teaspoon sesame oil
  • ½ cup soy sauce I used low sodium
  • 2 tablespoons honey maple, or brown sugar,you can also use agave syrup but the sauce will be less sweet but also tasty
  • ¼ cup scallions just the white part, and more green part for serving

Instructions

  • Stir in the uncooked rice and toast for about 1 minute. Add the water or broth, bring to a boil, then reduce the heat to low. Cover and simmer for 10 minutes, until the rice is nearly cooked.
  • While the rice cooks, whisk together the soy sauce, honey (or preferred sweetener), and sesame oil in a small bowl.
  • Stir the frozen stir-fry vegetables into the skillet. Cover and cook for another 5 minutes, until the vegetables are tender and the chicken is fully cooked.
  • Pour the sauce over the rice mixture and stir until evenly coated. Cook for 2–3 minutes more, then garnish with chopped scallion greens and serve hot.

Notes


Nutrition

Calories: 470kcal | Carbohydrates: 79g | Protein: 23g | Fat: 7g | Saturated Fat: 1g | Polyunsaturated Fat: 1g | Monounsaturated Fat: 4g | Trans Fat: 0.01g | Cholesterol: 36mg | Sodium: 1736mg | Potassium: 574mg | Fiber: 5g | Sugar: 9g | Vitamin A: 4700IU | Vitamin C: 12mg | Calcium: 59mg | Iron: 3mg

Baked Homemade Pepperoni Pizza Bagels 

Crispy baked pepperoni pizza bagels brushed with garlic butter, topped with marinara, melty mozzarella, and Parmesan. A quick 15-minute pizza fix.

Pepperoni Pizza Bagels with melted cheese and herbs on a white plate, surrounded by small bowls of toppings—enjoy this tasty twist on classic pizza in every bite.

I'll take pizza in any form, and these baked homemade pepperoni pizza bagels are one of my recent additions to my whole pizza recipe collection. I have homemade pepperoni pizza rolls, garlic butter pepperoni pizza muffins, and a cast iron deep dish pepperoni pizza, but this bagel version is quickly stealing hearts at home.

The reason these taste better than just throwing sauce and cheese on a bagel is the garlic butter barrier that gets brushed on first. Without it, the marinara soaks straight into the bread and turns the whole thing soggy instead of crispy, which I learned when I skipped that step once to save time and ended up with limp, wet bagel halves that nobody wanted to eat.

The sauce needs to be applied lightly, or it overwhelms the bagel and makes everything soft instead of getting those crispy edges that make these worth making. Thicker pizza sauce works better than marinara because it has less water content and won't seep into the bread as quickly. The pepperoni needs to go on top of the cheese instead of under it, or it steams and stays floppy instead of crisping up slightly in the oven, which is the whole point of baking these.

The shredded mozzarella gives you that stretchy, melty finish, and the grated Parmesan helps the tops brown beautifully. Mixing Italian seasoning into the garlic butter and sprinkling more on top makes these taste more like garlic bread pizza instead of just bagels with toppings.

My kids love how these are ready in about 15 minutes, and I like how I can portion them easily based on how many people I'm feeding. Each bagel makes two halves, so 3 bagels feed 3 people, 4 bagels feed 4, and so on. They've become our go-to for quick lunches and after-school snacks, and they're already competing with my other pizza recipes for the top spot.

Like little bagel treats? We're also fans of these Everything Bagel Pretzel Bites. They go great with some dip!

Ingredients

Sliced bagels, pepperoni, shredded cheese, pizza sauce, butter, herbs, and seasonings create delicious Homemade Pizza Bagels on a white background.

You'll be needing plain bagels as the base because they let the sauce, cheese, and seasonings shine, but everything bagels or cheese bagels work if you want more flavor built into the crust. Slicing and lightly toasting them before adding toppings helps prevent a soggy center and keeps the bottoms crisp.

Marinara sauce is essential, but use it lightly because too much makes the bagels soft instead of crisp. A thicker-style pizza sauce works well if you want a more concentrated flavor.

Pepperoni slices add classic pizza taste and crisp slightly in the oven, especially when placed on top of the cheese. Shredded mozzarella gives that stretchy, melty finish, while grated Parmesan adds a sharper edge and helps the tops brown.

Melted butter mixed with garlic powder and Italian seasoning, brushed over the bagels, adds extra flavor to the crust and makes them taste more like garlic bread pizza instead of just bagels with toppings. Fresh parsley is optional for garnish, but it adds a pop of color and freshness.

See the recipe card for exact quantities.

How to Make Baked Homemade Pepperoni Pizza Bagels?

Four homemade pepperoni pizza bagels with melted cheese and pepperoni slices on a white tray, baked to perfection and garnished with chopped herbs.

These baked homemade pepperoni pizza bagels come together quickly and bake up crisp on the edges with melty cheese on top. A simple garlic butter base adds extra flavor and helps the bagels toast beautifully in the oven.

Preheat and Prepare

Preheat your oven to 400°F. Line a large baking sheet with parchment paper to prevent sticking and make cleanup easier.

Make the Garlic Butter

A glass bowl of homemade garlic herb butter sits in front of sliced plain bagels on a baking sheet, ready to be transformed into delicious baked Pepperoni Pizza Bagels.

In a small microwave-safe bowl, melt the butter. Stir in the garlic powder and ¼ teaspoon of the Italian seasoning until fully combined. This mixture will add flavor directly to the bagels and help them brown in the oven.

Assemble the Bagels

Six plain homemade bagel halves on a parchment-lined baking tray, arranged in two rows of three—perfect for turning into delicious Pepperoni Pizza Bagels.
Arrange the bagel halves cut-side up on the prepared baking sheet.
A silicone brush spreading seasoning and oil on a sliced piece of homemade bread.
Using a pastry brush or spoon, brush the garlic butter evenly over each cut surface.
Six homemade pizza bagel halves with tomato sauce spread on top, arranged on a white baking sheet.
Spread a thin layer of marinara sauce over each bagel half. Be careful not to overload them, as too much sauce can make them soggy.
Six homemade pepperoni pizza bagels topped with tomato sauce, shredded cheese, and pepperoni slices are baked to perfection on a white baking tray.
Sprinkle shredded mozzarella evenly over the sauce. Place 5 to 6 pepperoni slices on each bagel half, depending on size. Finish by sprinkling grated Parmesan and the remaining Italian seasoning over the top.

Bake

Six mini Pepperoni Pizza Bagels with melted cheese on a baking sheet, viewed from above.

Place the baking sheet in the oven and bake for 10 to 12 minutes, or until the cheese is fully melted and the edges of the bagels are lightly toasted.

If you want a more golden top, switch the oven to broil for about 30 seconds at the end. Watch closely to prevent burning.

Cool and Serve

Enjoy these Homemade Pizza Bagels topped with melted cheese, zesty pepperoni, and fresh herbs, served on a white plate with a parsley garnish.

Remove the pizza bagels from the oven and let them cool for a couple of minutes before serving. Garnish with fresh parsley if desired, then serve warm.

Storage

Homemade Pepperoni Pizza Bagels baked to perfection, topped with melted cheese, pepperoni slices, and herbs on a baking tray.

Let the pizza bagels cool completely before storing. Place leftovers in an airtight container and refrigerate for up to 3 days. To reheat, bake in a 375°F oven or air fryer for 4–6 minutes until heated through and crisp again. Avoid microwaving if possible, as it can make the bagels soft instead of crisp.

Top Tips for Baked Homemade Pepperoni Pizza Bagels 

Use a sauce you already like: Since there are only a few ingredients, the marinara really stands out. A thicker sauce works best and keeps the bagels from getting too soft.

Plan the bagel count: Use 3 bagels if serving 3 people or 4 bagels if serving 4. Each bagel makes two halves, which helps you portion easily.

Don’t skip the garlic butter: Brushing the cut sides with seasoned butter adds flavor and creates a barrier so the sauce doesn’t soak straight into the bread.

Recipe

Tried and loved this recipe? Please leave a 5-star review below! Your reviews mean a lot to me, so if you've got any questions, please let me know in a comment.

Homemade baked Pepperoni Pizza Bagels on a plate, topped with melted cheese, sliced pepperoni, and sprinkled herbs.
Print Recipe
No ratings yet

Baked Homemade Pepperoni Pizza Bagels

Crispy baked pepperoni pizza bagels brushed with garlic butter, topped with marinara, melty mozzarella, and Parmesan. A quick 15-minute pizza fix.
Prep Time5 minutes mins
Cook Time6 minutes mins
Total Time11 minutes mins
Course: Side, Snacks
Cuisine: American
Keyword: baked homemade pepperoni pizza bagels
Servings: 4 servings
Calories: 488kcal
Author: Ksenia Prints

Ingredients

  • 3 to 4 plain bagels halved
  • ½ cup marinara sauce
  • 30 to 40 pepperoni slices
  • 2 tablespoon salted butter melted
  • ½ teaspoon garlic powder
  • ½ teaspoon Italian seasoning divided
  • 1 ½ cups shredded mozzarella cheese
  • 2 tablespoon grated Parmesan cheese
  • Optional: fresh parsley chopped

Instructions

  • Preheat the oven to 400°F and line a baking sheet with parchment paper.
  • Melt the butter in a small microwave-safe bowl, then stir in the garlic powder and ¼ teaspoon of the Italian seasoning.
  • Arrange the bagel halves on the prepared baking sheet and brush each cut side generously with the garlic butter.
  • Spread marinara sauce over each bagel half, then top with mozzarella and 5–6 pepperoni slices.
  • Sprinkle with grated Parmesan and the remaining Italian seasoning.
  • Bake for 10–12 minutes, or until the cheese is melted and the edges are lightly toasted.
  • For a golden finish, broil for 30 seconds, watching closely.
  • Remove from the oven and let cool for a couple of minutes.
  • Garnish with fresh parsley before serving.

Notes


Nutrition

Calories: 488kcal | Carbohydrates: 46g | Protein: 22g | Fat: 24g | Saturated Fat: 12g | Polyunsaturated Fat: 2g | Monounsaturated Fat: 8g | Trans Fat: 0.5g | Cholesterol: 65mg | Sodium: 1155mg | Potassium: 257mg | Fiber: 2g | Sugar: 2g | Vitamin A: 617IU | Vitamin C: 2mg | Calcium: 261mg | Iron: 2mg

Sheet Pan Sausage, Kale, and Sweet Potatoes

Sheet pan sausage, kale, and sweet potatoes roasted with garlic lemon butter. A simple one-pan dinner with crisp edges and bright flavor.

Sheet pan sausage served with roasted sweet potatoes and sautéed kale on a plate with a gold fork.

Sheet pan recipes are a savior when you want quick and easy dinners, and this Sheet Pan Sausage Kale and Sweet Potatoes is a great dinner option for busy days. My kids love having a complete bite of sausage, kale, and sweet potatoes all together.

The reason the sweet potatoes need a 20-minute head start in the oven is that they're much denser than the other vegetables and won't cook through properly if you add everything at the same time. I learned this when I tried roasting it all together once to save time, and the sweet potatoes came out hard and half-raw in the center while the kale and sausage were already done, completely throwing off the timing. The garlic lemon butter drizzled over everything before the final roast keeps the vegetables from drying out and helps them caramelize instead of just getting shriveled and tough. Without enough fat, sheet pan vegetables end up dry and leathery instead of tender with crispy edges. The lemon brightens the whole pan and cuts through the richness of the sausage so it doesn't feel heavy despite being a protein and starch meal.

The kale holds up really well in the oven without wilting down too much, and the bell peppers add color and a touch of sweetness that rounds everything out. The chicken sausage keeps everything lighter and cooks quickly, but you can use whatever sausage you like since it brings most of the seasoning to the dish.

This has become one of our weeknight staples because I can have everything prepped and in the pan in about 15 minutes, then the oven does the rest of the work with barely any cleanup. Watching them carefully construct their "perfect bites" with equal amounts of each ingredient is just an added bonus that makes dinner feel a little more fun.

If you're looking for more sheet pan dinners, try my chicken sheet pan quesadillas recipe, creamy parmesan chicken sheet pan dinner, and sheet pan mini meatloaf and veggies recipe.

Ingredients

Bowls of chopped kale, sweet potatoes, sausage, bell pepper, and seasonings are arranged on a gray surface—perfect for an easy sheet pan meal.

Chicken sausage keeps this sheet pan sausage, kale, and sweet potatoes lighter and cooks quickly in the oven, but you can use turkey sausage, smoked sausage, or even spicy Italian sausage, depending on the flavor you want. Since the sausage brings most of the seasoning, choosing one you already enjoy makes a big difference.

Sweet potatoes add natural sweetness and help balance the savory sausage. Cutting them into small, even ½-inch cubes makes sure they cook through at the same rate as everything else.

Kale holds up well in the oven and doesn't wilt down as much as spinach would. Pre-chopped kale from the grocery store saves time and works perfectly here. Bell pepper adds color and a touch of sweetness.

Melted butter mixed with garlic and lemon juice ties everything together. The butter helps the vegetables roast instead of drying out, while the lemon brightens the whole pan and keeps it from feeling heavy. Olive oil spray and your favorite seasonings round out the flavors and help everything caramelize nicely in the oven.

See the recipe card for exact quantities.

How to Make Sheet Pan Sausage Kale and Sweet Potatoes?

Sheet pan sausage with sliced kale, sweet potatoes, and lemon slices on a white background with a towel.

This sheet pan sausage kale and sweet potatoes dinner is simple to prep and cooks mostly hands-off in the oven. Roasting the sweet potatoes first gives them a head start, then everything finishes together for a balanced, one-pan meal.

Preheat the Oven

Start by preheating your oven to 400°F. Line a large sheet pan with parchment paper or lightly grease it to prevent sticking.

Make the Garlic Lemon Butter

A metal spoon in a white bowl with a small amount of creamy white mixture on a gray surface, perfect for pairing with roasted sweet potatoes or sheet pan sausage dishes.

In a small bowl, stir together the melted butter, minced garlic, and lemon juice. Mix until fully combined and set aside. This mixture will be poured over the vegetables and sausage to add flavor and help everything roast evenly.

Roast the Sweet Potatoes

Diced orange sweet potatoes and sausage spread out on a parchment-lined sheet pan.
Diced roasted sweet potatoes and sausage on a parchment-lined sheet pan, spread out on a gray countertop.

Spread the diced sweet potatoes in a single layer on the sheet pan. Lightly spray them with olive oil or toss them with a small amount of oil to help them brown.

Place the pan in the oven and roast the sweet potatoes for 20 minutes. This step gives them time to soften before adding the other ingredients.

Add Sausage and Vegetables

A sheet pan with sliced sausage, diced butternut squash, sweet potatoes, and kale, all seasoned and ready to bake.

Remove the pan from the oven. Add the sliced sausage, chopped kale, and diced bell pepper directly onto the sheet pan with the sweet potatoes.

Drizzle the garlic lemon butter evenly over everything. Sprinkle with onion powder, paprika, salt, and black pepper. Toss gently on the pan to distribute the seasoning and butter as evenly as possible.

Finish Roasting

Sheet pan featuring roasted sweet potatoes, kale, bell peppers, and savory sausage slices on a gray surface.

Return the pan to the oven and roast for another 9 to 11 minutes. The vegetables should be tender, the kale slightly crisp at the edges, and the sausage lightly browned.

Serve

Sausage, sweet potatoes, and kale served on a white plate, garnished with fresh herbs and a sprinkle of pepper on the side.

Remove from the oven and serve immediately. Add extra lemon juice or lemon wedges on the side if you prefer a brighter finish.

Storage

Sliced sausage, tender kale, and roasted sweet potatoes are served on a white plate, garnished with fresh herbs.

Allow the sheet pan sausage, kale, and sweet potatoes to cool completely before storing. Transfer leftovers to an airtight container and refrigerate for up to 4 days.

To reheat, warm in a 375°F oven for 8–10 minutes until heated through, or microwave in 30–60 second intervals, stirring halfway through. If the vegetables seem dry, add a small squeeze of fresh lemon juice before serving to freshen them up.

Recipe

Tried and loved this recipe? Please leave a 5-star review below! Your reviews mean a lot to me, so if you've got any questions, please let me know in a comment.

Sliced sheet pan sausage, kale, and roasted sweet potatoes are served on a white plate and garnished with fresh herbs.
Print Recipe
No ratings yet

Sheet Pan Sausage Kale and Sweet Potatoes

Sheet pan sausage, kale, and sweet potatoes roasted with garlic lemon butter. A simple one-pan dinner with crisp edges and bright flavor.
Prep Time15 minutes mins
Cook Time25 minutes mins
Total Time40 minutes mins
Course: Main
Cuisine: American
Keyword: sheet pan sausage kale and sweet potatoes
Servings: 5 servings
Calories: 209kcal
Author: Ksenia Prints

Ingredients

  • 6 cups kale roughly chopped ( I went for pre chopped kale from the grocery store)
  • 4 links Chicken sausage or your favorite sausage
  • 1 medium bell pepper cut into smaller cubes
  • 2 cups sweet potato about 1 small-medium sized, diced into ½ inch cubes
  • 1 tablespoon garlic minced
  • 1 tablespoon lemon juice or more if you like lemony flavor
  • 1 teaspoon onion powder
  • ¼ teaspoon black pepper or to taste
  • ¼ teaspoon salt or to taste
  • ¼ cup butter melted (I used unsalted)
  • ½ teaspoon paprika to add more smoky flavor use smoked paprika
  • Olive oil for cooking

Instructions

  • Preheat your oven to 400°F.
  • In a bowl, combine melted butter, garlic, and lemon juice. Stir until well mixed.
  • Spread the sweet potatoes on a sheet pan, spray with olive oil, and roast for 20 minutes.
  • Add the sausage, kale, and bell pepper to the pan. Drizzle with the butter sauce and sprinkle with your favorite seasonings.
  • Roast for another 9–11 minutes, or until the veggies are tender and the sausage is slightly browned.
  • Serve with extra lemon juice or lemon wedges on the side. Enjoy!

Notes


Nutrition

Calories: 209kcal | Carbohydrates: 18g | Protein: 13g | Fat: 10g | Saturated Fat: 2g | Polyunsaturated Fat: 0.2g | Monounsaturated Fat: 0.1g | Cholesterol: 49mg | Sodium: 869mg | Potassium: 348mg | Fiber: 3g | Sugar: 5g | Vitamin A: 11071IU | Vitamin C: 58mg | Calcium: 101mg | Iron: 1mg

Slow Cooker Beef Stroganoff

Tender slow cooker beef stroganoff made with stew meat, onion soup mix, and cream of mushroom soup, finished with sour cream and served over egg noodles.

A bowl of pasta with creamy sauce and herbs, with a fork lifting a bite, parsley in the background.

When I decided it was time to use the slow cooker to get more tender beef stroganoff, I haven't made it in a pot since. With St. Patrick's Day coming up, this recipe will surely be on the table because it's become one of those meals my family requests for any celebration.

The slow cooker completely changed how I approach beef stroganoff because the beef stew meat becomes so tender after cooking low and slow for 6 hours. I just add the beef strips, sprinkle on the onion soup mix, spoon in the cream of mushroom soup, and let the crockpot do all the work. The onion soup mix is the shortcut that builds most of the seasoning without me having to measure out a bunch of spices, and the cream of mushroom soup creates that thick, savory base that stroganoff is known for.

What I love about this recipe is how hands-off it is. I can throw everything in the slow cooker in the morning, go about my day, and I'll have beef that's fork-tender and ready to serve. The sour cream stirred in at the end creates that classic creamy finish without curdling, as long as you add it just before serving instead of during the long cook time.

The egg noodles are perfect with this because their wide shape holds onto the sauce so well. And, cooking them fresh while the beef finishes in the slow cooker means everything is hot and ready at the same time. This has become my go-to for St. Patrick's Day and any other time I want something comforting that doesn't require me to stand over the stove. My family loves it, and honestly, I love how little effort it takes to make something this satisfying.

If you're looking for other beef recipes for St. Patrick's Day, you should try my beef pot pie recipe or my slow cooker beef bourguignon!

Ingredients

Ingredients for beef stroganoff arranged on a white marble surface, including beef strips, noodles, and seasonings.

Beef stew meat cut into strips becomes tender as it cooks low and slow in the crockpot. Chuck roast, cut into strips, is another good option if you prefer to slice your own meat, and it breaks down beautifully during the long cooking time.

Onion soup mix is the shortcut that builds most of the seasoning, adding salt, onion flavor, and depth without needing a long list of spices. Cream of mushroom soup creates the thick, savory base that stroganoff is known for. If you want a richer mushroom flavor, you can use golden mushroom soup or add sautéed mushrooms with the beef.

Sour cream is stirred in at the end to create that classic creamy finish. Adding it just before serving keeps the sauce smooth and prevents curdling.

Egg noodles are the traditional pairing because their wide shape holds onto the sauce well, but you could also serve this over rice or mashed potatoes if you want. 

See the recipe card for exact quantities.

How to Make Slow Cooker Beef Stroganoff? 

Bowl of creamy beef stroganoff over egg noodles, garnished with chopped herbs, on a marble surface.

This slow cooker beef stroganoff is a simple, hands-off dinner that cooks low and slow until the beef is tender. The sauce thickens in the crockpot, then you stir in the sour cream for a creamy finish.

Add Ingredients to the Slow Cooker

Raw beef strips mixed with a creamy sauce in a black slow cooker on a marble countertop.
Place the beef strips into the slow cooker.
Beef stroganoff in a slow cooker with a wooden spoon resting on top of the creamy mixture.
Sprinkle the onion soup mix evenly over the top. Add the cream of mushroom soup and spread it over the beef.

Stir everything together until the soup mixture evenly coats the meat.

Slow Cook

Cover the slow cooker with the lid. Cook on low for 6 hours or on high for 3 hours. The beef should be tender and easy to break apart with a fork when done.

Cook the Noodles

About 15 minutes before serving, cook the egg noodles according to the package directions. Drain them well and set aside until ready to serve.

Finish the Sauce

Beef stroganoff in a slow cooker with a dollop of sour cream and a wooden spoon on top.

Just before serving, stir the sour cream into the beef mixture. Mix until fully combined and creamy.

Taste and season with salt and pepper as needed.

Serve

A bowl of creamy slow cooker beef stroganoff with parsley sits in front of the appliance on a marble surface.

Spoon the beef stroganoff over the hot egg noodles and serve immediately.

Storage

A bowl of creamy beef stroganoff over egg noodles, garnished with chopped parsley, with a forkful lifted.

Allow the beef stroganoff to cool completely before storing. Transfer leftovers to an airtight container and refrigerate for up to 3–4 days. Store the noodles separately if possible to prevent them from soaking up too much sauce.

To reheat, warm gently on the stovetop over medium-low heat, stirring occasionally until heated through. You can also microwave in 30–60 second intervals, stirring between each. If the sauce has thickened, add a small splash of milk or broth to loosen it.

Top Tips for Slow Cooker Beef Stroganoff

Brown the beef first if you have time: While not required, quickly searing the beef before adding it to the slow cooker adds deeper flavor and better texture.

Stir in sour cream at the end: Always add the sour cream just before serving. Adding it too early can cause it to separate during the long cook time.

Cook noodles separately: Prepare the egg noodles fresh and store them separately from leftovers. This keeps them from getting overly soft and soaking up too much sauce.

Recipe

Tried and loved this recipe? Please leave a 5-star review below! Your reviews mean a lot to me, so if you've got any questions, please let me know in a comment.

Bowl of creamy beef stroganoff with egg noodles, garnished with chopped parsley, on a white surface.
Print Recipe
No ratings yet

Slow Cooker Beef Stroganoff

Tender slow cooker beef stroganoff made with stew meat, onion soup mix, and cream of mushroom soup, finished with sour cream and served over egg noodles.
Prep Time15 minutes mins
Cook Time6 hours hrs
Course: Dinner, Lunch, Main
Cuisine: American
Keyword: slow cooker beef stroganoff
Servings: 6 servings
Calories: 507kcal
Author: Ksenia Prints

Ingredients

  • 2 lbs beef stew meat cut in strips
  • 1 packet 1 oz onion soup mix
  • 1 can 10.75 oz cream of mushroom soup
  • 1 cup sour cream
  • 12 oz egg noodles
  • Salt and pepper to taste

Instructions

  • Add beef, onion soup mix, and cream of mushroom soup to slow cooker.
  • Cook on low 6 hours or high 3 hours.
  • Cook noodles according to package directions during last 15 minutes.
  • Stir sour cream into beef mixture just before serving.
  • Season with salt and pepper.
  • Serve over hot egg noodles.
  • Serve immediately.

Video

Notes


Nutrition

Calories: 507kcal | Carbohydrates: 42g | Protein: 43g | Fat: 18g | Saturated Fat: 7g | Polyunsaturated Fat: 1g | Monounsaturated Fat: 6g | Trans Fat: 0.03g | Cholesterol: 164mg | Sodium: 109mg | Potassium: 704mg | Fiber: 2g | Sugar: 2g | Vitamin A: 277IU | Vitamin C: 0.3mg | Calcium: 90mg | Iron: 4mg

Easy Hot Dog Chili Recipe

Thick, homemade hot dog chili made with finely crumbled beef, tomatoes, and warm spices. Perfect for piling onto hot dogs, fries, or chips.

A chili dog with fries, hot dog buns, hot dogs, and bowls of Hot Dog Chili and cheese on a table—a classic spread featuring the perfect Hot Dog Topping.

Sunny afternoons with friends or family are never complete without a backyard hot dog. When I started making my own chili instead of buying pre-made from the store, everyone has been requiring and requesting that I make my own version every single time. Sometimes I have to double the recipe because it doesn't just go on hot dogs anymore; people start eating it straight from the pot with chips or spooning it over fries.

The difference between homemade hot dog chili and canned versions is texture and how the flavors build. Breaking the ground beef up very finely as it browns is critical because big chunks fall off the hot dog instead of creating that classic, scoopable consistency that actually stays put. I learned this matters when I didn't break it up enough once and ended up with a chunky meat sauce that slid right off every hot dog, making a mess and frustrating everyone.

The crushed tomatoes and tomato paste need to cook down together, or the chili stays too thin and watery, running everywhere instead of holding its shape on the bun. Simmering it uncovered for at least 20 minutes lets the liquid evaporate and concentrates the flavors, which is what makes homemade chili taste deeper and more complex than anything from a can that's been sitting on a shelf.

The white sugar cuts the acidity of the tomatoes and rounds out all the flavors in a way that makes the chili taste complete instead of sharp.

My friends and family now expect this chili at every get-together, and I don't mind making it because it's ready in around 45 minutes and tastes way better than anything store-bought. A simple backyard hot dog turned into something people actually look forward to, and I'm fine with that. It's by far the best hot dog chili recipe I've ever come up with.

Try serving it with either air fryer BBQ chicken mac and cheese or white chicken chili mac and cheese! Either will be a great filling pair, or serve it with hot honey air fryer chicken tenders, which is my personal favorite to serve at get-togethers at home.

Ingredients

Raw ground beef, diced onions, garlic, spices, sugar, tomato paste, and crushed tomatoes arranged on a white surface—perfect ingredients for an easy Hot Dog Chili recipe.

Ground beef is the base of this easy hot dog chili. Using a slightly higher fat content like 80/20 gives the chili more flavor and a richer texture. Breaking the meat up very finely as it cooks helps create that classic, scoopable consistency that sits on hot dogs instead of large crumbles that fall off.

Crushed tomatoes and tomato paste work together to build thickness and depth. The crushed tomatoes form the body of the chili, while the tomato paste concentrates the flavor and helps it cook down faster. This combination keeps the chili thick enough to stay on a hot dog without running everywhere.

Chili powder, cumin, smoked paprika, and oregano create a balanced spice base, while cayenne adds gentle heat you can adjust based on what you like. White sugar might seem like an odd ingredient, but it cuts the acidity of the tomatoes and rounds out the flavor. You can adjust it slightly depending on how sweet or acidic your tomatoes taste.

Garlic and onion add aromatic depth that makes the chili taste more complex. Beef broth thins the mixture to the right consistency while keeping it rich and flavorful.

Serve with hot dog buns, hot dogs, shredded cheese, diced onions, mustard, chopped parsley, and potato chips or french fries.

See the recipe card for exact quantities.

How to Make Easy Hot Dog Chili?

Hot Dog Chili topped with shredded cheese, served alongside French fries on a white plate—an irresistible combination of classic hot dog toppings.

This easy hot dog chili comes together quickly on the stovetop and is made to be thick, flavorful, and perfect for piling onto hot dogs. A short simmer helps the spices develop while keeping the texture just right for topping.

Brown the Beef and Aromatics

Cooked ground beef with chopped onions in a white pot, viewed from above on a white background—perfect as a base for an Easy Chili Recipe or delicious Hot Dog Toppings.

Place a large Dutch oven over medium heat. Add the ground beef, diced onion, and minced garlic to the pot. Cook, stirring frequently, until the beef is fully browned and no longer pink. As it cooks, use a wooden spoon or spatula to break the meat into very small crumbles. This creates the fine texture that works best for hot dog chili.

If there is excess grease after browning, carefully drain it off before continuing.

Add the Sauce and Seasonings

Ground meat in a pot topped with tomato sauce and various spices, perfect for an easy chili recipe or as a flavorful hot dog topping, ready to be mixed and cooked.

Stir in the crushed tomatoes and tomato paste until combined with the beef mixture. Add the chili powder, ground cumin, smoked paprika, dried oregano, garlic powder, cayenne pepper, sugar, salt, and pepper.

Mix well so the spices are evenly distributed throughout the chili.

Simmer Until Thick

A pan filled with cooked ground meat mixed with tomato sauce and diced onions, seen from above—perfect as an easy chili or a flavorful hot dog chili for your next meal.

Bring the mixture to a gentle boil. Once it starts bubbling, reduce the heat to low.

Let the chili simmer uncovered for about 20 minutes, stirring occasionally. This allows the flavors to develop and the sauce to thicken. The chili should be thick enough to spoon over a hot dog without running off.

Serve

A chili cheese hot dog with fries on a plate, surrounded by extra chili, buns, and sausages—perfect for showcasing your favorite Hot Dog Chili as the ultimate Hot Dog Topping.

Spoon the hot chili over cooked hot dogs and serve immediately. Add shredded cheese, diced onions, or mustard if desired.

Storage

Bowl of hot dog chili topped with shredded cheese, with hot dogs, buns, and sausages on plates nearby.

Allow the chili to cool completely before storing. Transfer leftovers to an airtight container and refrigerate for up to 4 days.

To reheat, warm on the stovetop over medium-low heat, stirring occasionally until heated through. You can also microwave in 30–60 second intervals, stirring between each, until hot. If the chili has thickened in the fridge, add a small splash of water to loosen it as it reheats.

For longer storage, freeze in a freezer-safe container for up to 3 months. Thaw overnight in the refrigerator before reheating.

Top Tips for Easy Hot Dog Chili

Break the beef up very fine: Use a wooden spoon or meat chopper to crumble the beef as small as possible while browning. A fine texture helps the chili sit neatly on hot dogs instead of falling off in chunks.

Drain excess grease: After browning the meat, remove extra fat before adding the tomatoes and spices. This keeps the chili from becoming oily and helps the flavor stay balanced.

Simmer uncovered: Let the chili cook without a lid so it thickens properly. If it looks too thin, give it a few extra minutes to reduce until it reaches a spoonable, thick consistency.

Recipe

Tried and loved this recipe? Please leave a 5-star review below! Your reviews mean a lot to me, so if you've got any questions, please let me know in a comment.

Hot dog topped with savory Hot Dog Chili and shredded cheese, served alongside golden French fries on a white plate—an easy recipe perfect for quick meals.
Print Recipe
No ratings yet

Hot Dog Chili

Thick, homemade hot dog chili made with finely crumbled beef, tomatoes, and warm spices. Perfect for piling onto hot dogs, fries, or chips.
Prep Time10 minutes mins
Cook Time45 minutes mins
Total Time55 minutes mins
Course: dip, Side Dish, Snacks
Cuisine: American
Keyword: hot dog chili
Servings: 10 servings
Calories: 272kcal
Author: Ksenia Prints

Ingredients

  • 2 lbs ground beef
  • 1 onion diced
  • 3 cloves garlic minced
  • 28 oz can crushed tomatoes
  • 2 tablespoons tomato paste
  • 1 ½ tablespoons chili powder
  • 1 teaspoon ground cumin
  • 1 teaspoon smoked paprika
  • 1 teaspoon dried oregano
  • ½ teaspoon garlic powder
  • ¼ teaspoon cayenne pepper
  • 1-2 teaspoons white sugar or to taste
  • Salt and pepper to taste

Instructions

  • In a large dutch oven over medium heat, sauté ground beef, onion, and garlic until ground beef is browned. Break apart the meat as you go.
  • Stir in the crushed tomatoes, tomato paste, chili powder, ground cumin, smoked paprika, dried oregano, garlic powder, cayenne pepper, sugar, salt, and pepper.
  • Bring chili to boil. Once the sauce is bubbling, lower the heat and simmer for about 20 minutes, until the chili thickens.
  • Serve over hot dogs.

Notes


Nutrition

Calories: 272kcal | Carbohydrates: 9g | Protein: 17g | Fat: 19g | Saturated Fat: 7g | Polyunsaturated Fat: 1g | Monounsaturated Fat: 8g | Trans Fat: 1g | Cholesterol: 64mg | Sodium: 212mg | Potassium: 566mg | Fiber: 2g | Sugar: 5g | Vitamin A: 701IU | Vitamin C: 9mg | Calcium: 58mg | Iron: 3mg

Slow Cooker Garlic Parmesan Pork Chops

Slow cooker garlic parmesan pork chops with tender potatoes in a creamy, garlicky sauce. A rich, hands-off dinner perfect for busy nights.

Grilled chicken with roasted potatoes and broccoli in a white bowl on a wooden board, topped with a hint of garlic parmesan, with bread in the background.

Slow cooker pork chops are so easy to make, and I love switching up the flavors every time I want to make a different version. This slow cooker garlic parmesan pork chops recipe has been a staple in our house because of how much my family loves garlic parmesan flavors on different proteins. I actually have crockpot garlic parmesan chicken and air fryer garlic parmesan chicken wings that I also love making when I'm craving that creamy, garlicky flavor.

The reason pork chops stay juicy in the slow cooker instead of drying out is the initial sear in butter. This creates a flavorful crust that helps lock in moisture during those hours of low heat. Without that sear, the pork releases all its juices into the sauce and turns dry and stringy instead of tender, which I learned when I skipped that step once to save time, and the chops came out tough. The heavy cream in the sauce keeps the parmesan from clumping or getting grainy as it melts. This is because Parmesan on its own can seize up and turn gritty in the slow cooker's wet heat. The potatoes need to go on the bottom so they're submerged in the liquid, or they'll sit above the sauce line and come out hard and undercooked instead of fork-tender.

This pork chop recipe is one of my husband's favorites, and he always has a big plate of it whenever I make it (he always gets a big plate or two of what I make, though LOL). What makes this so convenient is that the potatoes cook right alongside the pork chops, soaking up all that garlic-parmesan goodness without any extra effort.

My husband loves how flavorful and tender the pork chops turn out, and honestly, I love how little hands-on time this requires. The garlic powder, onion powder, and paprika create a savory base that works with the creamy sauce, and now this has become a staple in our dinner rotation more often than probably any other pork recipe.

Ingredients

Raw pork chops, halved yellow potatoes, cream, mustard sauce, seasonings, butter, and breadcrumbs on a counter—perfect ingredients for your next Garlic Parmesan Pork Chops recipe.

You'll be needing pork chops (bone-in or boneless) that can hold up to long, slow cooking here. Thicker chops work best because they stay tender and don't dry out as easily. Browning them briefly in butter before adding to the slow cooker adds extra flavor and helps seal in moisture.

Garlic powder, onion powder, and paprika season the pork chops before browning, creating a savory base flavor that goes perfectly with the creamy sauce.

Parmesan garlic wing sauce is the shortcut ingredient that builds most of the flavor. It already contains garlic, seasoning, and richness, so you don't need a long list of extra spices. Mixing it with heavy cream softens the sharpness and creates a smooth, creamy sauce that coats both the pork and potatoes. Grated parmesan cheese, stirred in, thickens the sauce slightly and adds a stronger cheese finish. Baby potatoes halved cook evenly and hold their shape during the long cook time, becoming fork-tender without turning mushy. 

See the recipe card for exact quantities.

How to Make Slow Cooker Garlic Parmesan Pork Chops?

Grilled chicken and roasted potatoes served in a white bowl with broccoli and a slice of bread—an easy dinner for busy nights, just like your favorite Pork Chops Recipe.

This slow cooker garlic parmesan pork chops recipe is built for busy days when you want a full meal with minimal effort. A quick sear adds flavor, then everything finishes together in the slow cooker with a creamy garlic parmesan sauce that coats both the pork and potatoes.

Sear the Pork Chops

Raw pork chops coated with a savory seasoning blend, ready to be transformed into delicious garlic parmesan pork chops, arranged in a clear glass dish on a white marble surface.

Start by heating a large skillet over medium-high heat. Add the butter and let it melt completely. While the butter is melting, season both sides of the pork chops evenly with garlic powder, onion powder, and paprika.

Four seasoned pork chops sizzle in a frying pan on a marble countertop, their aroma hinting at delicious Garlic Parmesan flavors.

Place the pork chops in the hot skillet and brown them on each side until they develop a light color. You are not cooking them through at this stage, just adding flavor to the outside. Once browned, remove them from the skillet and set aside.

Layer the Slow Cooker

Garlic Parmesan Pork Chops and chopped potatoes are arranged inside a black slow cooker, perfectly seasoned and ready to be cooked.

Add the halved baby potatoes to the bottom of the slow cooker and spread them out evenly. This helps them cook through and absorb the sauce.

Place the browned pork chops directly on top of the potatoes in a single layer if possible.

Make the Sauce

Glass mixing bowl with a yellow batter and grated cheese on top, perfect for creating Garlic Parmesan pork chops, sitting on a white marble surface.

In a medium bowl, whisk together the Parmesan garlic wing sauce, heavy cream, and grated Parmesan cheese until smooth. This creates a creamy sauce that will coat everything as it cooks.

Slow Cooker pork chops simmer with creamy garlic Parmesan sauce and tender apple chunks, ready to be cooked.

Pour the sauce mixture evenly over the pork chops and potatoes.

Slow Cook

Enjoy garlic parmesan pork chops in a creamy herb sauce with tender potatoes, all made effortlessly in your slow cooker for a comforting meal.

Cover with the lid and cook on low for 6 hours or on high for 4 hours. The pork chops should be tender, and the potatoes soft when pierced with a fork.

Garnish and Serve

Garlic Parmesan Pork Chops served with yellow potatoes and broccoli, garnished with fresh herbs on a white plate.

Spoon some of the sauce over the pork chops before serving. Sprinkle with fresh parsley and serve hot.

Make it Better

Garlic Parmesan pork chops with golden potatoes and broccoli served in a white bowl on a wooden board.

You can easily adjust this recipe based on what you have on hand. If you do not have pork chops, boneless chicken breasts or thighs work well and cook in a similar amount of time. For the potatoes, Yukon golds, russets cut into chunks, or even sweet potatoes can be used, depending on your preference. Sweet potatoes add a slightly sweeter contrast to the savory sauce. If you cannot find garlic parmesan wing sauce, substitute Alfredo sauce and mix in extra garlic and grated parmesan to build a similar flavor. For a lighter option, half-and-half or evaporated milk can replace the heavy cream. Romano or Asiago cheese can also stand in for Parmesan and will give the sauce a slightly sharper taste.

There are also several easy ways to change it up. For an extra cheesy version, add shredded mozzarella or provolone over the top before serving. To add more vegetables, stir in spinach, broccoli florets, or sliced mushrooms during the last hour of cooking. If you prefer heat, sprinkle in red pepper flakes or use a spicy garlic parmesan wing sauce. Crumbled bacon on top adds a savory layer, and stirring in a packet of ranch seasoning creates a richer, more seasoned sauce.

Storage

Grilled chicken with herbs served over roasted potatoes and broccoli in a white bowl on a wooden board, finished with a touch of garlic parmesan.

Store leftovers in an airtight container in the refrigerator for up to 3–4 days. Keep the pork chops and potatoes covered with some of the sauce to help prevent them from drying out.

To reheat, warm gently on the stovetop over medium-low heat or in the microwave in 30–60 second intervals, stirring the sauce occasionally. If the sauce has thickened in the fridge, add a splash of cream or milk to loosen it before reheating.

Top Tips for Slow Cooker Garlic Parmesan Pork Chops

Brown first for better flavor: Take a few extra minutes to sear the pork chops before adding them to the slow cooker. It builds deeper flavor and helps keep the meat juicy during the long cook time.

Layer potatoes on the bottom: Always place the potatoes under the pork chops. They need direct heat from the slow cooker to become tender and cook evenly.

Check the internal temperature: Pork chops are done at 145°F. Using a meat thermometer prevents overcooking and keeps them tender instead of dry.

Recipe

Tried and loved this recipe? Please leave a 5-star review below! Your reviews mean a lot to me, so if you've got any questions, please let me know in a comment.

Garlic Parmesan pork chops with roasted potatoes and broccoli in a white bowl on a wooden board.
Print Recipe
5 from 1 vote

Slow Cooker Garlic Parmesan Pork Chops

Slow cooker garlic parmesan pork chops with tender potatoes in a creamy, garlicky sauce. A rich, hands-off dinner perfect for busy nights.
Prep Time10 minutes mins
Cook Time1 hour hr
Total Time1 hour hr 10 minutes mins
Course: Dinner, Lunch, Main
Cuisine: American
Keyword: slow cooker garlic parmesan pork chops
Servings: 4 servings
Calories: 990kcal
Author: Ksenia Prints

Ingredients

  • 6 pork chops
  • 1 teaspoon garlic powder
  • 1 teaspoon onion powder
  • 1 teaspoon paprika
  • 1 tablespoon butter
  • 1 pound baby potatoes halved
  • 12 ounces parmesan garlic wing sauce
  • 1 cup heavy cream
  • ¼ cup grated parmesan cheese
Parsley for garnish

Instructions

  • In a large skillet over medium high heat add the butter and melt.
  • Season your pork chops with the garlic powder, onion powder and paprika.
  • Brown the pork chops in the skillet until just browned.
  • Add the potatoes to the  bottom of the slow cooker.
  • Add the pork chops on top.
  • Mix the garlic parmesan wing sauce with the heavy cream and parmesan cheese.
  • Pour over the pork chops and potatoes.
  • Cover and cook on low for 6 hours or high for 4 hours until the potatoes and pork chops are tender.
  • Garnish with parsley.
  • Serve!

Notes


Nutrition

Calories: 990kcal | Carbohydrates: 33g | Protein: 75g | Fat: 61g | Saturated Fat: 33g | Polyunsaturated Fat: 4g | Monounsaturated Fat: 17g | Trans Fat: 0.1g | Cholesterol: 281mg | Sodium: 1713mg | Potassium: 1465mg | Fiber: 3g | Sugar: 3g | Vitamin A: 1676IU | Vitamin C: 23mg | Calcium: 900mg | Iron: 2mg

Easy Vegetarian Swamp Potatoes Recipe with Sausage

One-pan vegetarian swamp potatoes with veggie sausage and green beans. Cozy enough for St. Patrick’s Day, easy enough for weeknights.

A bowl of Vegetarian Swamp Potatoes, green beans, and pieces of meatless protein, garnished with fresh herbs.

St. Patrick’s Day always nudges me toward hearty meals, the ones that can feed a crowd without making you feel like you spent all day in the kitchen. I’ve made the traditional Southern swamp potatoes with sausage before, but this year, I thought, why not make a vegetarian version?

I didn’t want to lose any of the richness or comfort that makes the dish stick to your ribs, so I built it around layers of aromatics, a little spice, and plenty of butter. It feels balanced and filling without relying on meat.

Surprisingly, I prepped this while Lin was coloring at the table and Leo kept sneaking bites of raw potatoes from the tray, so I understand the value of a recipe that comes together quickly. The Yukon Golds soften in a single pot while the veggie sausage browns separately, so by the time the potatoes are ready, most of the flavor work is done. It’s one-pan-friendly, so cleanup is straightforward on weeknights when the dishwasher is already full.

Bowl of hearty beef stew with potatoes and green beans, topped with chopped herbs, next to a blue pot—perfect alongside Vegetarian Swamp Potatoes for a comforting meal.

I like that this dish is flexible. If I want to switch things up for the week, I can pair it with a Irish boxty potato pancakes like the one from last St. Patrick’s Day, or add a side of loaded baked potato bites for a snacky twist. On days when I have leftover chicken, it folds into a cheese, chicken, and potato bake with minimal extra effort.

It feels satisfying to serve a meal that hits the same notes as a classic, even when my evenings are crowded with homework, piano practice, and dinner chatter.

At the end of the night, I felt like I was giving my family a cozy meal, even on a Tuesday, and I didn’t have to disappear into the kitchen for hours to do it.

Ingredients

Ingredients for Vegetarian Swamp Potatoes: potatoes, sausage, green beans, onion, garlic, butter, broth, spices, and parsley—perfect for a flavorful one-pot meal with hearty veggies and savory goodness.

Yukon Gold potatoes are the base here because they hold their shape when boiled and simmered, giving the dish a creamy texture without turning mushy. You can swap Yukon Golds for red potatoes if you prefer, or add leftover roasted sweet potatoes for extra creaminess

For the “meaty” element, I use a veggie sausage like Beyond Meat sausage, but any plant-based sausage that browns well works. Onion and garlic form the flavor foundation, and green beans add a little color and bite while keeping it simple.

Cajun seasoningis essential. It brings warmth and a bit of spice without overpowering kids’ palates. Butter and vegetable broth carry the sauce, helping everything meld together as it simmers. Fresh parsley at the end is optional but adds a quick fresh note if you have it!

See the recipe card for exact quantities.

How to Make Vegetarian Swamp Potatoes Recipe?

A bowl of Vegetarian Swamp Potatoes, green beans, and seasoned meat with herbs sits invitingly, with a fork and a pot in the background.

This humble vegetarian swamp potatoes skillet is a quick St. Patrick’s Day dinner. potatoes, green beans, and veggie sausage cook together in one pan for a simple, festive meal the kids can help with. Here's the direction on how to make this recipe:

Boil the Potatoes

Sliced baby potatoes soaking in water in a white pot on a marble surface, ready for Vegetarian Swamp Potatoes, with fresh parsley on the side.

Place the diced Yukon Gold potatoes in a large pot and cover with water. Bring to a boil over high heat and cook until the potatoes are just tender, about 10-12 minutes. Drain and set aside.

Cook the Veggie Sausage

Sliced sausages cooking in a blue skillet with Vegetarian Swamp Potatoes, stirred with a wooden spoon on a white marble surface.

While the potatoes are cooking, heat a large skillet or Dutch oven over medium heat. Add the veggie sausage, breaking it up slightly with a spoon. Cook for 5-7 minutes until it’s browned and heated through. Remove from the skillet and set aside.

Sauté the Aromatics

Diced onions sautéing in a blue pan with a wooden spoon, ready to be added to Vegetarian Swamp Potatoes; fresh herbs on the side.

In the same skillet, add the butter and diced onion. Sauté for 3-4 minutes until the onion is translucent. Add the minced garlic and cook for another minute until fragrant.

Add the Green Beans

Green beans and chopped onions sautéing in a blue skillet with a wooden spatula, perfect for pairing with Vegetarian Swamp Potatoes; fresh parsley on the side.

Stir in the green beans and sauté for about 5 minutes, until they start to soften but still have a little crispness.

Combine Everything

A skillet with sausage, potatoes, green beans, and broth being poured in; parsley on the side—perfect for making hearty Vegetarian Swamp Potatoes.
A blue pot of Vegetarian Swamp Potatoes with sausage, potatoes, and green beans being stirred with a wooden spatula on a marble surface.

Return the cooked potatoes and veggie sausage to the skillet. Pour in the vegetable broth and sprinkle with Cajun seasoning, salt, and black pepper to taste. Stir gently so everything is coated evenly.

Simmer

Reduce the heat to low and cover the skillet. Let it simmer for 10-15 minutes, stirring occasionally, until the flavors meld and the green beans are fully tender.

Finish and Serve

A bowl of sausage, potatoes, and green beans sits next to a pan of the same dish—perfect for those who love comfort food. Try a Vegetarian Swamp Potatoes version for a meat-free twist, with fresh parsley and a fork nearby.

Remove from heat and stir in fresh parsley if using. Taste and adjust seasoning if needed. Serve warm straight from the skillet.

Storage

A white bowl of Vegetarian Swamp Potatoes—potatoes, green beans, and sausage—with a fork, in front of a blue pot filled with the same hearty dish.

Let the skillet cool completely before storing. Transfer leftovers to an airtight container and keep in the refrigerator for up to 4 days. For longer storage, divide into portions, wrap in foil or freezer-safe wrap, and freeze for up to 2 months.

To reheat, warm refrigerated portions in a 350°F (180°C) oven for 15–20 minutes, or heat frozen portions (unwrapped) for 30–35 minutes until hot and the vegetables are tender again.

A bowl of Vegetarian Swamp Potatoes features green beans and baby potatoes garnished with herbs, with a fork and an orange napkin nearby.

Top Tips for Vegetarian Swamp Potatoes 

Cook potatoes just until tender: Overcooking makes them fall apart when you stir everything together.

Brown the veggie sausage well: This adds depth of flavor and helps it hold its shape in the skillet.

Simmer gently: Low heat allows the green beans to stay crisp-tender while the potatoes soak up the broth.

Recipe

Tried and loved this recipe? Please leave a 5-star review below! Your reviews mean a lot to me, so if you've got any questions, please let me know in a comment.

A bowl of Vegetarian Swamp Potatoes stew with green beans, hearty chunks, and fresh herbs, served beside an orange napkin.
Print Recipe
No ratings yet

Vegetarian Swamp Potatoes

One-pan vegetarian swamp potatoes with veggie sausage and green beans.
Prep Time15 minutes mins
Cook Time30 minutes mins
Total Time45 minutes mins
Course: Main, Main Course
Cuisine: Southern
Keyword: Vegetarian Swamp Potatoes
Servings: 6 servings
Calories: 349kcal
Author: Ksenia Prints

Equipment

  • Large pot
  • large skillet or Dutch oven,
  • Cutting Board
  • Knife
  • stirring spoon

Ingredients

  • 3 lbs Yukon Gold potatoes peeled and diced
  • 1 lb veggie sausage like Beyond Meat sausage
  • 1 large onion diced
  • 1 lb green beans
  • 3 cloves garlic minced
  • 1 cup vegetable broth
  • 2 tablespoon butter
  • 1 ½ teaspoons Cajun seasoning
  • Salt and black pepper to taste
  • 2 tablespoon chopped fresh parsley optional

Instructions

  • Place the diced Yukon Gold potatoes in a large pot and cover with water. Bring to a boil over high heat and cook until the potatoes are just tender, about 10-12 minutes. Drain and set aside.
  • While the potatoes cook, heat a large skillet or Dutch oven over medium heat. Add the veggie sausage, breaking it up slightly with a spoon, and cook until browned and heated through, about 5-7 minutes. Remove from the skillet and set aside.
  • In the same skillet, add the butter and diced onion. Sauté until the onion is translucent, about 3-4 minutes. Add the minced garlic and cook for another 1 minute until fragrant.
  • Add the green beans to the skillet and sauté for 5 minutes, or until they start to become tender but still crisp.
  • Return the cooked potatoes and veggie sausage to the skillet with the vegetables. Pour in the vegetable broth and sprinkle with Cajun seasoning, salt, and black pepper to taste. Stir gently to combine.
  • Reduce the heat to low, cover, and let simmer for 10-15 minutes, stirring occasionally, until the flavors meld and the green beans are fully tender.
  • Remove from heat and stir in chopped fresh parsley, if using. Adjust seasoning as needed. Serve warm.

Nutrition

Calories: 349kcal | Carbohydrates: 53g | Protein: 22g | Fat: 6g | Saturated Fat: 1g | Polyunsaturated Fat: 3g | Monounsaturated Fat: 2g | Cholesterol: 1mg | Sodium: 686mg | Potassium: 1257mg | Fiber: 11g | Sugar: 6g | Vitamin A: 977IU | Vitamin C: 58mg | Calcium: 71mg | Iron: 20mg

Crispy Air Fryer Cheese Bites 

Crispy air fryer cheese bites with a golden panko coating and melty center. Easy to prep, quick to cook, and perfect for snacking.

A pile of crispy air fryer cheese bites made with breaded, baked broccoli and melted cheese on a wooden serving board.

I love having finger foods on the table for game days or movie nights, especially the kind you can grab without stopping to think about plates. Most of the time, I stick to whatever comes together easily, and these crispy air fryer cheese bites have become one of the snacks I rely on most. They’re familiar, crowd-friendly, and usually the first thing gone.

I started making them not long after we brought home a new air fryer and were looking for reasons to use it. I wanted something quick that actually showed what it could do, and these fit right in. They cook fast, come out crisp on the outside, and feel like the kind of snack you’d normally associate with takeout rather than a weeknight at home.

This is the recipe I reach for when we have a free night and something queued up to watch. They’re easy to prep ahead, and once they’re in the air fryer, everything else can stay on pause. Even on busy days, they’re manageable to fit in without turning snack time into a whole project.

The first time I served them, my son claimed them as his new movie-night favorite before the tray had even cooled. Since then, they’ve become a regular request, and with game season heating up, I already know they’ll be showing up on our snack table more than once.

Ingredients

Cubes of cheese and squash, two eggs, flour, oats, and herbs in bowls on a white background—everything you need to make crispy air fryer cheese bites.

The cheese is the star here, and using a mix of mozzarella and cheddar gives you the best balance. Mozzarella melts smoothly and creates that stretchy center everyone wants, while cheddar adds sharper flavor so the bites don’t taste flat. Cutting the cheese into even cubes matters more than it sounds. Uniform pieces melt at the same rate, which helps keep them from leaking out before the coating crisps.

The coating does most of the work on the outside. Panko breadcrumbs are key because they fry up lighter and crunchier than regular breadcrumbs, which can turn dense in the air fryer. The seasoned flour layer builds flavor from the start, and doubling up during the dredging helps the coating stay sealed. Eggs act as the glue, locking everything together so the cheese stays inside until you bite into it.

See the recipe card for exact quantities.

How to Make Crispy Air Fryer Cheese Bites?

Breaded and baked cauliflower florets on a wooden board, served with dipping sauce in the background—perfect to enjoy alongside crispy air fryer cheese bites.

These crispy air fryer cheese bites come together quickly with a simple breading and a short freeze. The result is a crunchy outside with melty cheese inside, perfect for snacking or serving as an easy appetizer.

Set up the breading stations

A white bowl filled with beaten eggs sits on a plain white surface, ready to coat crispy air fryer cheese bites before cooking.
White bowl with a mixture of flour and dried herbs on a plain white surface, perfect for coating crispy air fryer cheese bites.
Four bowls with flour, whisked eggs, breadcrumbs, and a cutting board with cubed sweet potato and onion—perfect for prepping crispy air fryer cheese bites.

Start by getting everything ready before you touch the cheese. In one bowl, mix the flour, Italian seasoning, salt, and garlic powder until evenly combined. In a second bowl, beat the eggs until smooth. Add the panko breadcrumbs to a third bowl. Lining the bowls up in this order makes the coating process faster and less messy.

Coat the cheese cubes

Bowls of flour with butter, beaten eggs, breadcrumbs, and a cutting board with cubed cheese on a white surface—everything you need to make crispy air fryer cheese bites.
Bowls of flour, egg wash with cheese cubes, and breadcrumbs sit next to a cutting board with cubed cheese, ready for making crispy air fryer cheese bites.
Cubed cheese on a cutting board, with bowls of flour, beaten eggs, and breadcrumb mixtures nearby—perfect for making crispy air fryer cheese bites.

Work with a few cubes at a time so the coating stays dry and even. Roll each cheese cube in the seasoned flour, then dip it into the egg. Repeat the flour and egg steps once more, then finish by pressing the cube into the panko breadcrumbs. Make sure every side is fully covered, with no bare spots where cheese could leak out.

Freeze the coated cheese

A white plate with several crispy air fryer cheese bites, possibly nuggets, arranged on a white background.

Place the breaded cheese cubes on a parchment-lined baking sheet in a single layer. Transfer the tray to the freezer and chill for at least 30 minutes. This step firms up the coating and slows down melting, which helps the cheese stay inside while the outside crisps.

Air fry until crisp

Air fryer basket with parchment paper, holding 14 crispy air fryer cheese bites arranged in rows, ready to cook.
Crispy air fryer cheese bites with a golden breaded coating and melted cheese, served on parchment paper inside an air fryer basket, viewed from above.

Preheat your air fryer to 400°F (200°C). Arrange the frozen cheese bites in a single layer in the basket, leaving space between them so air can circulate. Air fry for 8–10 minutes, checking near the end. They’re ready when the coating is golden, and the cheese is just starting to ooze.

Serve right away

A pile of breaded and baked cauliflower bites on a wooden board, reminiscent of crispy air fryer cheese bites, with a white cloth and bowls in the background.

Remove the cheese bites from the air fryer and serve immediately while hot. Pair them with marinara, ranch, or our favorite homemade garlic aioli for dipping. It's so easy to make, yet flavorful!

Storage

Crispy air fryer cheese bites with melted cheese oozing out, served on a wooden board.

Store leftover cheese bites in an airtight container in the fridge for up to 3 days. Reheat in the air fryer at 375°F for 3–4 minutes until heated through and crisp again. Avoid the microwave, as it softens the coating and can cause the cheese to leak.

Top Tips for Crispy Air Fryer Cheese Bites 

Freeze them well: Don’t skip the freezer step. Fully chilled cheese bites hold their shape in the air fryer and are much less likely to burst and leak.

Double coat carefully: Make sure each cube is evenly coated all the way around, especially the corners. Any bare spots are where the cheese will escape first.

Air fry in batches: Crowding the basket traps steam and leads to soft coating. Give the bites space so they crisp evenly on all sides.

Recipe

Tried and loved this recipe? Please leave a 5-star review below! Your reviews mean a lot to me, so if you've got any questions, please let me know in a comment.

Crispy, breaded broccoli and cheese bites served on a wooden board, with sauce in a bowl and a plate in the background—perfect for making in your air fryer.
Print Recipe
No ratings yet

Crispy Air Fryer Cheese Bites 

Crispy air fryer cheese bites with a golden panko coating and melty center. Easy to prep, quick to cook, and perfect for snacking.
Prep Time15 minutes mins
Cook Time30 minutes mins
Total Time45 minutes mins
Course: Appetizer, Snack
Cuisine: American
Keyword: air fryer cheese bites
Servings: 20 pieces
Calories: 112kcal
Author: Ksenia Prints

Ingredients

  • ½ cup all-purpose flour
  • 2 tablespoons Italian seasoning
  • 1 tablespoon salt
  • 1 tablespoon garlic powder
  • 1 cup panko breadcrumbs
  • ½ lb mozzarella cheese cut into cubes
  • ½ lb cheddar cheese cut into cubes
  • 2 eggs beaten

Instructions

  • Prepare the breading stations: In one bowl, mix flour, Italian seasoning, salt, and garlic powder. In another, add the beaten eggs. Place panko breadcrumbs in a third bowl.
  • Coat the cheese cubes: Working in batches, dip each cheese cube into the flour, then the egg, back into the flour, again into the egg, and finally into the panko breadcrumbs. Make sure each cube is evenly coated.
  • Freeze: Place the coated cheese cubes on a parchment-lined baking sheet and freeze for at least 30 minutes to firm up (this helps prevent the cheese from oozing too quickly while air frying).
  • Air fry: Preheat your air fryer to 400°F (200°C). Arrange the cheese bites in a single layer in the air fryer basket. Cook for 8–10 minutes, or until golden brown and just starting to ooze slightly.
  • Serve: Enjoy hot with your favorite dipping sauce, marinara, ranch, or garlic aioli all work perfectly!

Notes


Nutrition

Calories: 112kcal | Carbohydrates: 6g | Protein: 7g | Fat: 7g | Saturated Fat: 4g | Polyunsaturated Fat: 0.4g | Monounsaturated Fat: 2g | Trans Fat: 0.002g | Cholesterol: 37mg | Sodium: 523mg | Potassium: 44mg | Fiber: 0.5g | Sugar: 0.4g | Vitamin A: 223IU | Vitamin C: 0.02mg | Calcium: 154mg | Iron: 1mg

Jalapeño Popper Loaded Cheese Fries Recipe

Crispy jalapeño popper loaded cheese fries topped with creamy ranch filling, cheddar, bacon, and toasted panko. A bold, crowd favorite game day snack.

Tater tot casserole inspired by a jalapeno popper loaded cheese fries recipe, topped with cheese, jalapeño slices, green onions, and bacon on a black plate.

Loaded fries are a staple restaurant order for us whenever they're available, but they're usually nacho-style with ground meat and onions. One time, I decided to add our favorite topping, jalapeños, and make these jalapeño popper loaded cheese fries that combine everything we love about jalapeño poppers with crispy fries. They've become our game day essential, equally loved as my loaded baked potato bites. When we're craving the real thing, this air fryer jalapeño popper recipe is the one I whip out, it's the best (no biases *wink*).

The reason these taste like actual jalapeño poppers instead of just cheese fries with jalapeños on top is the creamy layer made with cream cheese, sour cream, and ranch seasoning that mimics that rich filling without needing to stuff and bake peppers.

The cream cheese needs to be softened or it won't blend smoothly with the sour cream, and you'll end up with lumps that don't spread evenly. I learned this when U tried mixing it straight from the fridge once and it clumped up instead of creating that silky base, making the whole thing uneven and harder to eat. The fries need to stay crispy under all the toppings or the whole thing turns into a soggy mess, which is why thicker-cut or crinkle fries work better than thin ones that wilt under the weight. Bake time may vary depending on the type of fries you use, so check for that golden, crispy exterior before loading them up.

Close-up of a cheesy baked casserole inspired by a jalapeno popper loaded cheese fries recipe, topped with sliced jalapeños, green onions, and a creamy white drizzle.

The toasted panko on top mimics that crispy jalapeño popper coating and adds texture contrast that keeps every bite interesting instead of just feeling heavy and creamy all the way through.

My family goes crazy for these, and they're so much better than the loaded fries we've ordered at restaurants because I can control exactly how much jalapeño and bacon goes on. The melted cheddar creates that perfect cheese pull, and the ranch drizzle with green onions makes them look and taste like something you'd pay way too much for at a sports bar. These disappear in minutes every single time.

Ingredients

Crinkle-cut fries loaded with bacon, cheese, green onions, sour cream, cream cheese, butter, ranch dip, seasonings—this jalapeno popper loaded cheese fries recipe brings bold flavor to every bite.

Frozen fries are the base of these jalapeño popper-loaded cheese fries, and choosing thicker-cut fries or crinkle fries makes a big difference because they hold up better under the creamy topping and stay crisp longer. Thin fries work but tend to soften quickly once you layer everything on.

Cream cheese and sour cream create that rich, creamy layer that gives this dish its jalapeño popper flavor. The cream cheese needs to be fully softened so it blends smoothly without lumps. Ranch seasoning adds tang and depth without needing a bunch of extra spices, keeping the flavor bold but balanced.

Fresh jalapeños add real heat and texture. You can remove the seeds for a milder version or leave them in if you like it spicier. Cooked and crumbled bacon adds a smoky, salty flavor that pairs perfectly with the jalapeños and cheese.

Mild cheddar cheese melts smoothly and gives you that classic cheese pull, but you can swap in sharp cheddar if you want a stronger bite. Panko breadcrumbs toasted in butter create that crispy topping that mimics baked jalapeño poppers, giving contrast to the creamy layer underneath. Ranch dressing drizzled on top, and green onions for garnish finish everything off.

See the recipe card for exact quantities.

How to Make Jalapeño Popper Loaded Cheese Fries?

Crinkle-cut fries topped with cheese, bacon, jalapeños, green onions, breadcrumbs, and a drizzle of white sauce—this is the ultimate jalapeno popper loaded cheese fries recipe in every mouthwatering bite.

These jalapeño popper loaded cheese fries layer crisp fries with a creamy, cheesy topping and a crunchy finish. Each step builds flavor and texture, so everything comes out hot, melty, and balanced.

Prep the Oven and Fries

Preheat your oven to 425°F. Line a large baking sheet with parchment paper to prevent sticking and make cleanup easier.

Crinkle-cut French fries spread on a baking sheet lined with parchment paper, ready for the ultimate jalapeno popper loaded cheese fries recipe.
Crinkle-cut French fries spread on a parchment-lined baking sheet, ready to become the ultimate jalapeno popper loaded cheese fries recipe.

Spread the frozen fries in a single layer on the baking sheet. Bake according to the package directions until they are golden and crisp. This step is important since the fries need to be sturdy enough to hold the toppings. Once done, remove them from the oven and reduce the oven temperature to 400°F.

Make the Creamy Jalapeño Mixture

Glass bowl with whipped cream or frosting, viewed from above on a white surface—perfect for serving alongside your favorite jalapeno popper loaded cheese fries recipe.

In a large mixing bowl, combine the softened cream cheese and sour cream. Use a hand mixer or stand mixer to beat until completely smooth and creamy.

Glass bowl with shredded cheese, chopped bacon, diced jalapeños, ranch seasoning, and creamy base—perfect for a jalapeno popper loaded cheese fries recipe.
A glass bowl filled with creamy dip mixed with herbs and shredded vegetables, perfect for pairing with your favorite jalapeno popper loaded cheese fries recipe, sits on a white surface.

Add 1 cup of shredded cheddar cheese, the chopped jalapeños, ranch seasoning mix, and crumbled bacon. Mix again until everything is evenly combined. Set the mixture aside while you prepare the topping.

Toast the Panko

Overhead view of melted butter in a stainless steel saucepan on a white background, ready to start the jalapeno popper loaded cheese fries recipe.
Panko breadcrumbs and melted butter in a stainless steel pan on a white background, perfect for adding crunch to your jalapeno popper loaded cheese fries recipe.

In a small skillet over medium heat, melt the butter. Once melted, add the panko breadcrumbs. Cook for about 5 minutes, stirring often, until the breadcrumbs turn golden brown and crispy. Remove from heat once toasted.

Assemble the Loaded Fries

Crinkle-cut fries on a baking sheet topped with a creamy, white sauce, chopped herbs, and jalapeno popper loaded cheese for an irresistible fries recipe.
A sheet pan of crinkle-cut fries topped with melted cheese, creamy white sauce, and a kick of heat—your new favorite jalapeno popper loaded cheese fries recipe.

Spread the cream cheese mixture evenly over the hot fries. Use a spoon or spatula to gently smooth it across the surface. Sprinkle the remaining cheddar cheese over the top.

A spoon holds a scoop of cheesy casserole—reminiscent of a jalapeno popper loaded cheese fries recipe—topped with crispy breadcrumbs above a baking dish of the same casserole.
Sheet pan of jalapeno popper loaded cheese fries topped with bacon, extra cheese, jalapeños, green onions, and a creamy ranch drizzle.

Add the toasted panko, then sprinkle extra bacon and jalapeño slices over everything for added texture and heat.

Bake and Finish

Plate of cheesy casserole topped with jalapeño slices, bacon, and green onions—just like a jalapeno popper loaded cheese fries recipe—served hot with a baking tray in the background.

Place the loaded fries back in the oven and bake for 10–12 minutes, or until the cheese is fully melted and everything is heated through.

Remove from the oven. Drizzle ranch dressing over the top and garnish with sliced green onions. Serve immediately while hot and crisp.

Storage

Crinkle-cut fries topped with cheese, bacon, green onions, and sliced jalapeños, then drizzled with ranch—our take on a jalapeno popper loaded cheese fries recipe.

Store any leftovers in an airtight container in the refrigerator for up to 2–3 days. Keep in mind the fries will soften once refrigerated. To reheat, spread them on a baking sheet. Then, warm in a 375°F oven for 8–10 minutes until heated through. Avoid microwaving if possible, as it will make the fries soggy.

Top Tips for Jalapeño Popper Loaded Cheese Fries

Bake the fries extra crisp: Cook them a few minutes longer than the package suggests so they stay sturdy under the creamy topping.

Soften the cream cheese fully: Let it sit at room temperature before mixing so the topping spreads smoothly without lumps.

Control the heat: Remove jalapeño seeds for milder fries or leave them in for more spice. Taste the mixture before spreading to adjust if needed.

Recipe

Tried and loved this recipe? Please leave a 5-star review below! Your reviews mean a lot to me, so if you've got any questions, please let me know in a comment.

A serving of cheesy casserole topped with jalapeño slices and green onions on a black plate with a fork, inspired by the flavors of a jalapeno popper loaded cheese fries recipe.
Print Recipe
No ratings yet

Jalapeño Popper Loaded Cheese Fries

Crispy jalapeño popper loaded cheese fries topped with creamy ranch filling, cheddar, bacon, and toasted panko. A bold, crowd favorite game day snack.
Prep Time10 minutes mins
Cook Time40 minutes mins
Total Time50 minutes mins
Course: Appetizer, Snacks
Cuisine: American
Keyword: jalapeno popper loaded cheese fries
Servings: 6 servings
Calories: 744kcal
Author: Ksenia Prints

Ingredients

  • 1 ½ lb frozen fries
  • 8 oz cream cheese softened
  • ⅔ cup sour cream
  • 1 1 oz packet ranch seasoning mix
  • ½ cup cooked and crumbled bacon plus extra for topping
  • 2 fresh jalapeños chopped, plus extra slices for topping
  • 1 ½ cups shredded mild cheddar cheese
  • 2 tablespoon salted butter
  • 1 cup panko breadcrumbs
  • 3 tablespoon ranch dressing
  • Green onion for garnish

Instructions

  • Preheat the oven to 425°F and line a baking sheet with parchment paper.
  • Cook the fries according to package directions until crisp, then remove from the oven.
  • Reduce oven temperature to 400°F.
  • In a large bowl, beat together the softened cream cheese and sour cream until smooth using a hand mixer or stand mixer.
  • Add 1 cup cheddar cheese, chopped jalapeños, ranch seasoning, and bacon. Mix again until combined and set aside.
  • In a small pan, melt the butter over medium heat. Add the panko and cook for about 5 minutes, stirring often, until golden and toasted.
  • Spread the cream cheese mixture over the cooked fries in an even layer. Sprinkle with the remaining cheddar.
  • Top with toasted panko, plus extra bacon and jalapeño slices.
  • Bake for 10–12 minutes, or until the cheese is melted and everything is heated through.
  • Drizzle with ranch and garnish with sliced green onion before serving.

Notes


Nutrition

Calories: 744kcal | Carbohydrates: 46g | Protein: 17g | Fat: 55g | Saturated Fat: 25g | Polyunsaturated Fat: 5g | Monounsaturated Fat: 20g | Trans Fat: 0.2g | Cholesterol: 103mg | Sodium: 1209mg | Potassium: 675mg | Fiber: 6g | Sugar: 4g | Vitamin A: 1123IU | Vitamin C: 13mg | Calcium: 296mg | Iron: 2mg

Homemade Big Mac Sliders Recipe

Homemade Big Mac sliders layered with seasoned beef, American cheese, crisp lettuce, pickles, and a creamy copycat sauce on soft Hawaiian rolls.

A plate with four homemade sliders on sesame buns, inspired by the classic Big Mac recipe, served with pickles and condiments nearby.

I rarely crave Big Macs, and honestly, it's truly a guilty pleasure when I do go to McDonald's and order one. But as a parent, I also want to let my kids enjoy simple things like these without feeling guilty about feeding them "junk food." So I started making my own version at home where I know exactly what goes into the food, and honestly, these homemade big mac sliders taste even better than the drive-thru version.

The Hawaiian rolls are what make these so good because they're soft and slightly sweet, creating that perfect contrast with the savory beef and tangy sauce. I cook the ground beef fully before assembling so there's no excess grease soaking into the buns, and keeping the rolls connected while building everything makes the whole process so much easier. The melted butter brushed on top with sesame seeds gives them that classic burger look that makes my kids excited before they even take a bite.

What really makes these taste like the real thing is the homemade Big Mac sauce. Mixing mayonnaise, mustard, vinegar, pickled relish, and simple spices recreates that familiar flavor without any mystery ingredients or preservatives. The shredded iceberg lettuce stays crisp, the American cheese melts perfectly, and the dill pickles add that tangy contrast that ties everything together.

My kids love these sliders, and I love that I can serve them something that tastes like a treat but is made with ingredients I actually recognize. They bake all together on one sheet pan, which means I can have a dozen sliders ready in about 30 minutes without standing over a grill flipping individual burgers. These have joined my rotation of slider recipes I swear by, right alongside my BBQ chicken sliders, buffalo chicken sliders, and slow cooker cranberry BBQ turkey sliders. None of us miss the drive-thru version anymore.

Ingredients

Ingredients for homemade sliders arranged on a counter, including rolls, ground beef, cheese, and condiments—perfect for making delicious Big Mac Sliders at home.

Ground beef seasoned with salt and pepper keeps the flavor simple and close to the original Big Mac. Regular ground beef instead of extra lean keeps the meat juicy once baked. Cooking it fully before assembling prevents excess grease from soaking into the buns.

Hawaiian rolls are essential for that soft, slightly sweet contrast. Their texture holds up well when baked as a sheet, and the sweetness balances the savory beef and tangy sauce. Melted butter brushed on top and sesame seeds sprinkled over give them that classic burger-style finish.

Mayonnaise, mustard, vinegar, pickled relish, onion powder, garlic powder, and paprika recreate that familiar Big Mac sauce without needing store-bought dressing. Finely diced white onion adds crunch and sharpness, while shredded iceberg lettuce keeps the sliders crisp and fresh.

American cheese melts smoothly and creates that signature layered bite. Dill pickles add the final tangy contrast that makes these sliders taste like the real thing.

See the recipe card for exact quantities.

How to Make Homemade Big Mac Sliders?

A large pull-apart sandwich inspired by the Big Mac Sliders recipe, with sesame seed buns, lettuce, cheese, and meat served on parchment paper.

These homemade big mac sliders come together in layers and bake all at once, making them easy to prep and serve for a group. Follow each step to keep the buns soft, the beef juicy, and the toppings fresh.

Cook the Beef and Prep the Pan

Raw ground beef with seasoning sits in a gray skillet on a marble surface, ready to be transformed into delicious Homemade Sliders or the perfect Big Mac Sliders.

In a large skillet over medium-high heat, add the ground beef along with the salt and pepper. Cook for about 10 minutes, breaking the meat apart as it browns. Continue cooking until the beef is fully cooked through and no pink remains. Drain any excess grease if needed and set aside.

Preheat your oven to 350°F. Line a large baking sheet with parchment paper and set it aside.

Assemble the Sliders

A square of sandwich bread topped with four slices of yellow processed cheese on brown parchment paper, perfect for assembling Big Mac Sliders or your favorite homemade sliders.

Keeping the rolls connected, slice the entire sheet of Hawaiian rolls in half horizontally. Place the bottom half on the prepared baking sheet and set the top half aside for now.

A rectangular pizza crust topped with cheese, ground meat, and chopped onions on parchment paper, inspired by the flavors of Big Mac Sliders for a unique homemade sliders twist.

Lay the slices of American cheese evenly over the bottom buns. Spoon the cooked ground beef over the cheese and spread it into an even layer. Sprinkle the diced white onion evenly across the top of the beef.

Place the top half of the rolls back on.

Brush and Bake

Brush the tops of the buns with melted butter. Immediately sprinkle sesame seeds over the butter so they stick.

Place the sliders in the oven and bake for about 12 minutes, or until the tops are lightly golden and the cheese is melted.

Make the Sauce

A white bowl with mayonnaise, mustard, relish, spices, and an egg yolk on a marble surface—perfect for making the classic sauce for Big Mac Sliders.

While the sliders bake, prepare the sauce. In a small bowl, stir together the mayonnaise, mustard, vinegar, pickled relish, onion powder, garlic powder, and paprika. Mix until smooth and well combined.

Add the Fresh Toppings and Serve

Remove the sliders from the oven. Carefully lift off the top layer of buns and set them aside.

Sprinkle the shredded iceberg lettuce evenly over the onions and beef. Drizzle the sauce over the lettuce. Place two pickle slices on each slider.

A pull-apart sandwich with sesame buns, lettuce, cheese, and beef on parchment paper—these homemade Big Mac Sliders are perfect for sharing.

Set the tops back on and gently press down. Use a sharp knife to slice along the roll lines to separate into individual sliders. Serve warm.

Storage

Store leftover sliders in an airtight container in the refrigerator for up to 3 days. For best results, remove the lettuce before storing if possible, since it can become soggy. Reheat the sliders in a 350°F oven for 8–10 minutes until warmed through. Add fresh lettuce and extra sauce after reheating before serving.

Top Tips for Homemade Big Mac Sliders

Drain the beef well: After cooking, remove excess grease before assembling the sliders. This keeps the buns from getting soggy and helps the layers hold together better.

Use 80/20 ground beef: The higher fat content keeps the meat juicy and flavorful without drying out during baking.

Let the sauce rest: If you have time, chill the sauce for about an hour before using. This helps the flavors blend and gives it a more balanced taste.

Recipe

Tried and loved this recipe? Please leave a 5-star review below! Your reviews mean a lot to me, so if you've got any questions, please let me know in a comment.

Four homemade sliders with sesame buns, lettuce, and beef patties on a plate—perfect for anyone craving tasty Big Mac sliders in bite-sized form.
Print Recipe
No ratings yet

Homemade Big Mac Sliders

Homemade Big Mac sliders layered with seasoned beef, American cheese, crisp lettuce, pickles, and a creamy copycat sauce on soft Hawaiian rolls.
Prep Time10 minutes mins
Cook Time20 minutes mins
Total Time30 minutes mins
Course: Dinner, Lunch, Snacks
Cuisine: American
Keyword: homemade big mac sliders
Servings: 6 servings
Calories: 604kcal
Author: Ksenia Prints

Ingredients

  • 1 lb ground beef
  • 1 teaspoon pepper
  • 1 teaspoon salt
  • 12 Hawaiian rolls
  • 6 slices American cheese
  • ½ cup white onion diced
  • 1 tablespoon butter melted
  • 1 tablespoon sesame seeds
  • ½ cup mayonnaise
  • 2 teaspoon mustard
  • 1 teaspoon vinegar
  • 3 tablespoon pickled relish
  • ½ teaspoon onion powder
  • ½ teaspoon garlic powder
  • ½ teaspoon paprika
  • 5 oz shredded iceberg lettuce
  • ½ cup sliced dill pickles

Instructions

  • In a large skillet, cook the ground beef with salt and pepper over medium-high heat until fully cooked, about 10 minutes. Preheat the oven to 350°F and line a large baking sheet with parchment paper.
  • Slice the connected slider rolls in half horizontally. Place the bottom half on the baking sheet and set the tops aside. Layer with cheese, cooked beef, and onions.
  • Replace the tops, brush with melted butter, and sprinkle with sesame seeds. Bake for 12 minutes, or until golden brown.
  • Stir together the mayonnaise, mustard, vinegar, relish, onion powder, garlic powder, and paprika. Remove the sliders from the oven and lift off the tops.
  • Add lettuce, drizzle with sauce, and place two pickles on each slider. Replace the tops and slice to serve.

Notes


Nutrition

Calories: 604kcal | Carbohydrates: 36g | Protein: 24g | Fat: 41g | Saturated Fat: 14g | Polyunsaturated Fat: 9g | Monounsaturated Fat: 12g | Trans Fat: 1g | Cholesterol: 102mg | Sodium: 1278mg | Potassium: 329mg | Fiber: 1g | Sugar: 10g | Vitamin A: 371IU | Vitamin C: 2mg | Calcium: 268mg | Iron: 2mg
« Previous Page
Next Page »
Woman smelling food on stove

Hello! I am Ksenia, a cook and blogger passionate about comfort food that warms the heart.

More about me →

Footer

↑ back to top

About

  • About me
  • Privacy Policy

Newsletter

  • Sign Up! for emails and updates

Contact

  • Contact
  • Services
  • FAQ

As an Amazon Associate I earn from qualifying purchases.

This site is owned and operated by Prints Media. Copyright © 2025 Thermocookery. All rights reserved.

Rate This Recipe

Your vote:


A rating is required
A name is required
An email is required